Need something that's not here? Found a bug?
Every bug report and suggestion helps shape the next release.
Changelog
Joint forces, Forces panel, Learn page
2026-09-25 · 2.24
New ways to see why a truss stands: how the forces meet at every joint, and how they balance.
- New diagram — Joint forces
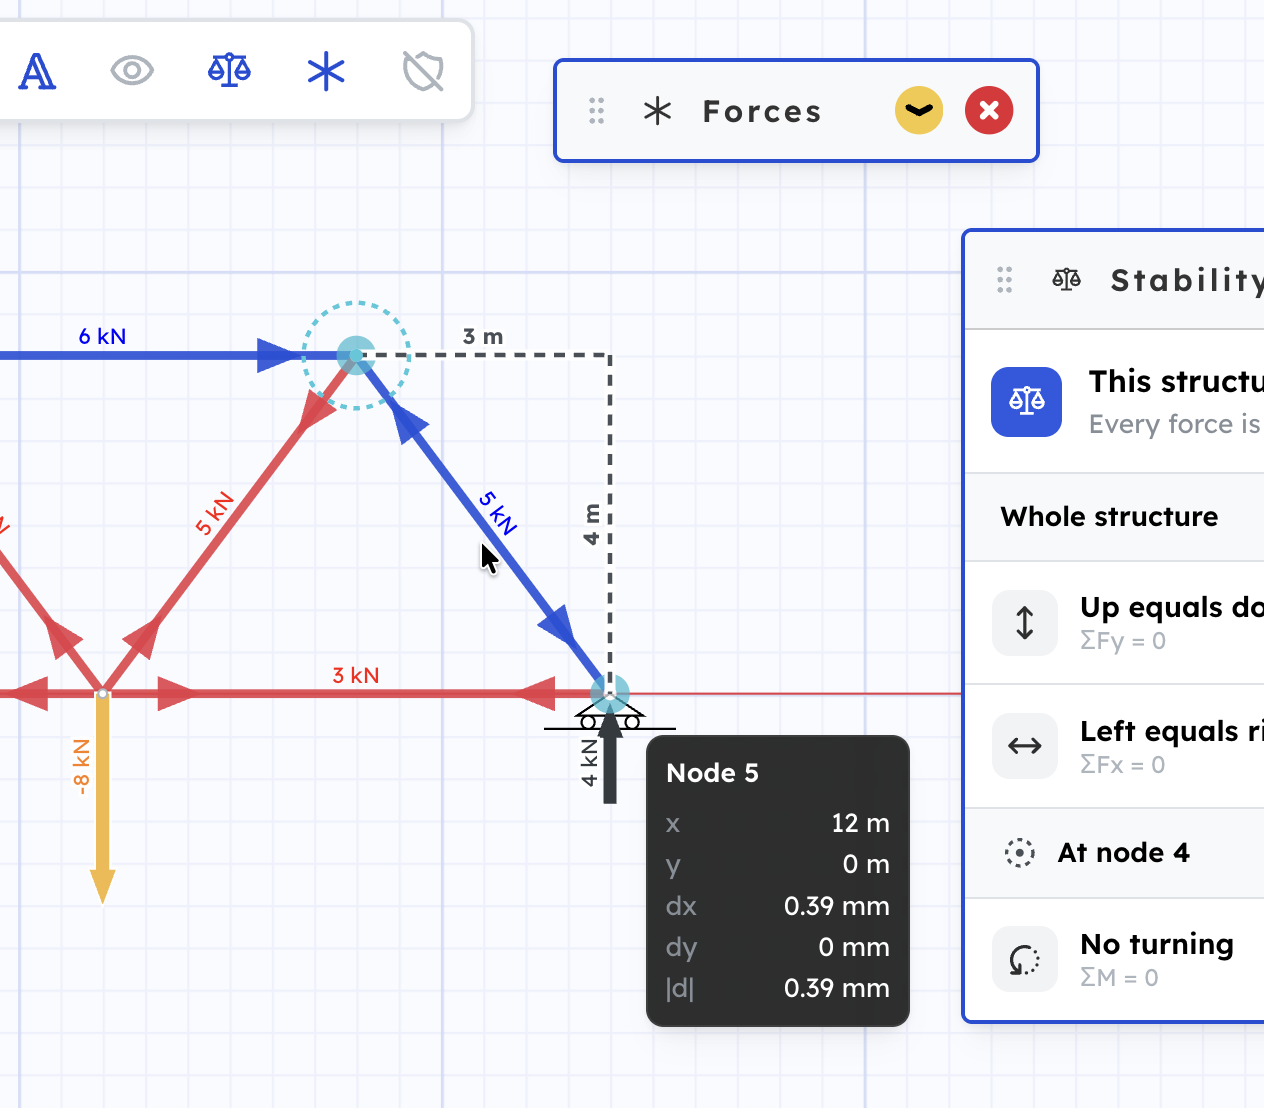
- New panel — Forces, with a free-body diagram and a force polygon
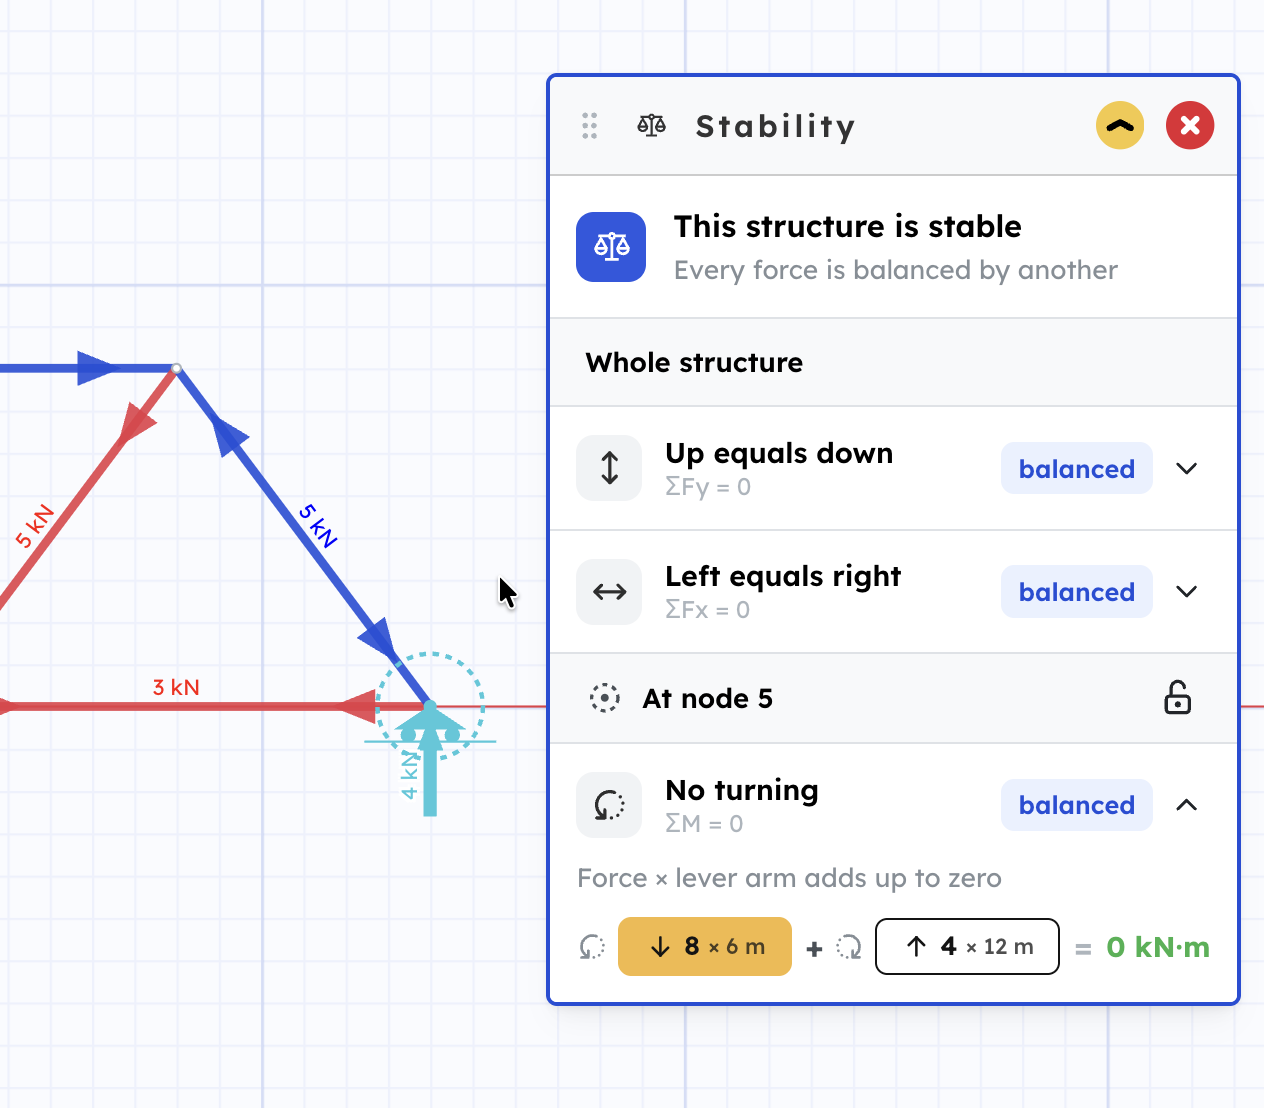
- Stability — a new moment check
- Learn — a new page with 8 articles on the physics behind trusses
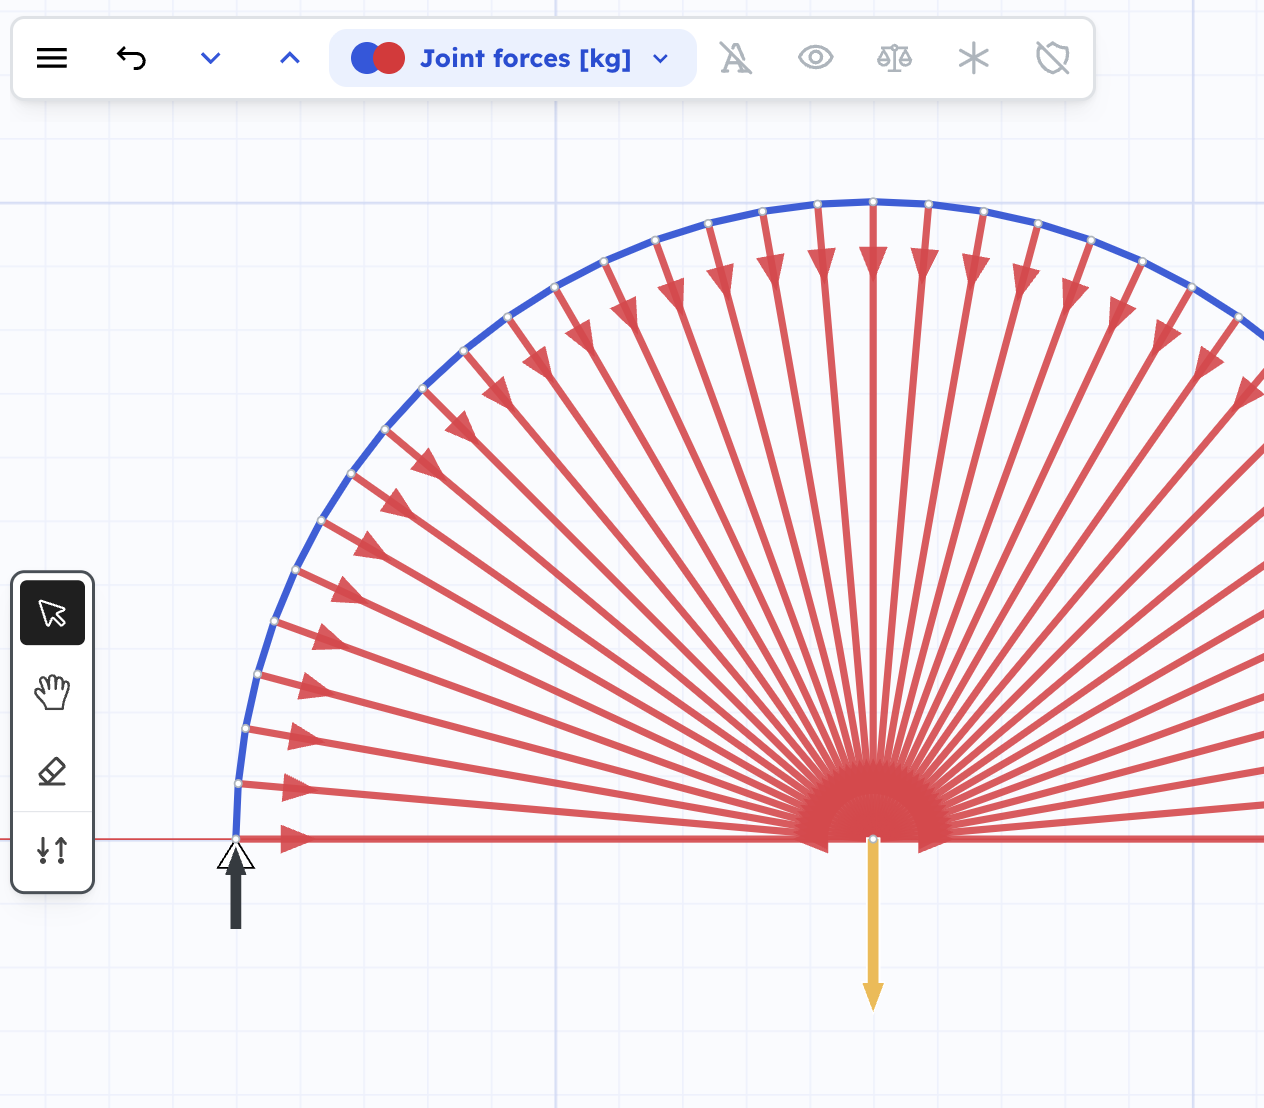
Joint forces diagram
A new diagram type: how each member pulls or pushes on the joints at its ends. It's the "what the joint feels" view from Tension and compression, on your own truss.
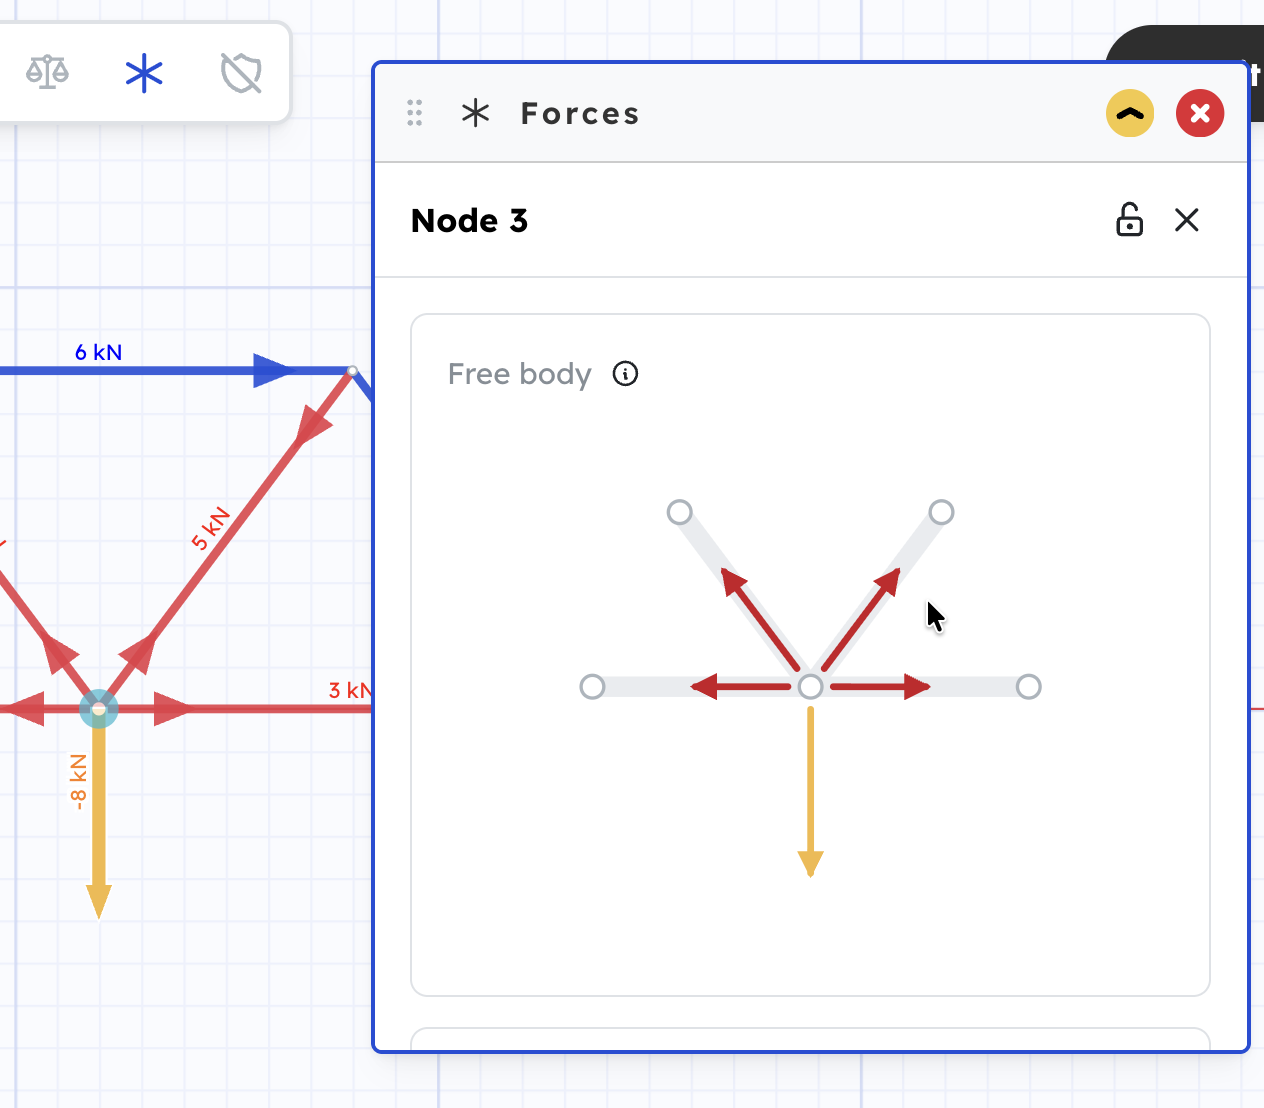
Forces panel
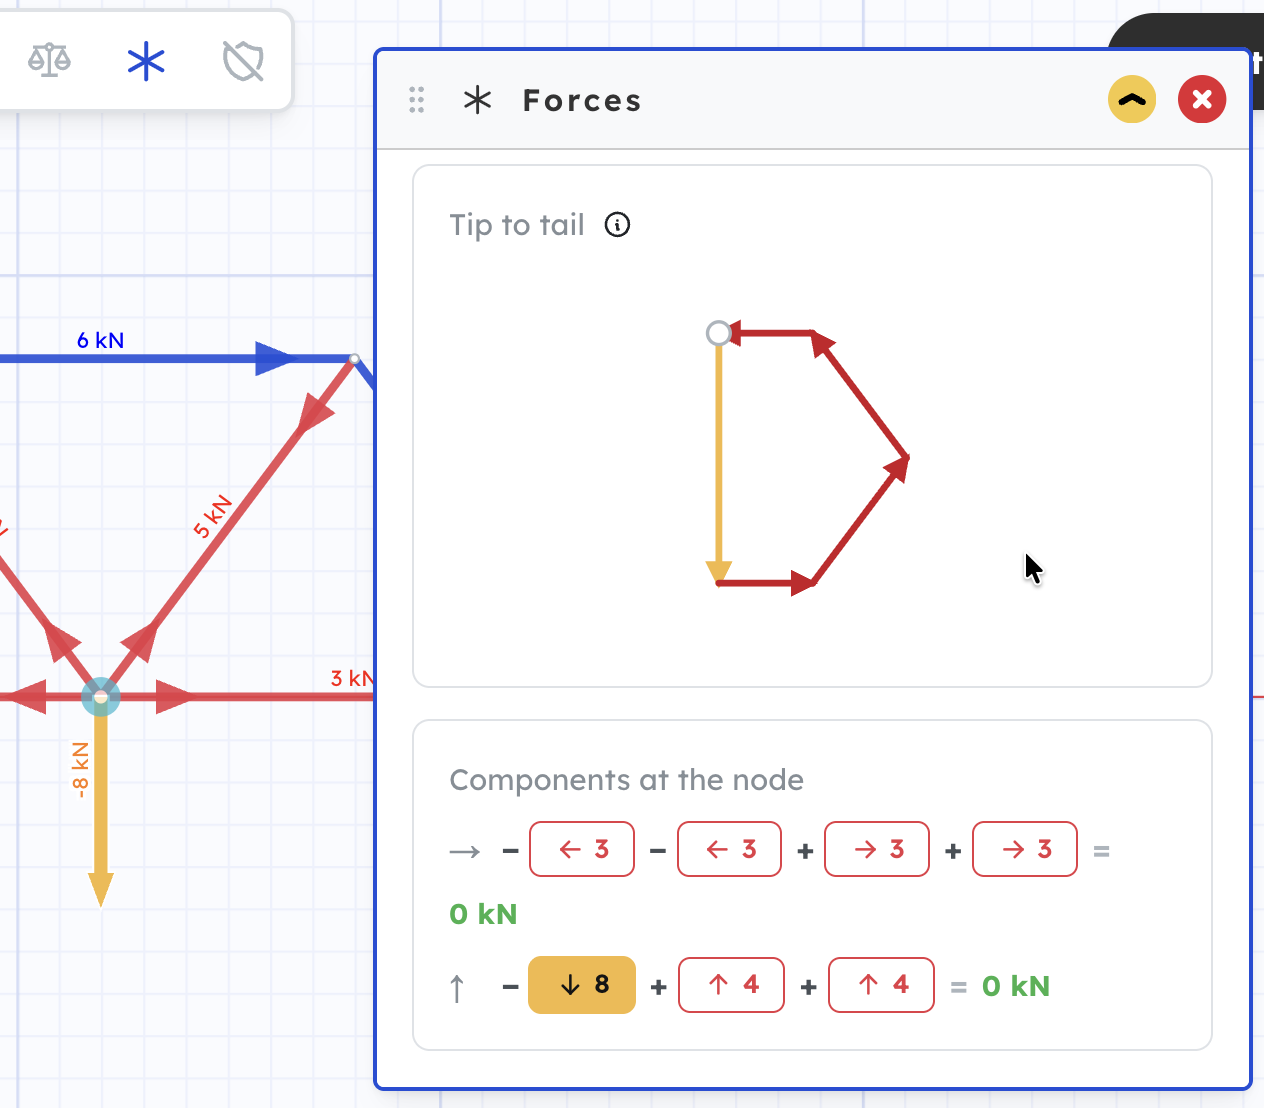
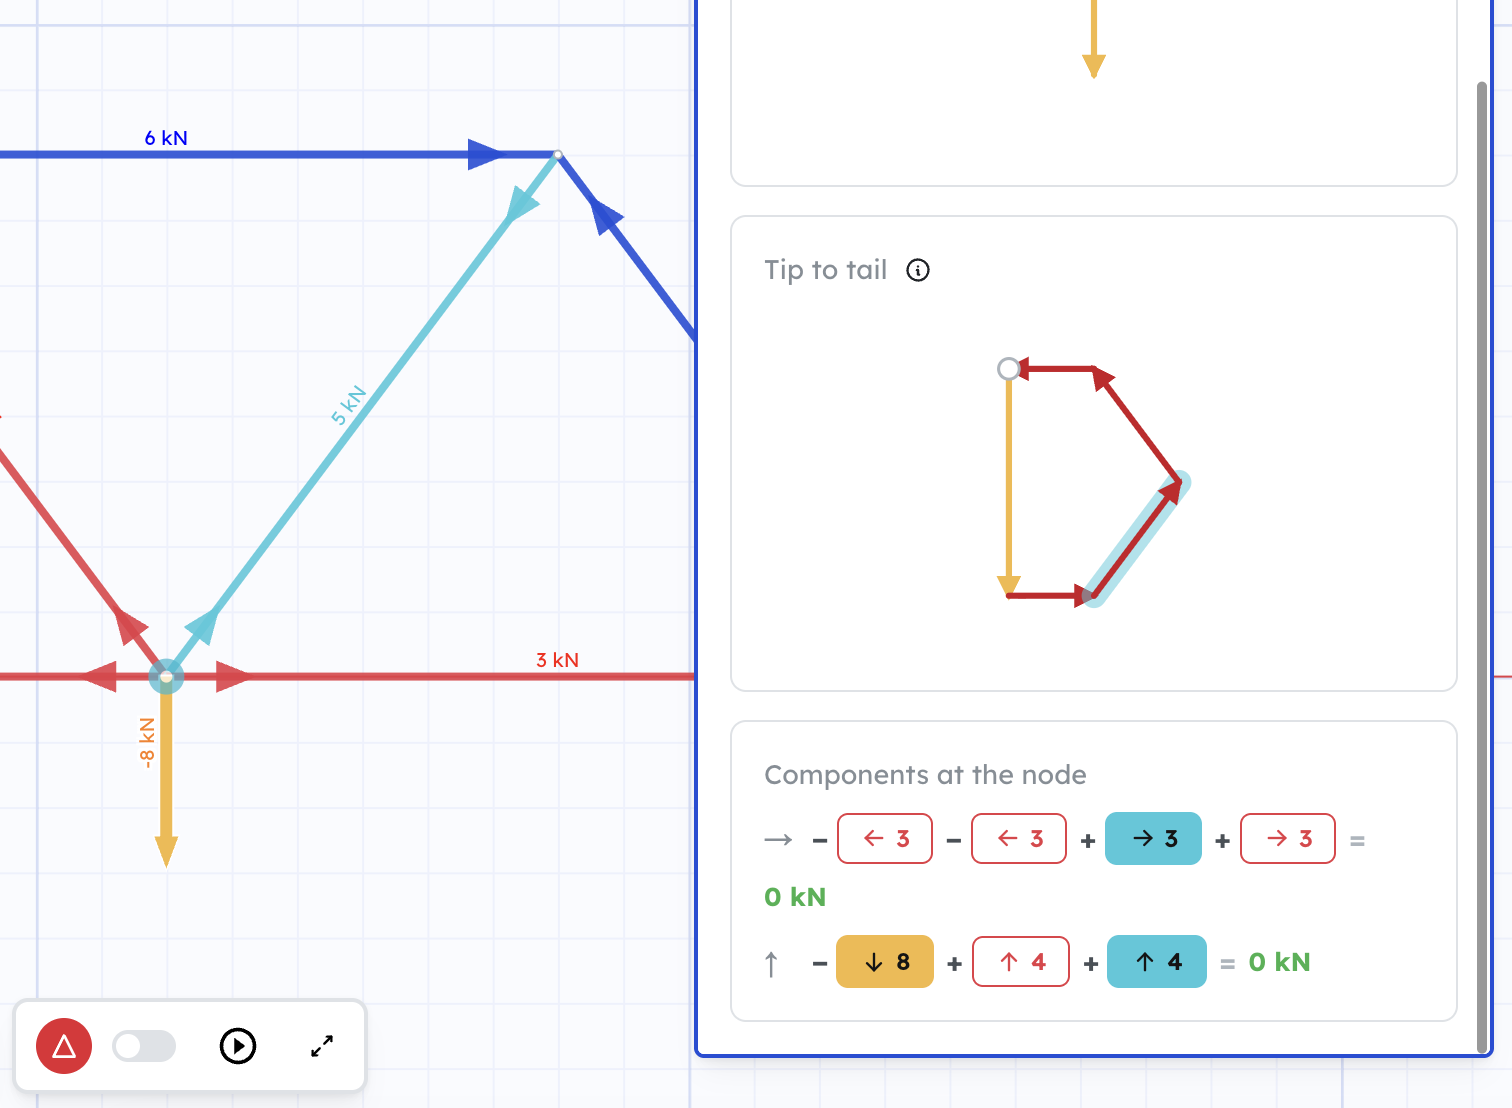
Next to Stability in the top toolbar. Select a node, member, load or support, and see how it carries its force: its components, the resultant, and for a node, the free-body diagram and the force polygon. Hover an arrow in the panel to highlight its element on the truss.
Tip: lock the panel to one element, and it stays on it while you select and drag others.
Stability panel
The balance check is now three steps: the sideways forces cancel out, the up-down forces cancel out, and the moments around the selected node add up to zero.
Tip: Keep this node holds on to that node while you work on the rest.
Learn
A new Learn page, with short articles for students on the physics behind trusses: pictures, worked examples and interactive demos. Guides show how to do something in the app; Learn explains why it works.
Presentation mode
2026-09-21 · 2.23
A view for playing with a truss instead of building one. Press the presentation button on the right and the editor gets out of the way, leaving the structure and the few things that make it move — drag it, break it, animate it. Made for demos, and for messing about.
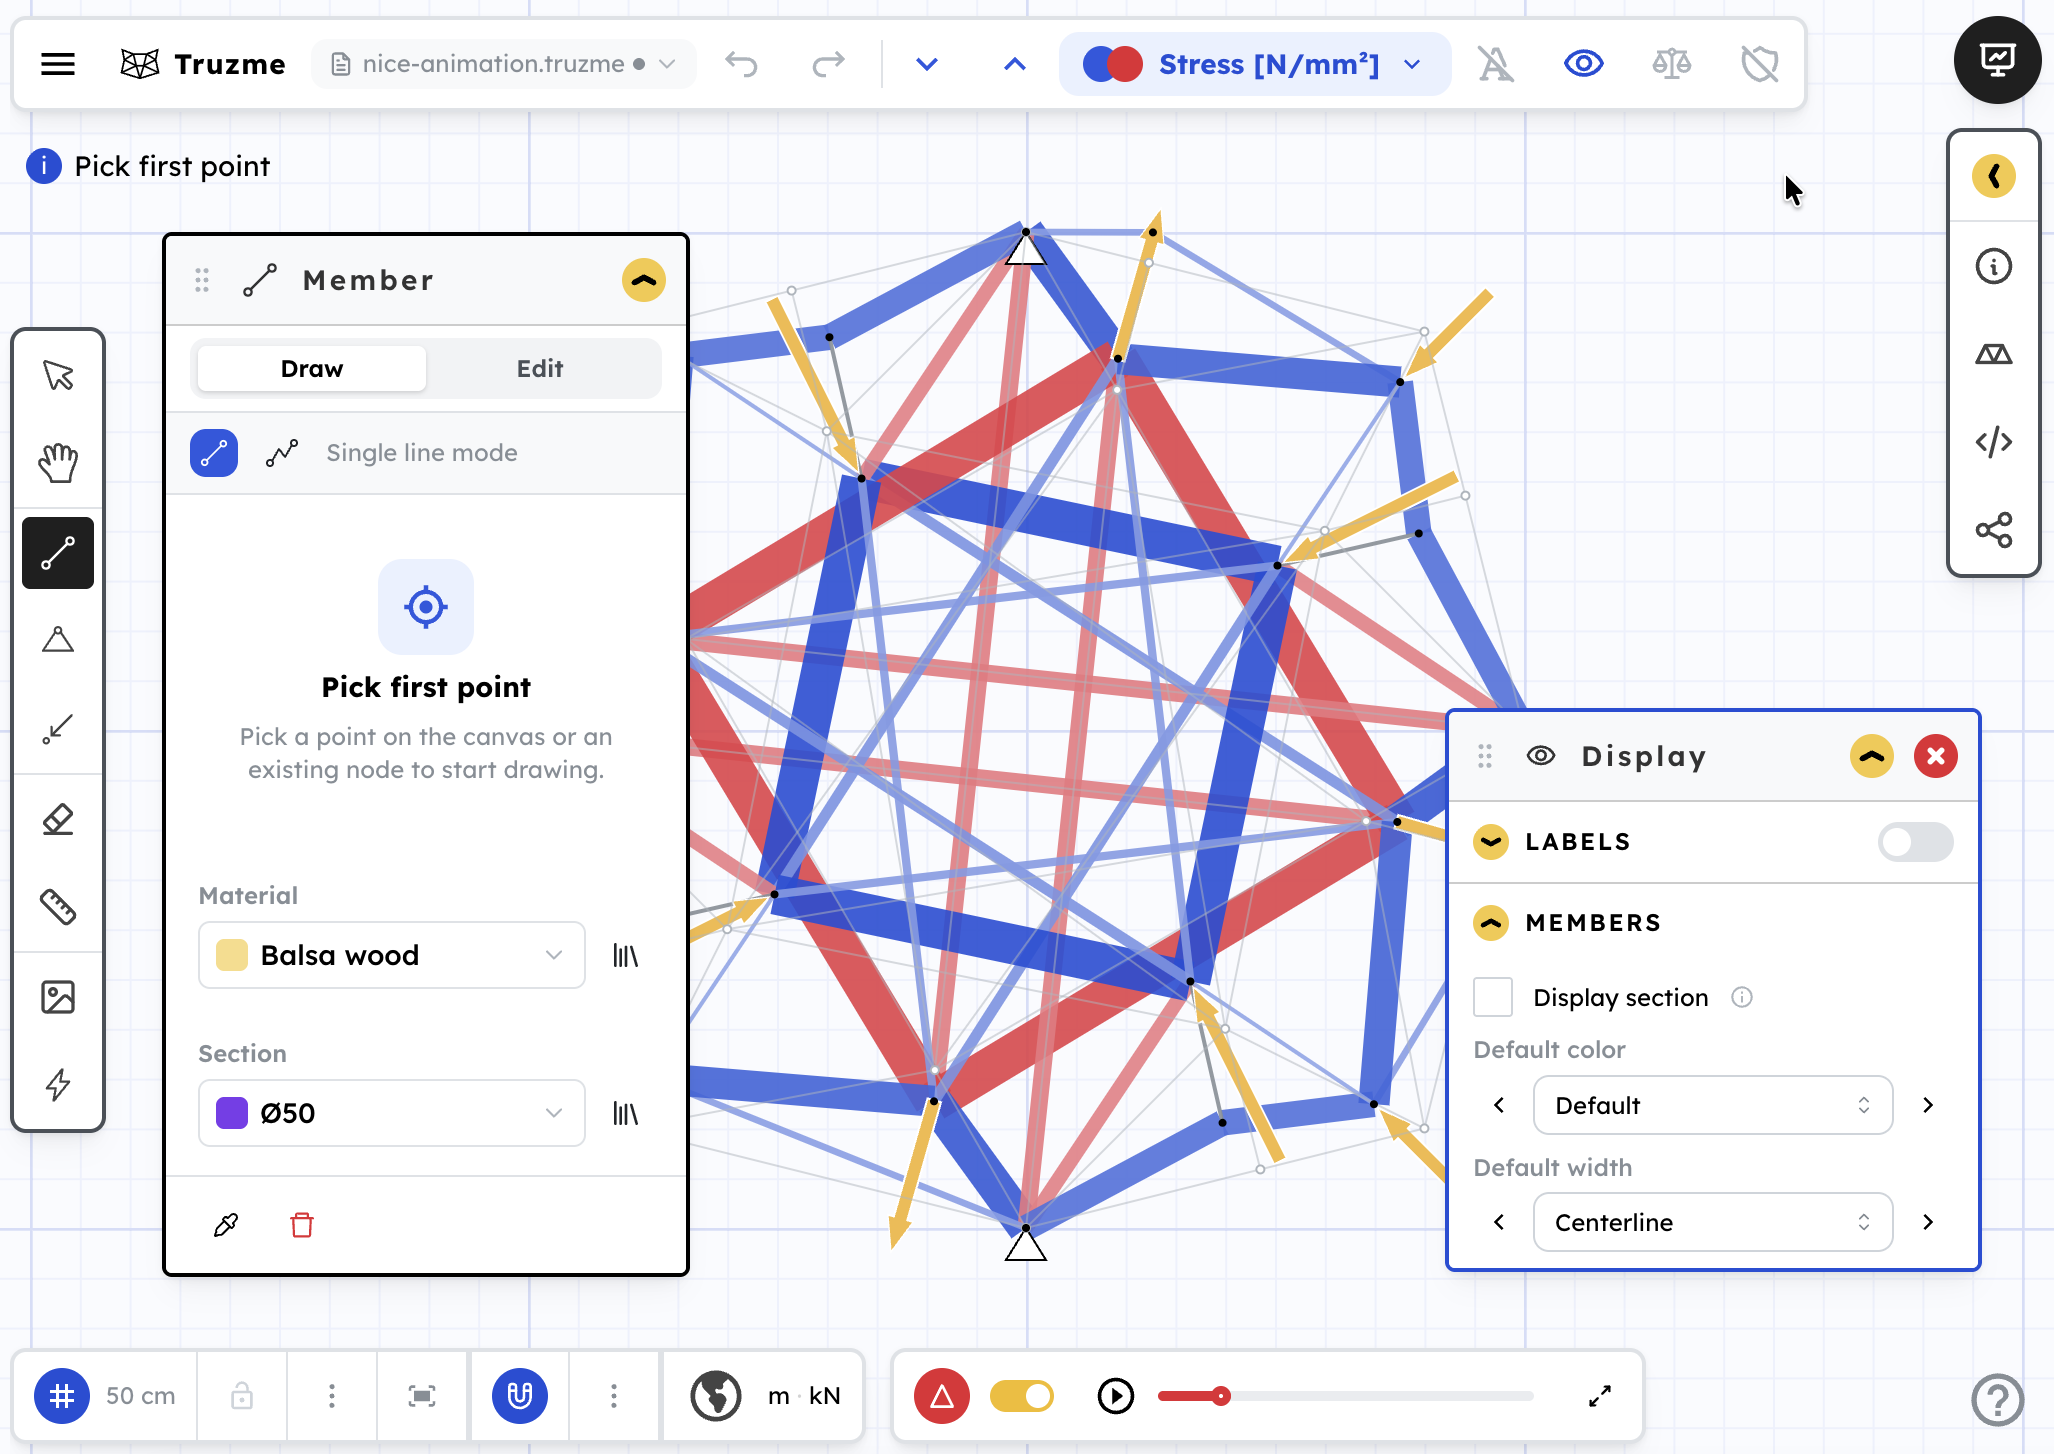
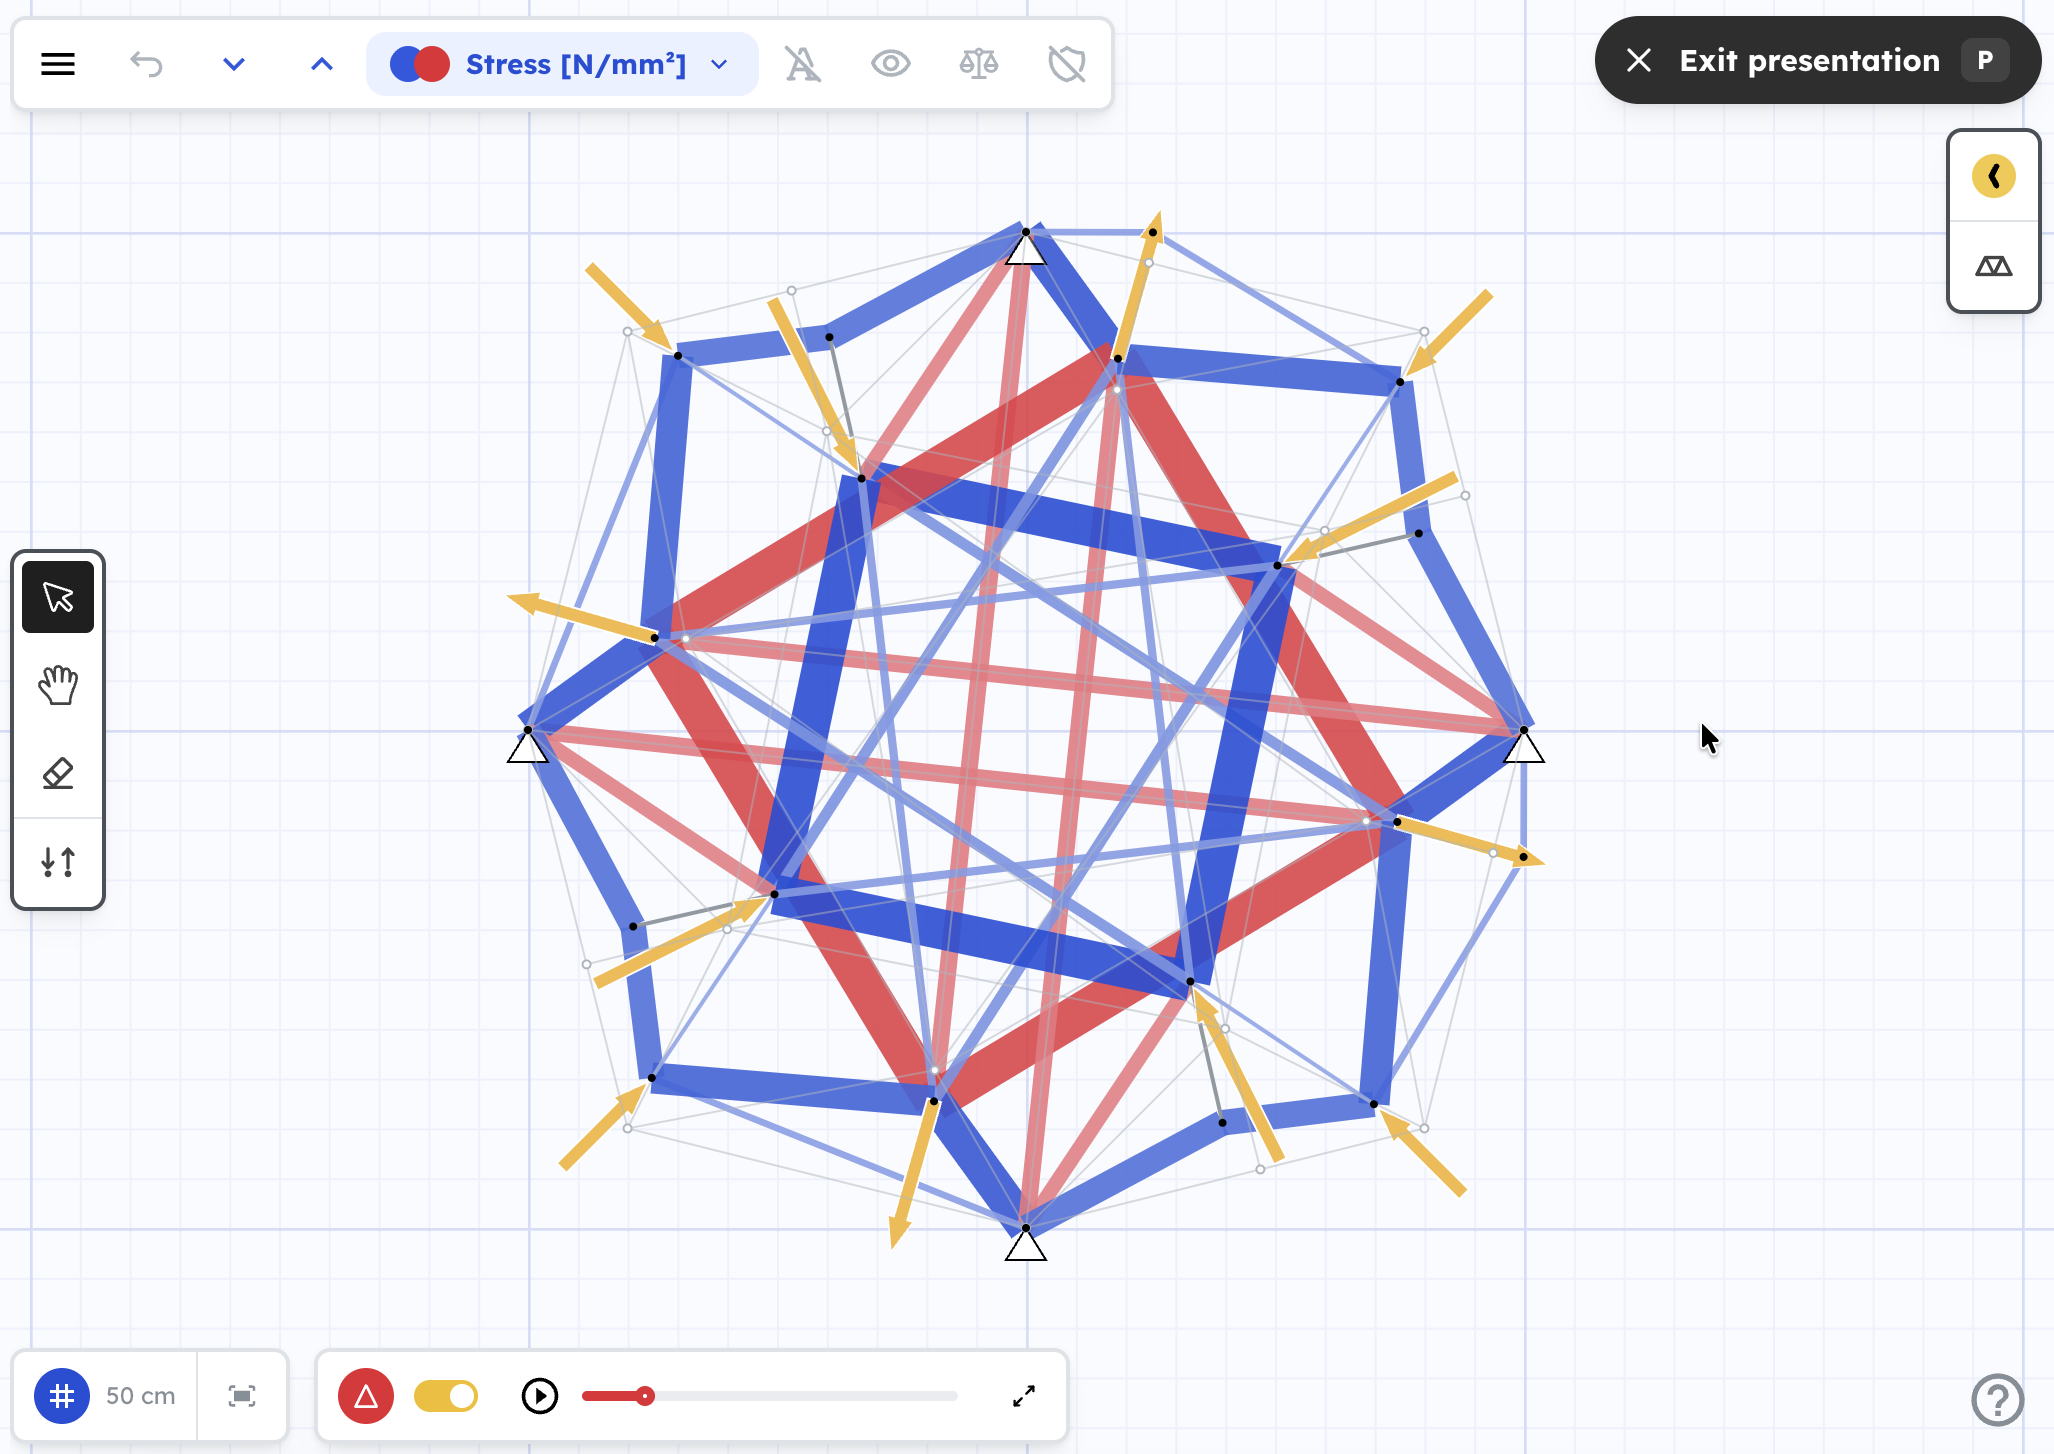
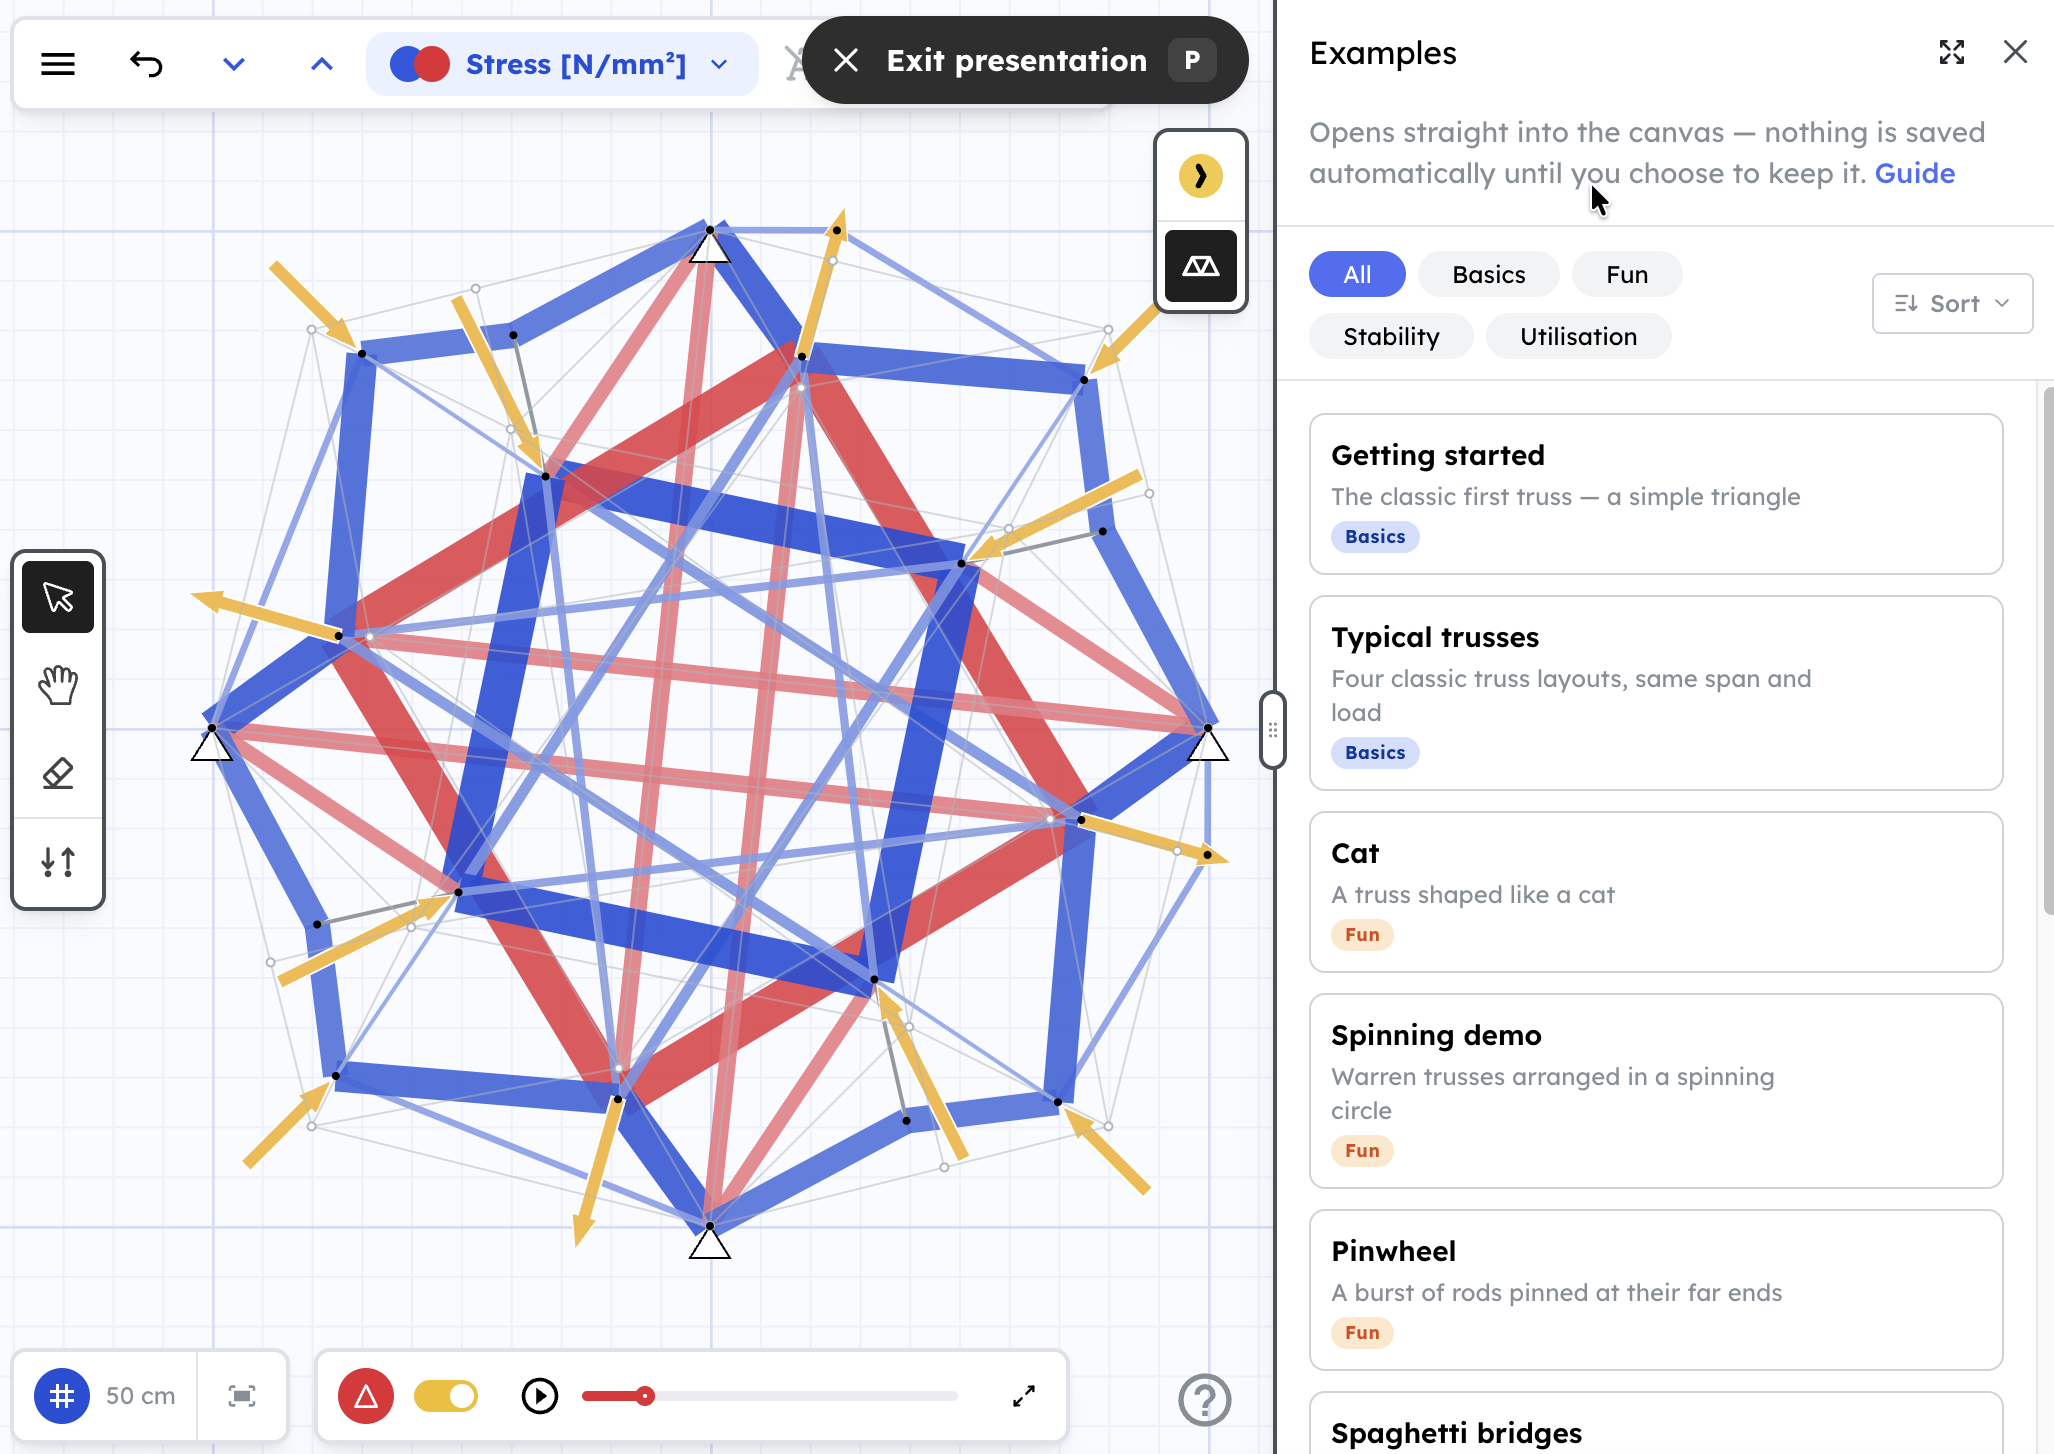
- Pull it about — drag a node or a whole member with the Select tool
- Rub bits out — with the Eraser tool
- Flip the loads — every load turns the other way at once. Best while the animation runs
- Play the animation — watch the structure deform
- Switch diagrams — normal forces, utilisation, and more
- Press P — in and out of presentation mode
It's still the full calculator underneath: everything you change is real, and nothing is lost when you leave.
Also in this release
- A Share panel — every way to send a truss, in one place under the share icon on the right. See the Sharing a truss guide.
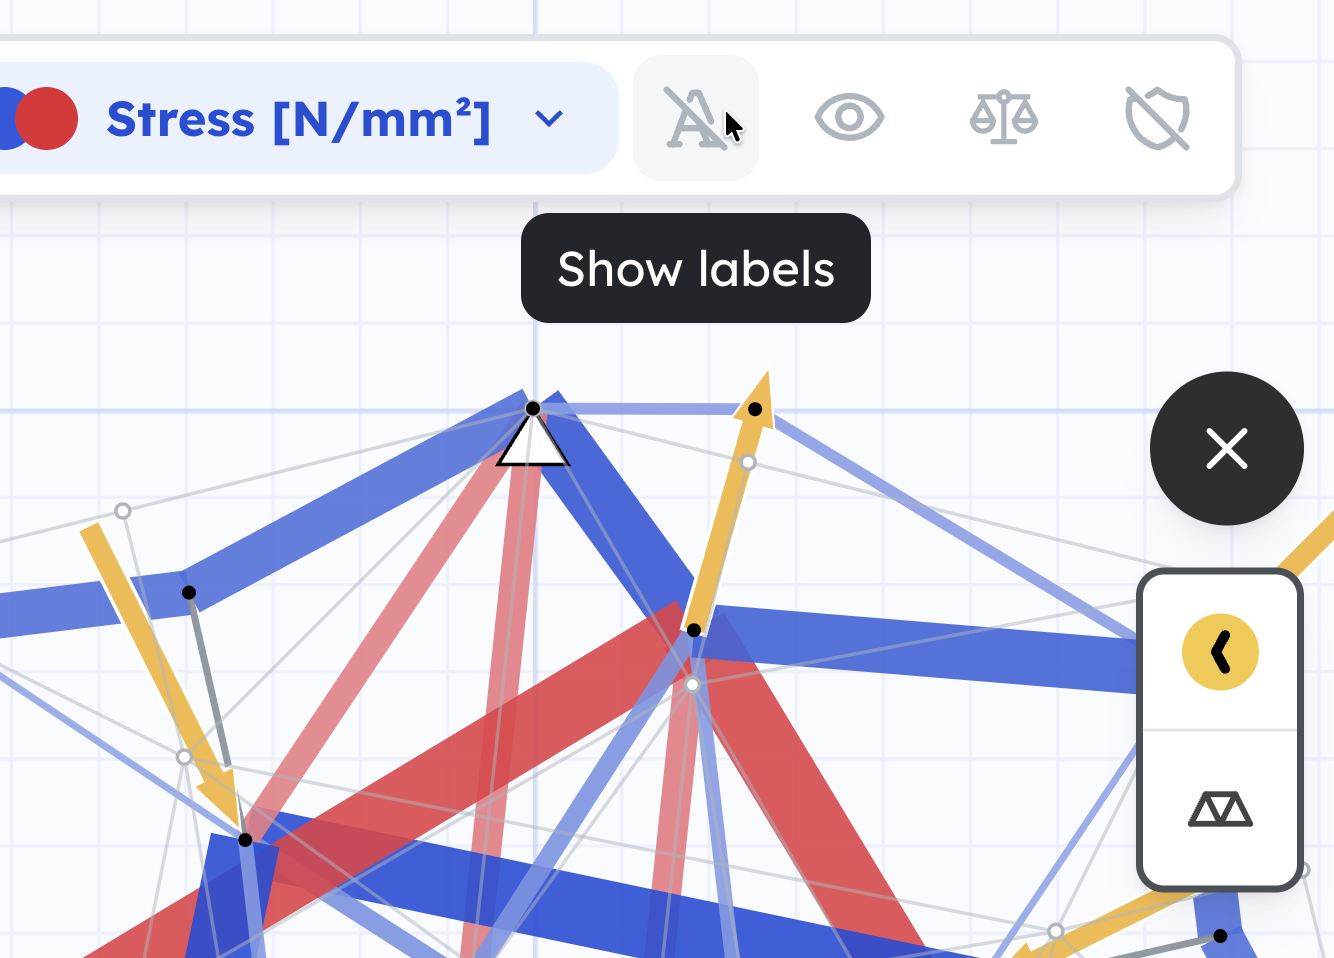
- Labels on and off in one click — a new icon in the top toolbar, next to the eye.
- Using Truzme on a Chromebook — school Chromebooks often delete everything at sign-out, trusses included. Read the Chromebook guide if you work on one.
- Guides brought up to date — several rewritten or extended. Sort by Newest first on the guides page to see which.
Copy, paste, cut and duplicate
2026-09-17 · 2.22
New keyboard shortcuts on the canvas — ⌘ instead of Ctrl on a Mac.
Pro tip: Ctrl+C on the canvas copies your truss as plain text an AI can read, so you can paste it straight into ChatGPT or Claude and ask for whatever you want changed. Press Ctrl+V on the canvas to put the answer back. No export, no import, no files — just copy and paste, in both directions.
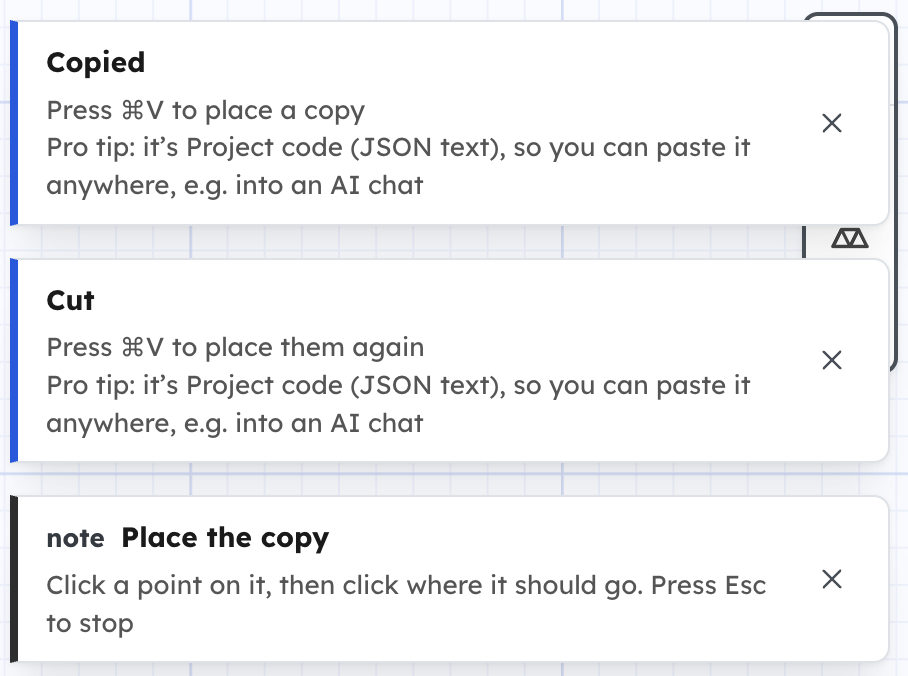
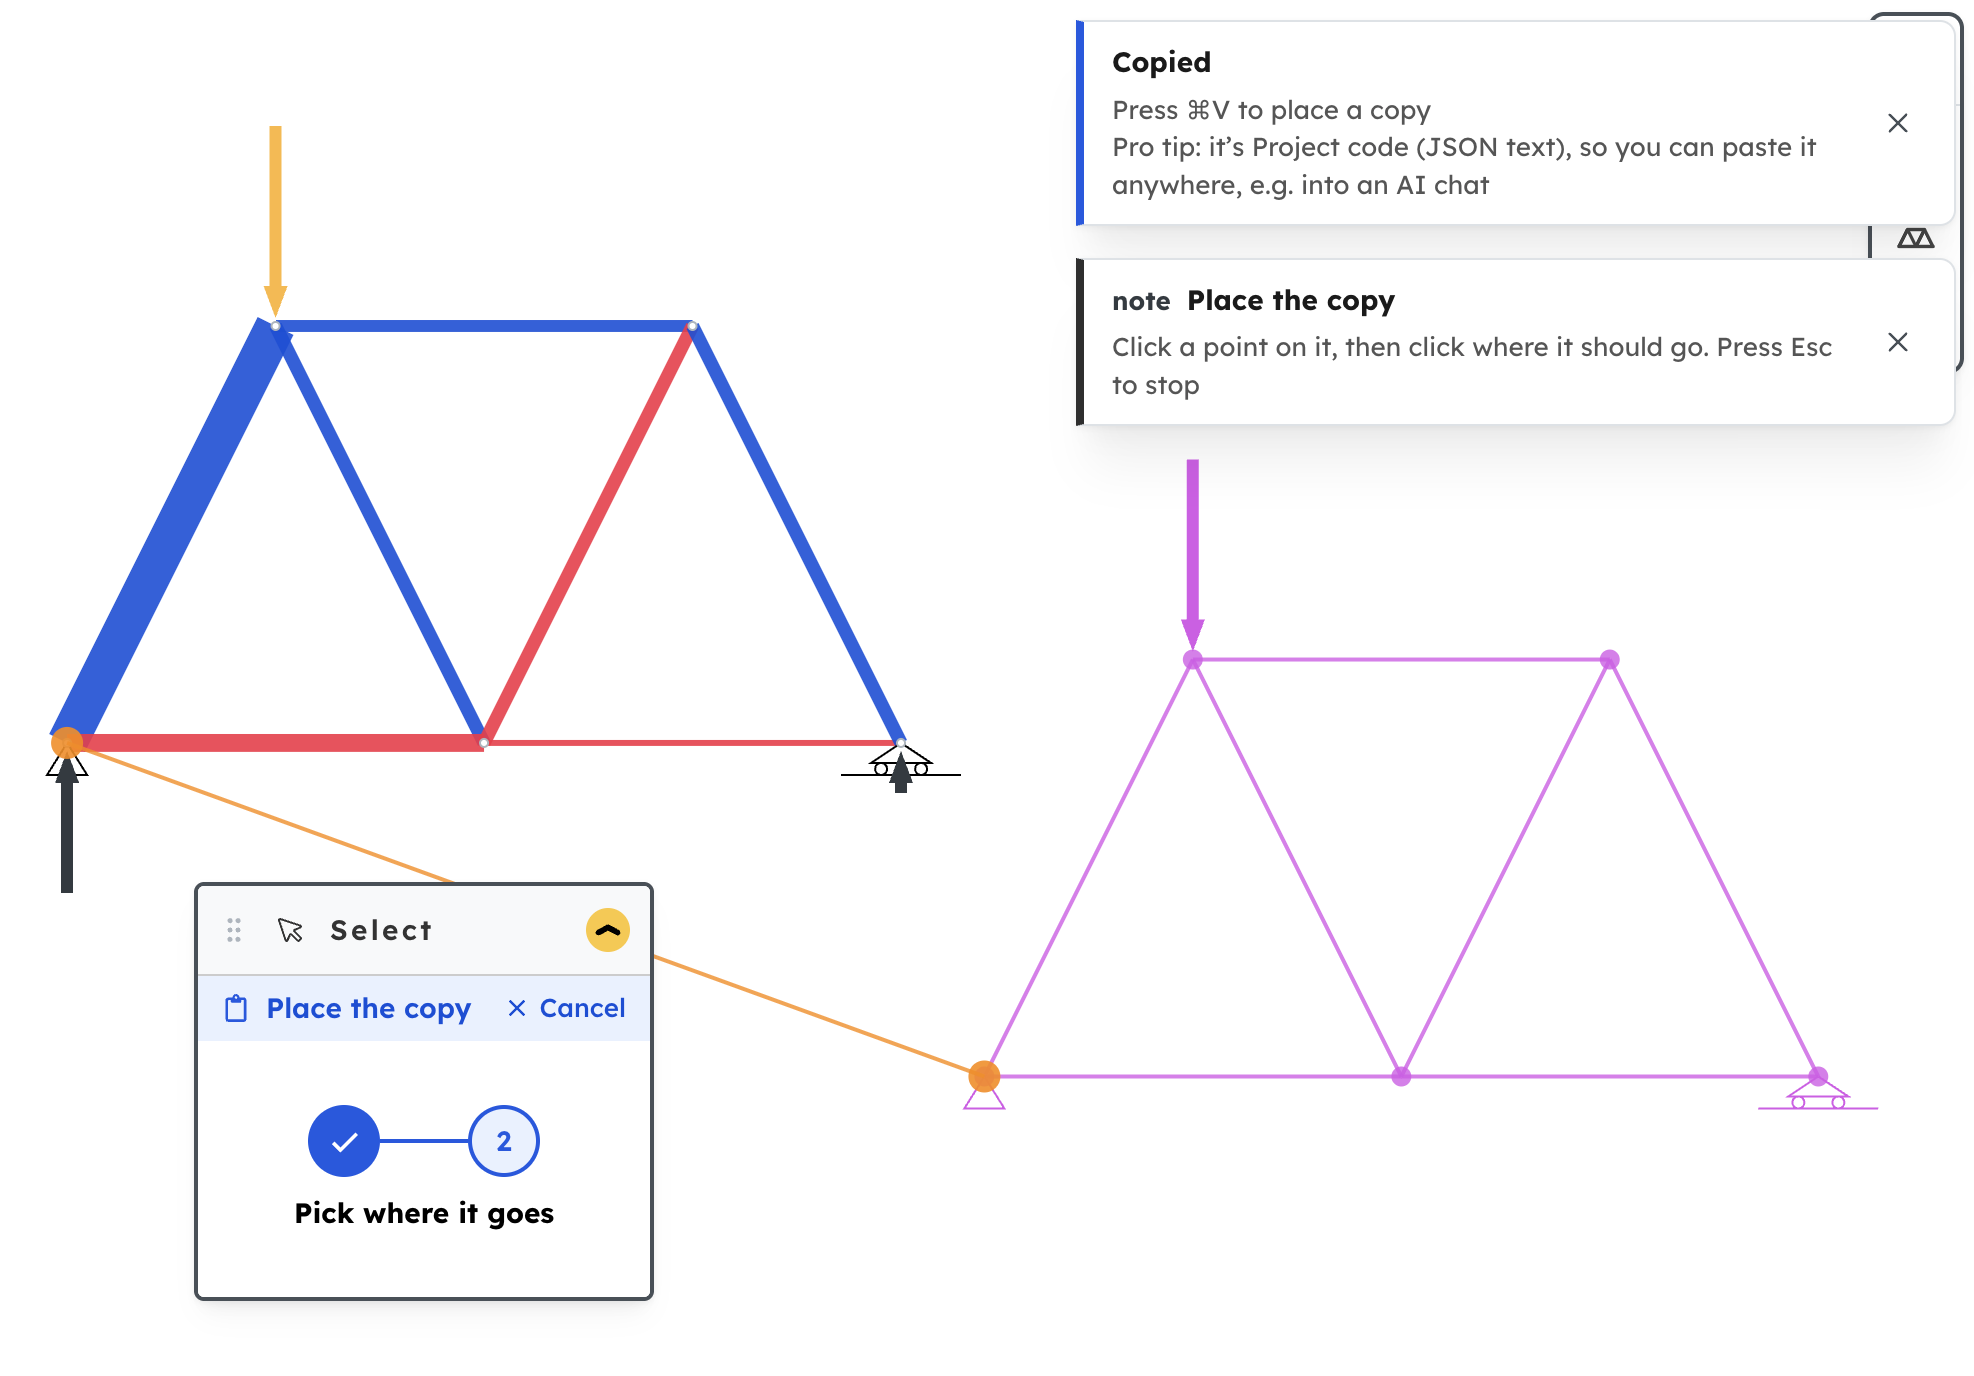
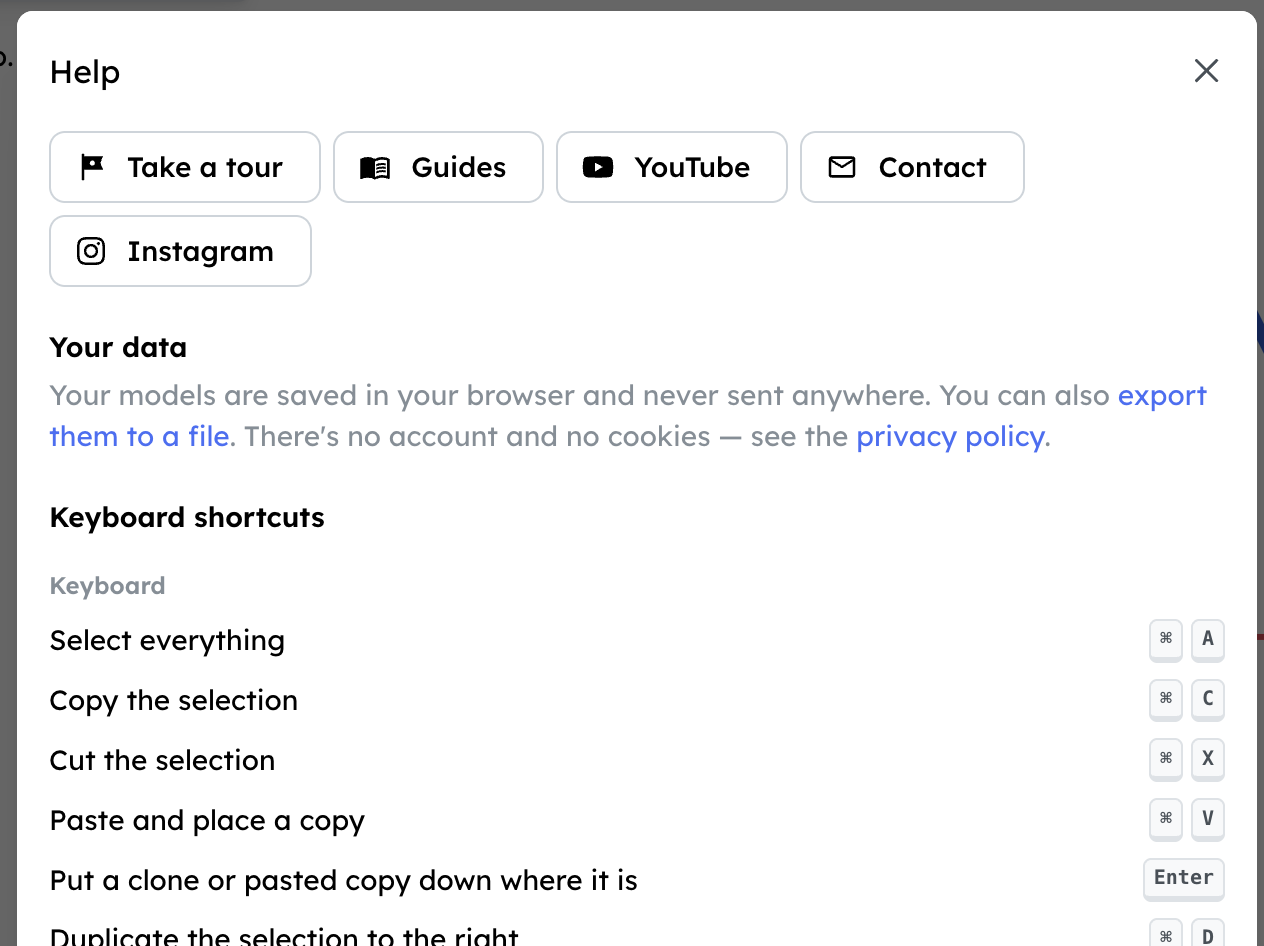
- Ctrl+C / Ctrl+X / Ctrl+V — copy, cut and paste. After pasting, click a point on the copy, then click where it goes.
- Ctrl+D — duplicate the selection to the right. Press it again to keep extending the truss.
- Ctrl+A — select everything.
- Enter — put a clone or a pasted copy down where it is.
- Paste it anywhere — a copy is Project code: plain JSON text that lots of other apps can read. Paste part of your truss into ChatGPT or Claude and ask about just that part, or paste an AI's answer onto the canvas as an addition to your model.
- A simpler Help menu — the question mark on the right: now with keyboard shortcuts
New guides: Copy, paste & duplicate and Working with AI.
Project code: your truss as text
2026-09-16 · 2.21
Every model now has a text version, called Project code — open it with the code icon on the right side of the calculator. Copy it out, change it, and paste it back. Developed in collaboration with Penn State University.
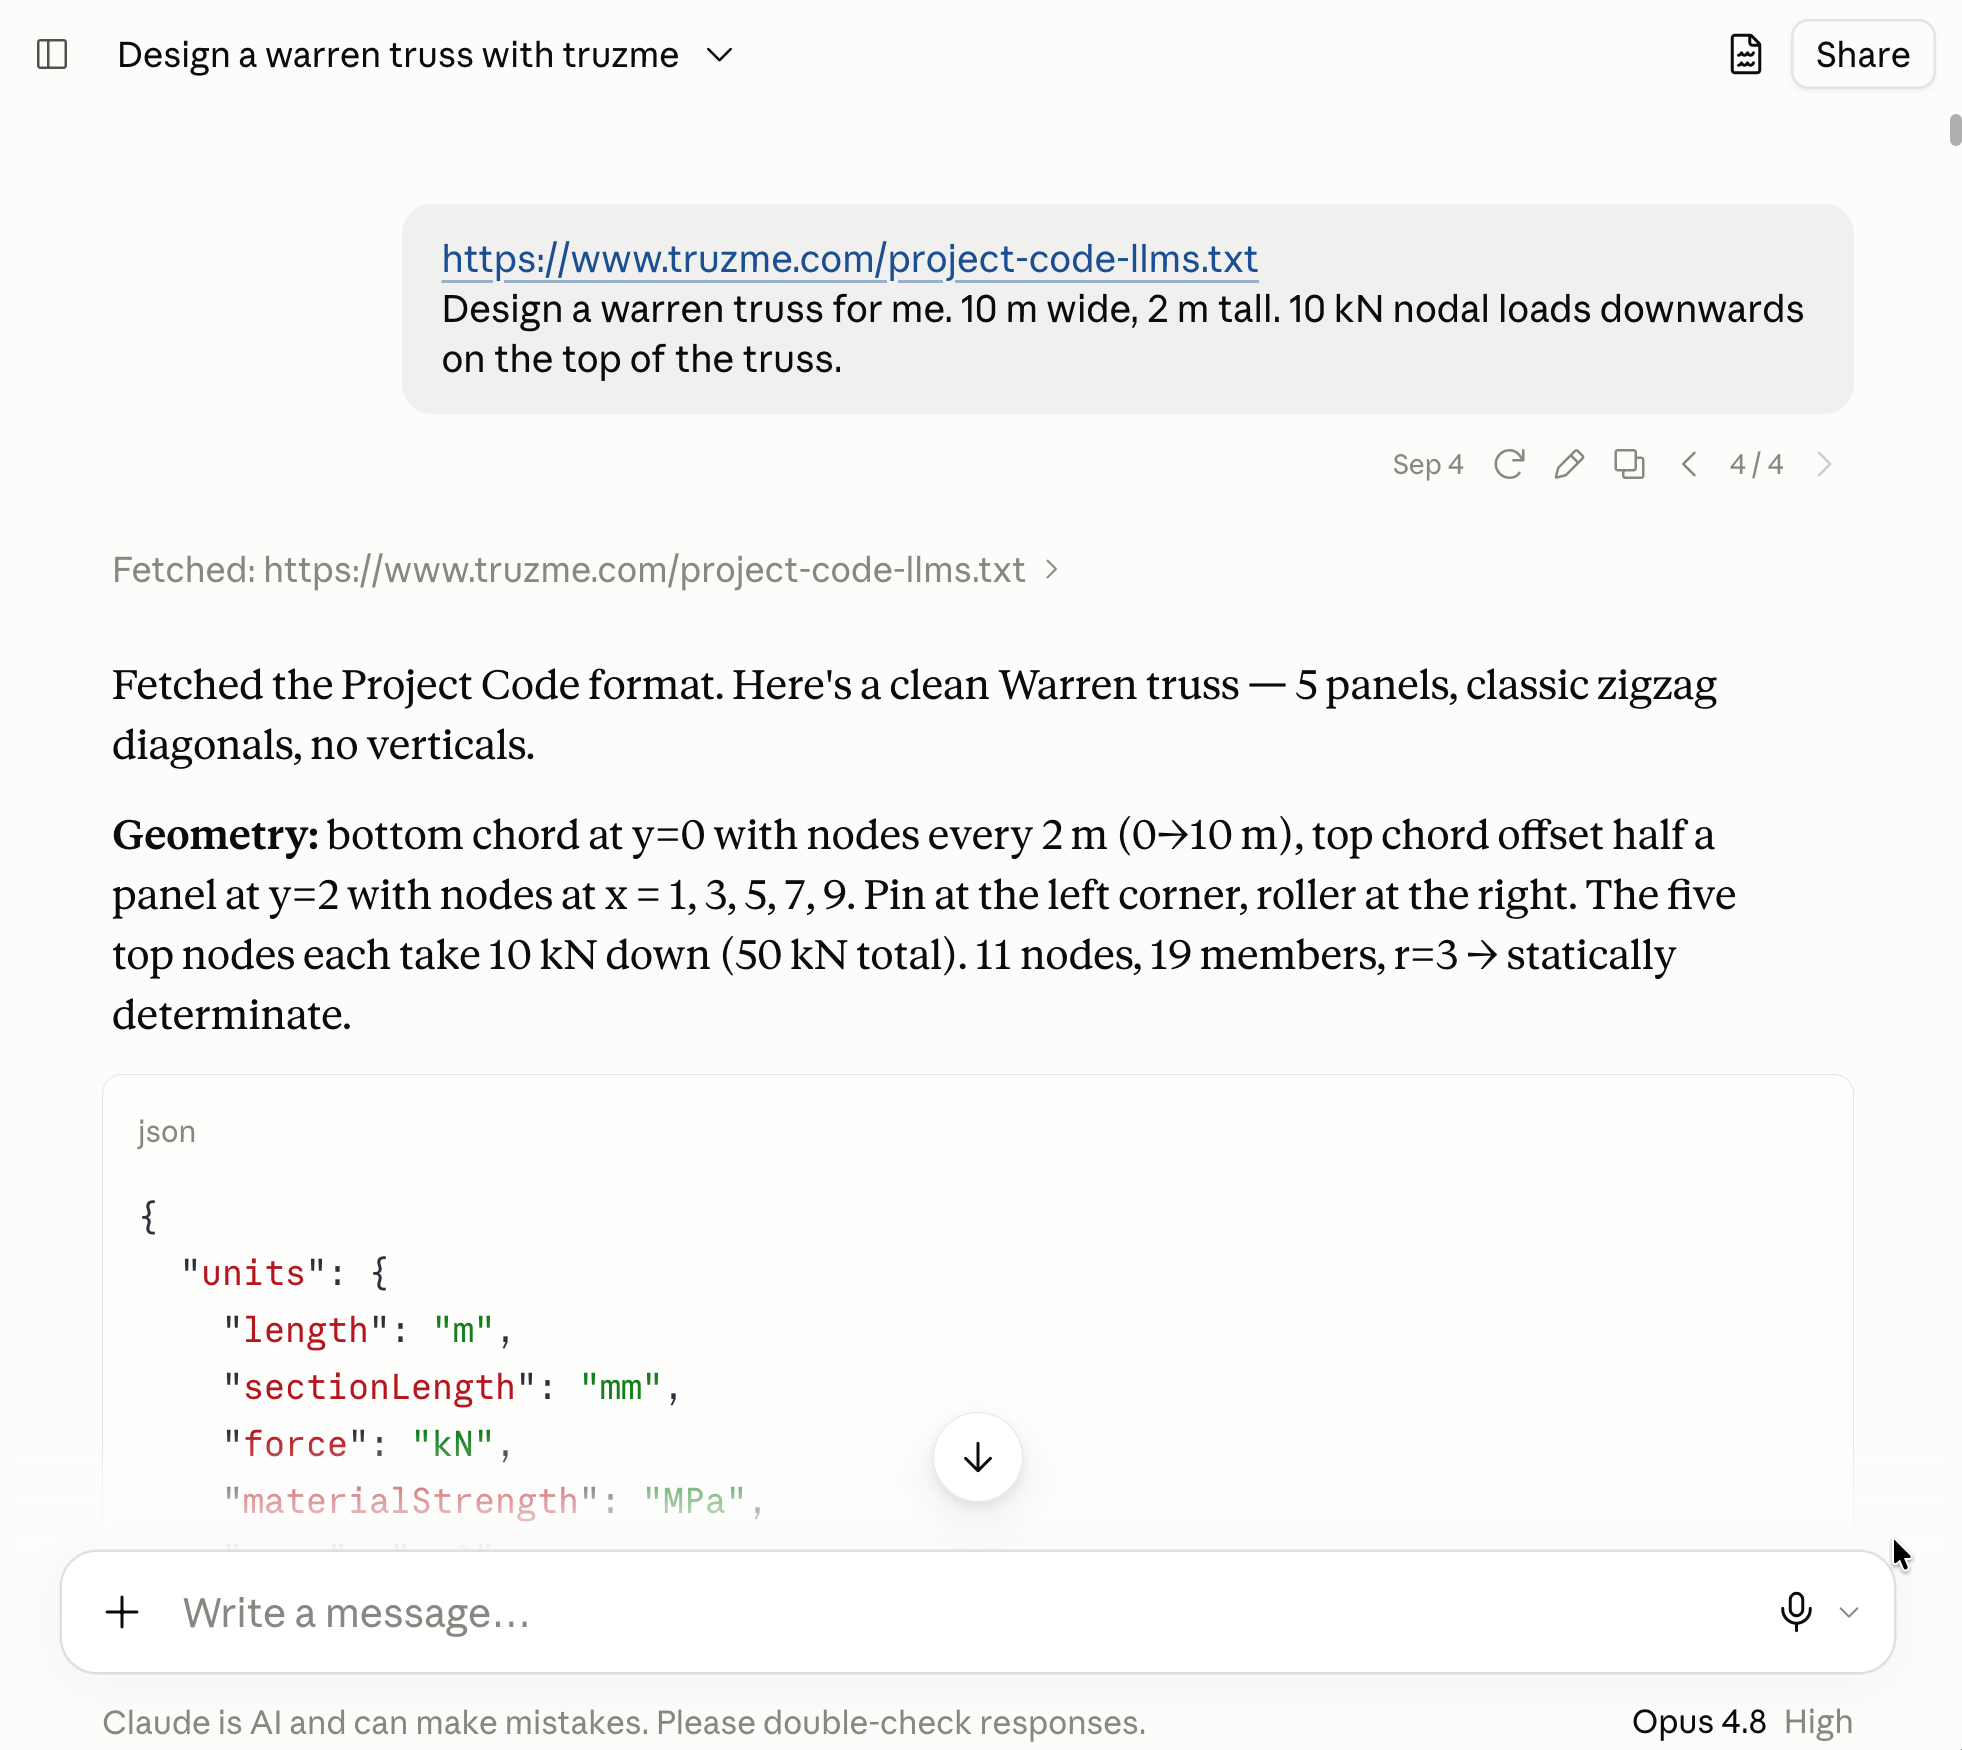
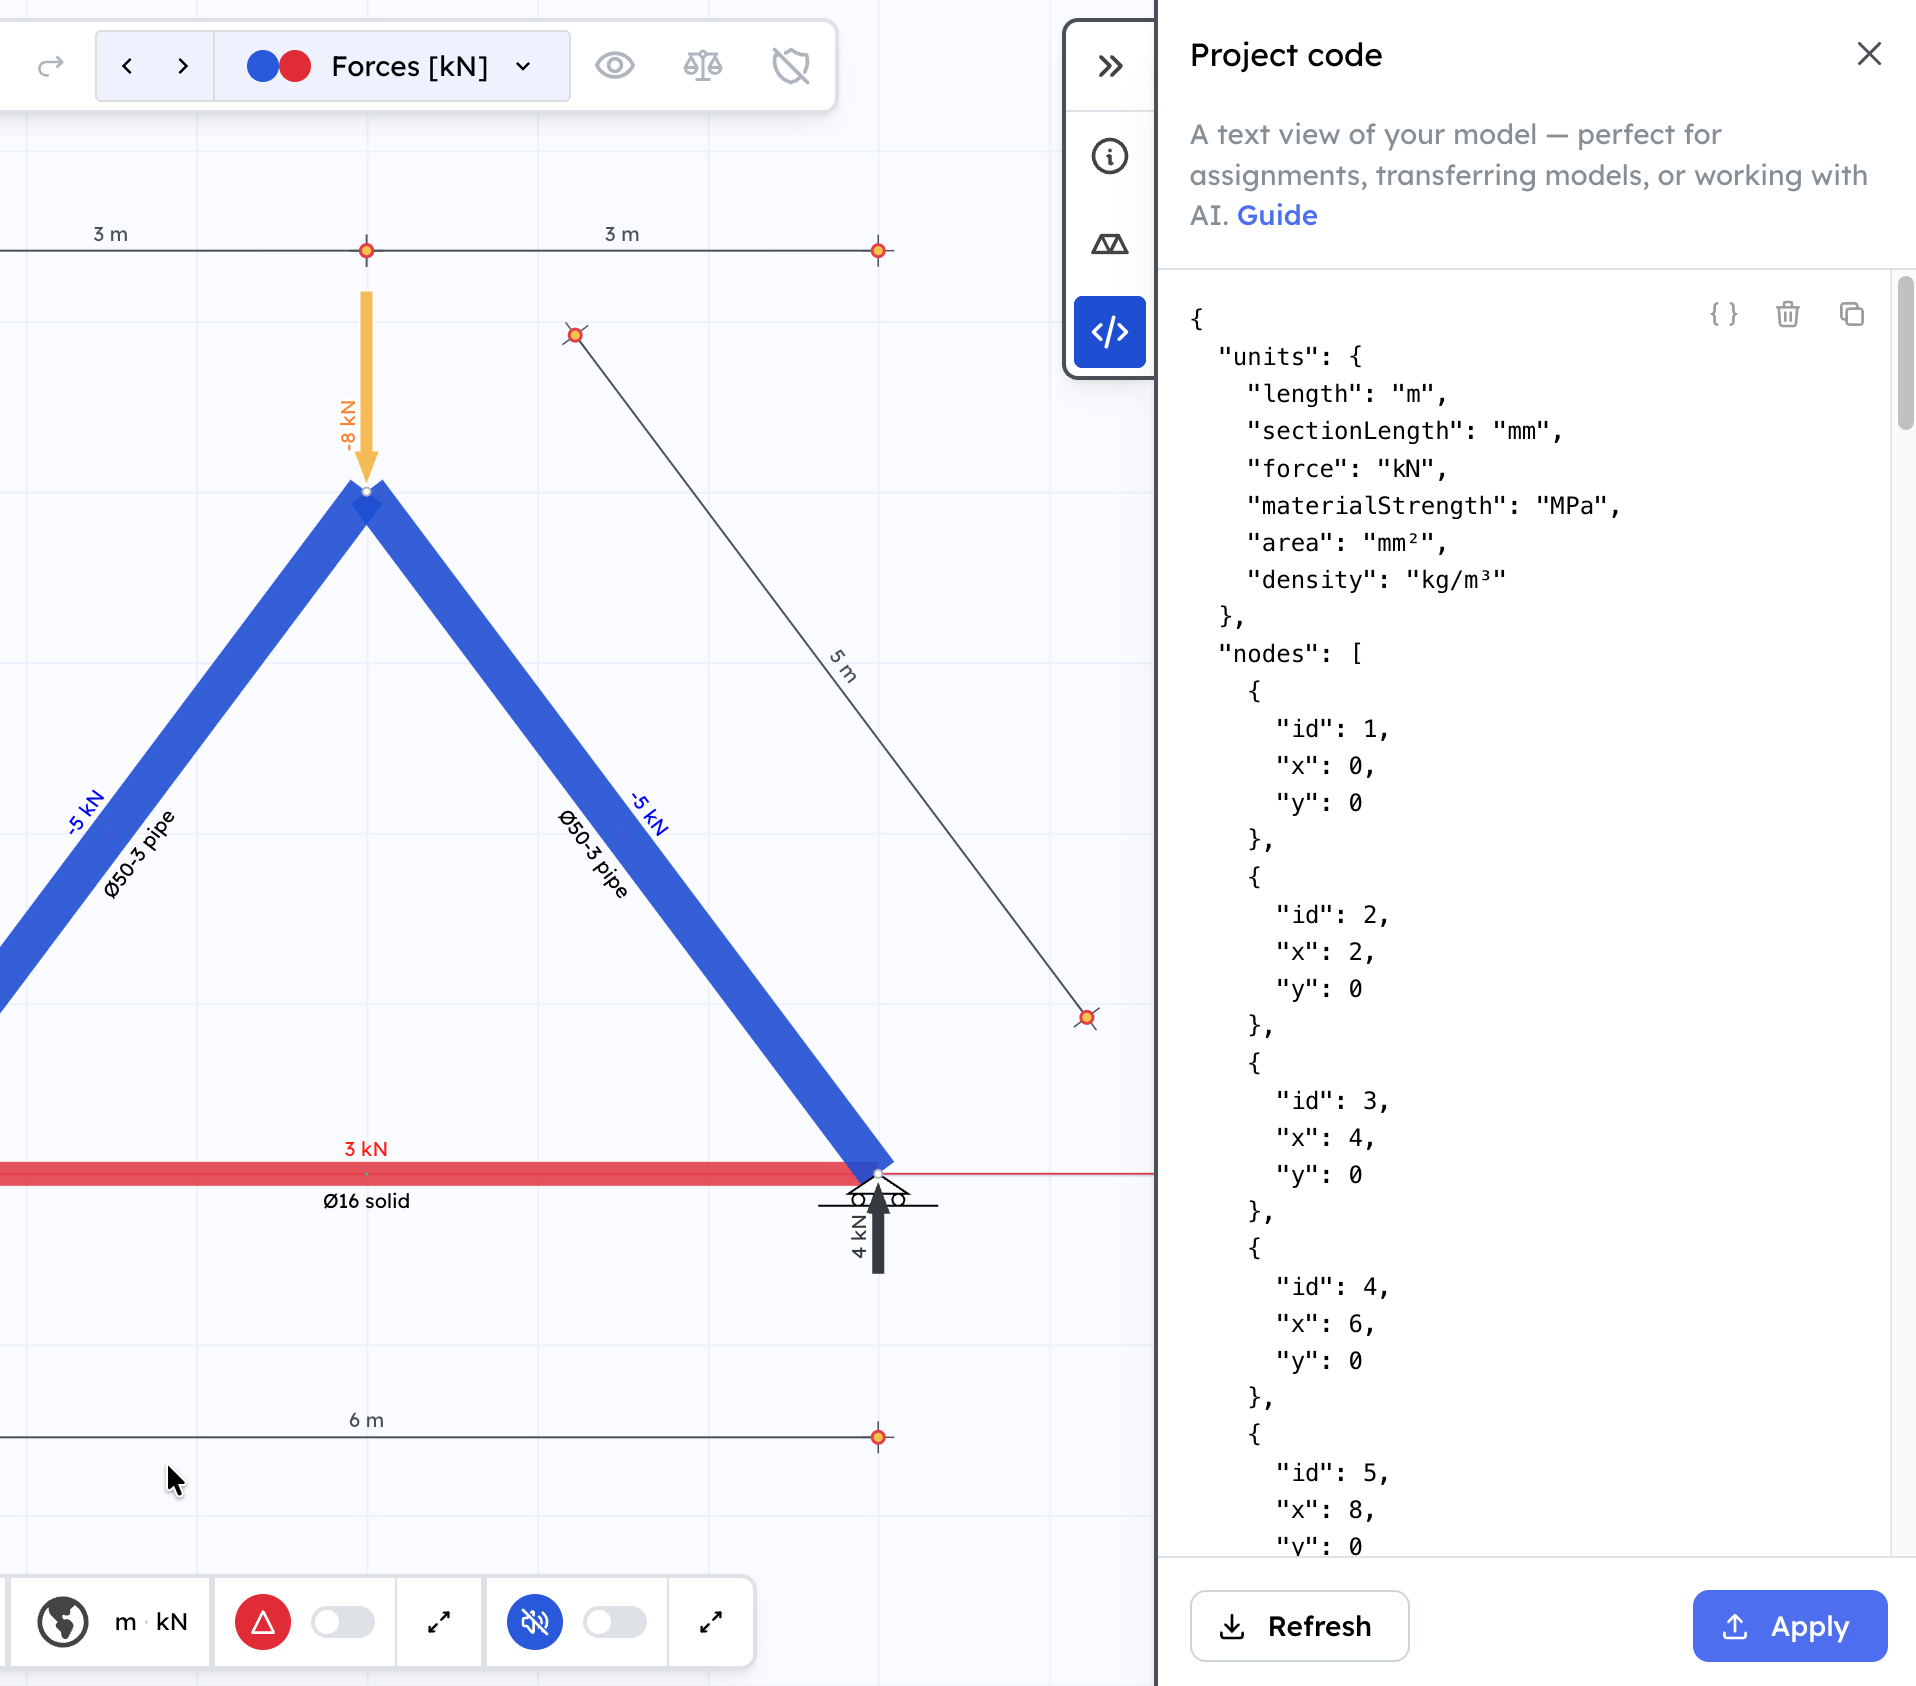
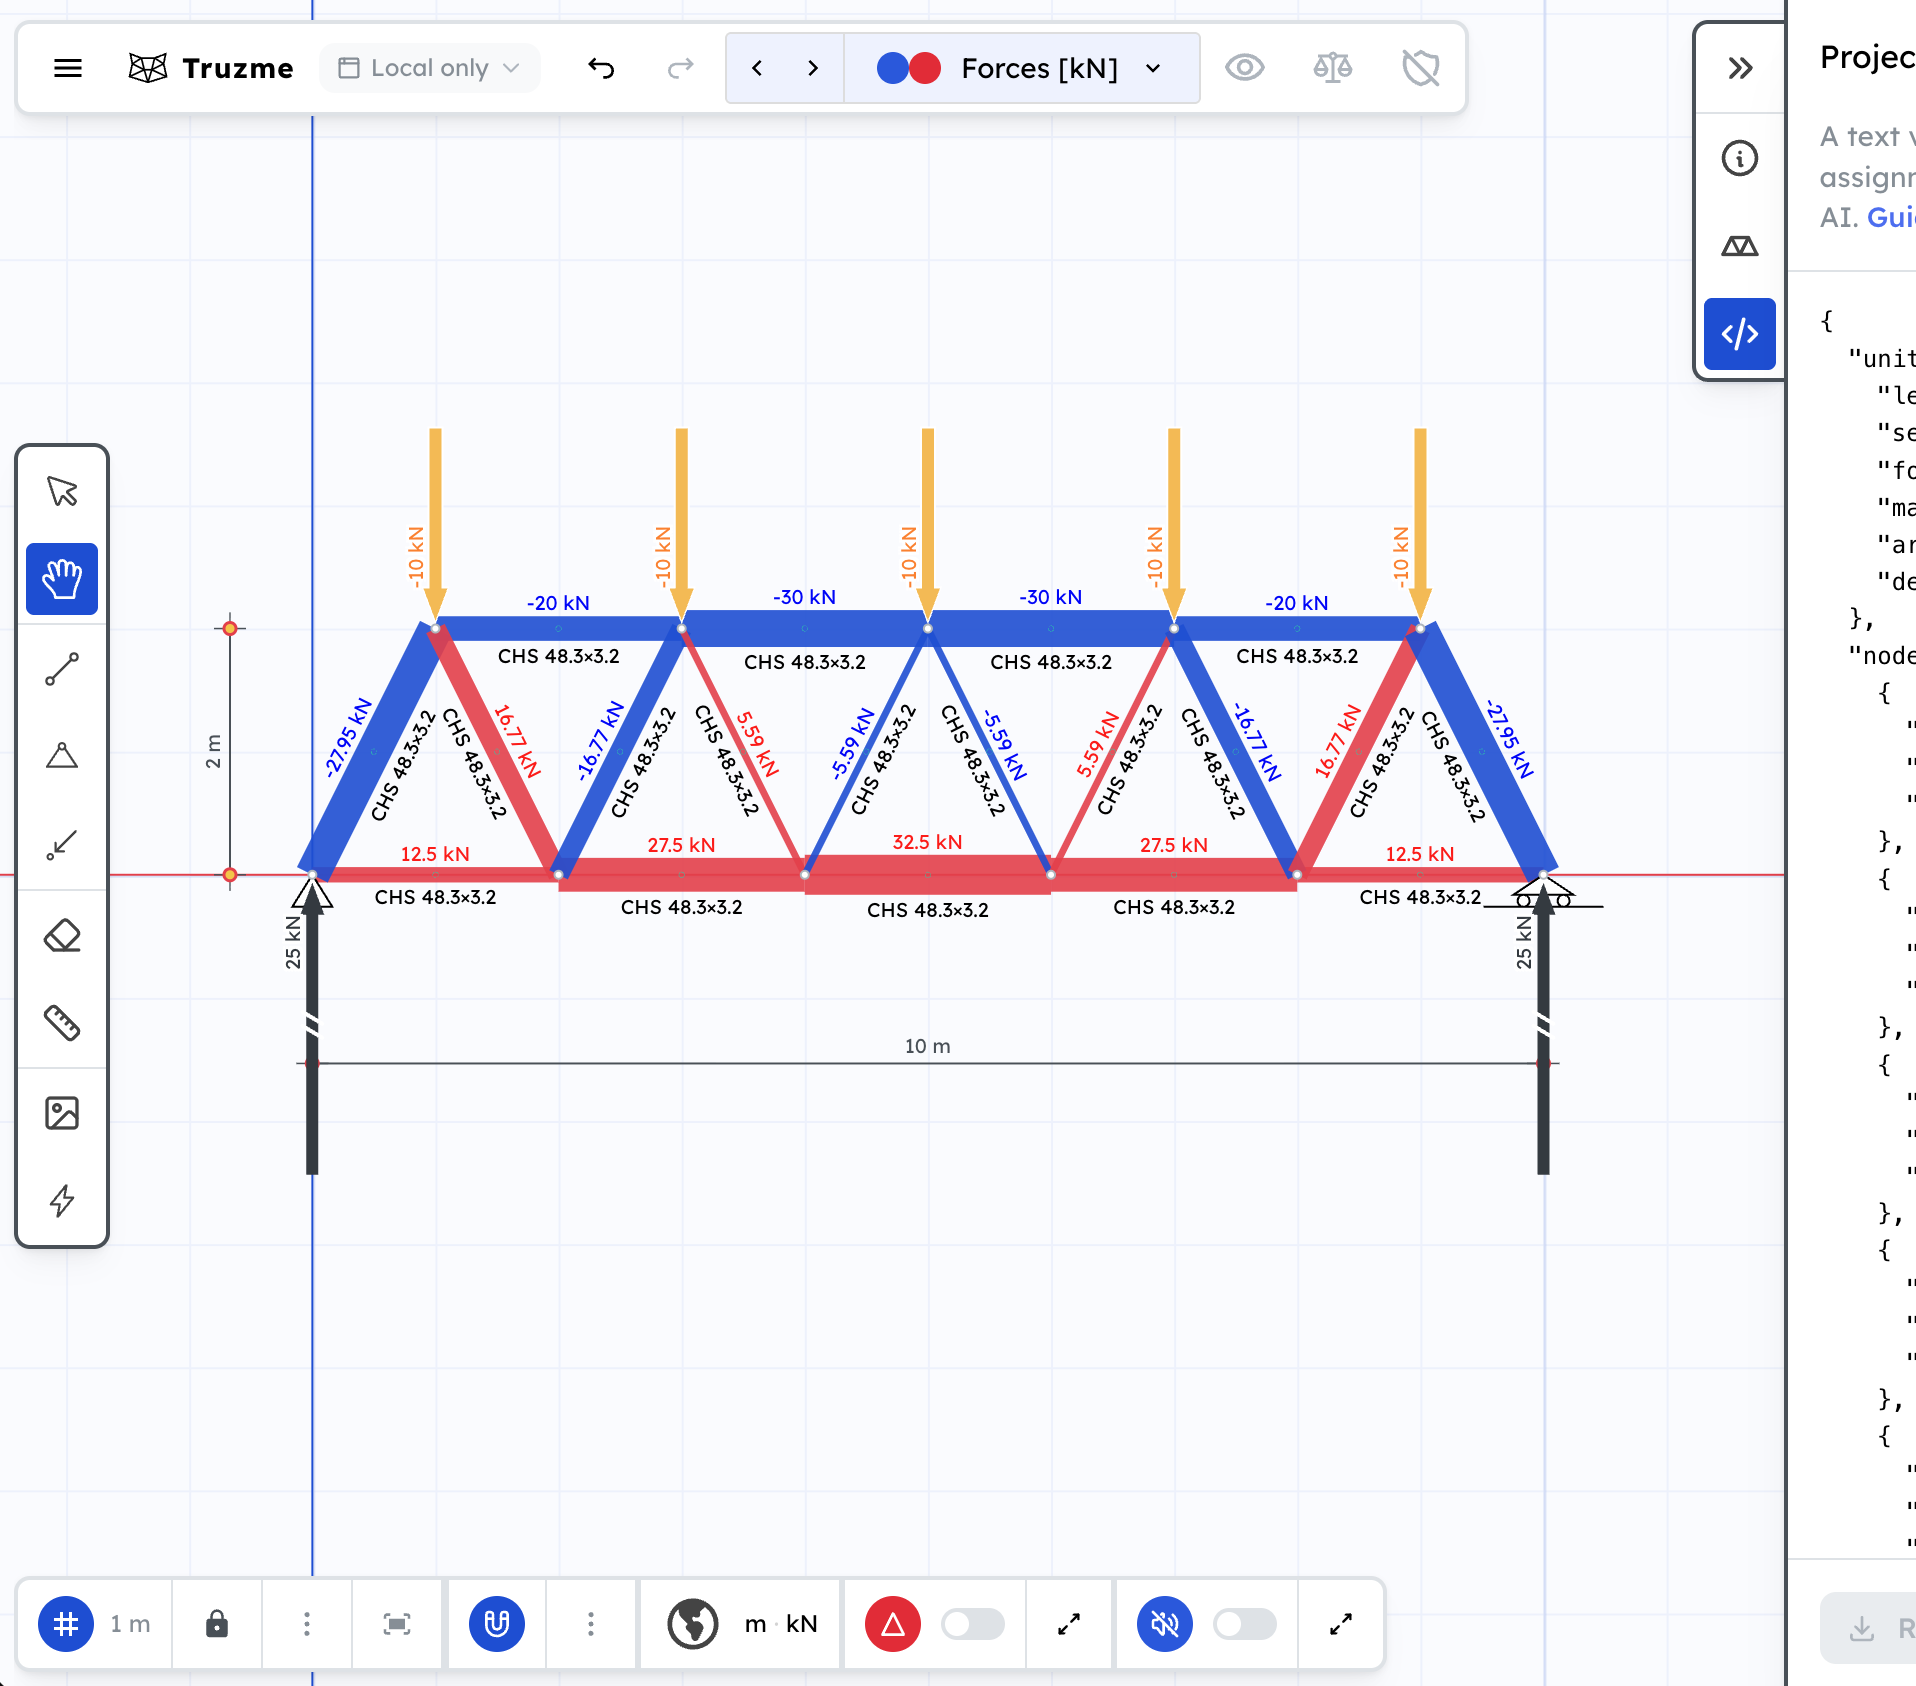
- Design with AI — give ChatGPT or Claude a description of the truss you want, paste its reply into Truzme, and it's on the canvas. Works for redesigning a truss you've already built, too.
- Hand out assignments — a teacher copies a starting truss into Canvas, Moodle or Google Classroom, and every student pastes in exactly the same model.
- Move models anywhere — it's plain text, so a model fits in an email, a chat message or a document.
- Safe to paste — Truzme checks the code before it touches your model, and says in plain words what's wrong, e.g. "member 3 references node 9, which doesn't exist".
See the Project code guide for the whole workflow, including a ready-made AI prompt to copy.
Privacy Policy and Terms clarified
2026-09-16 · 2.20
The Privacy Policy and Terms of Service now describe exactly what the site does — no cookies, one analytics tool you can switch off, and nothing you draw leaving your device. Each page lists what changed at the bottom.
Tension utilisation diagram
2026-09-15 · 2.19
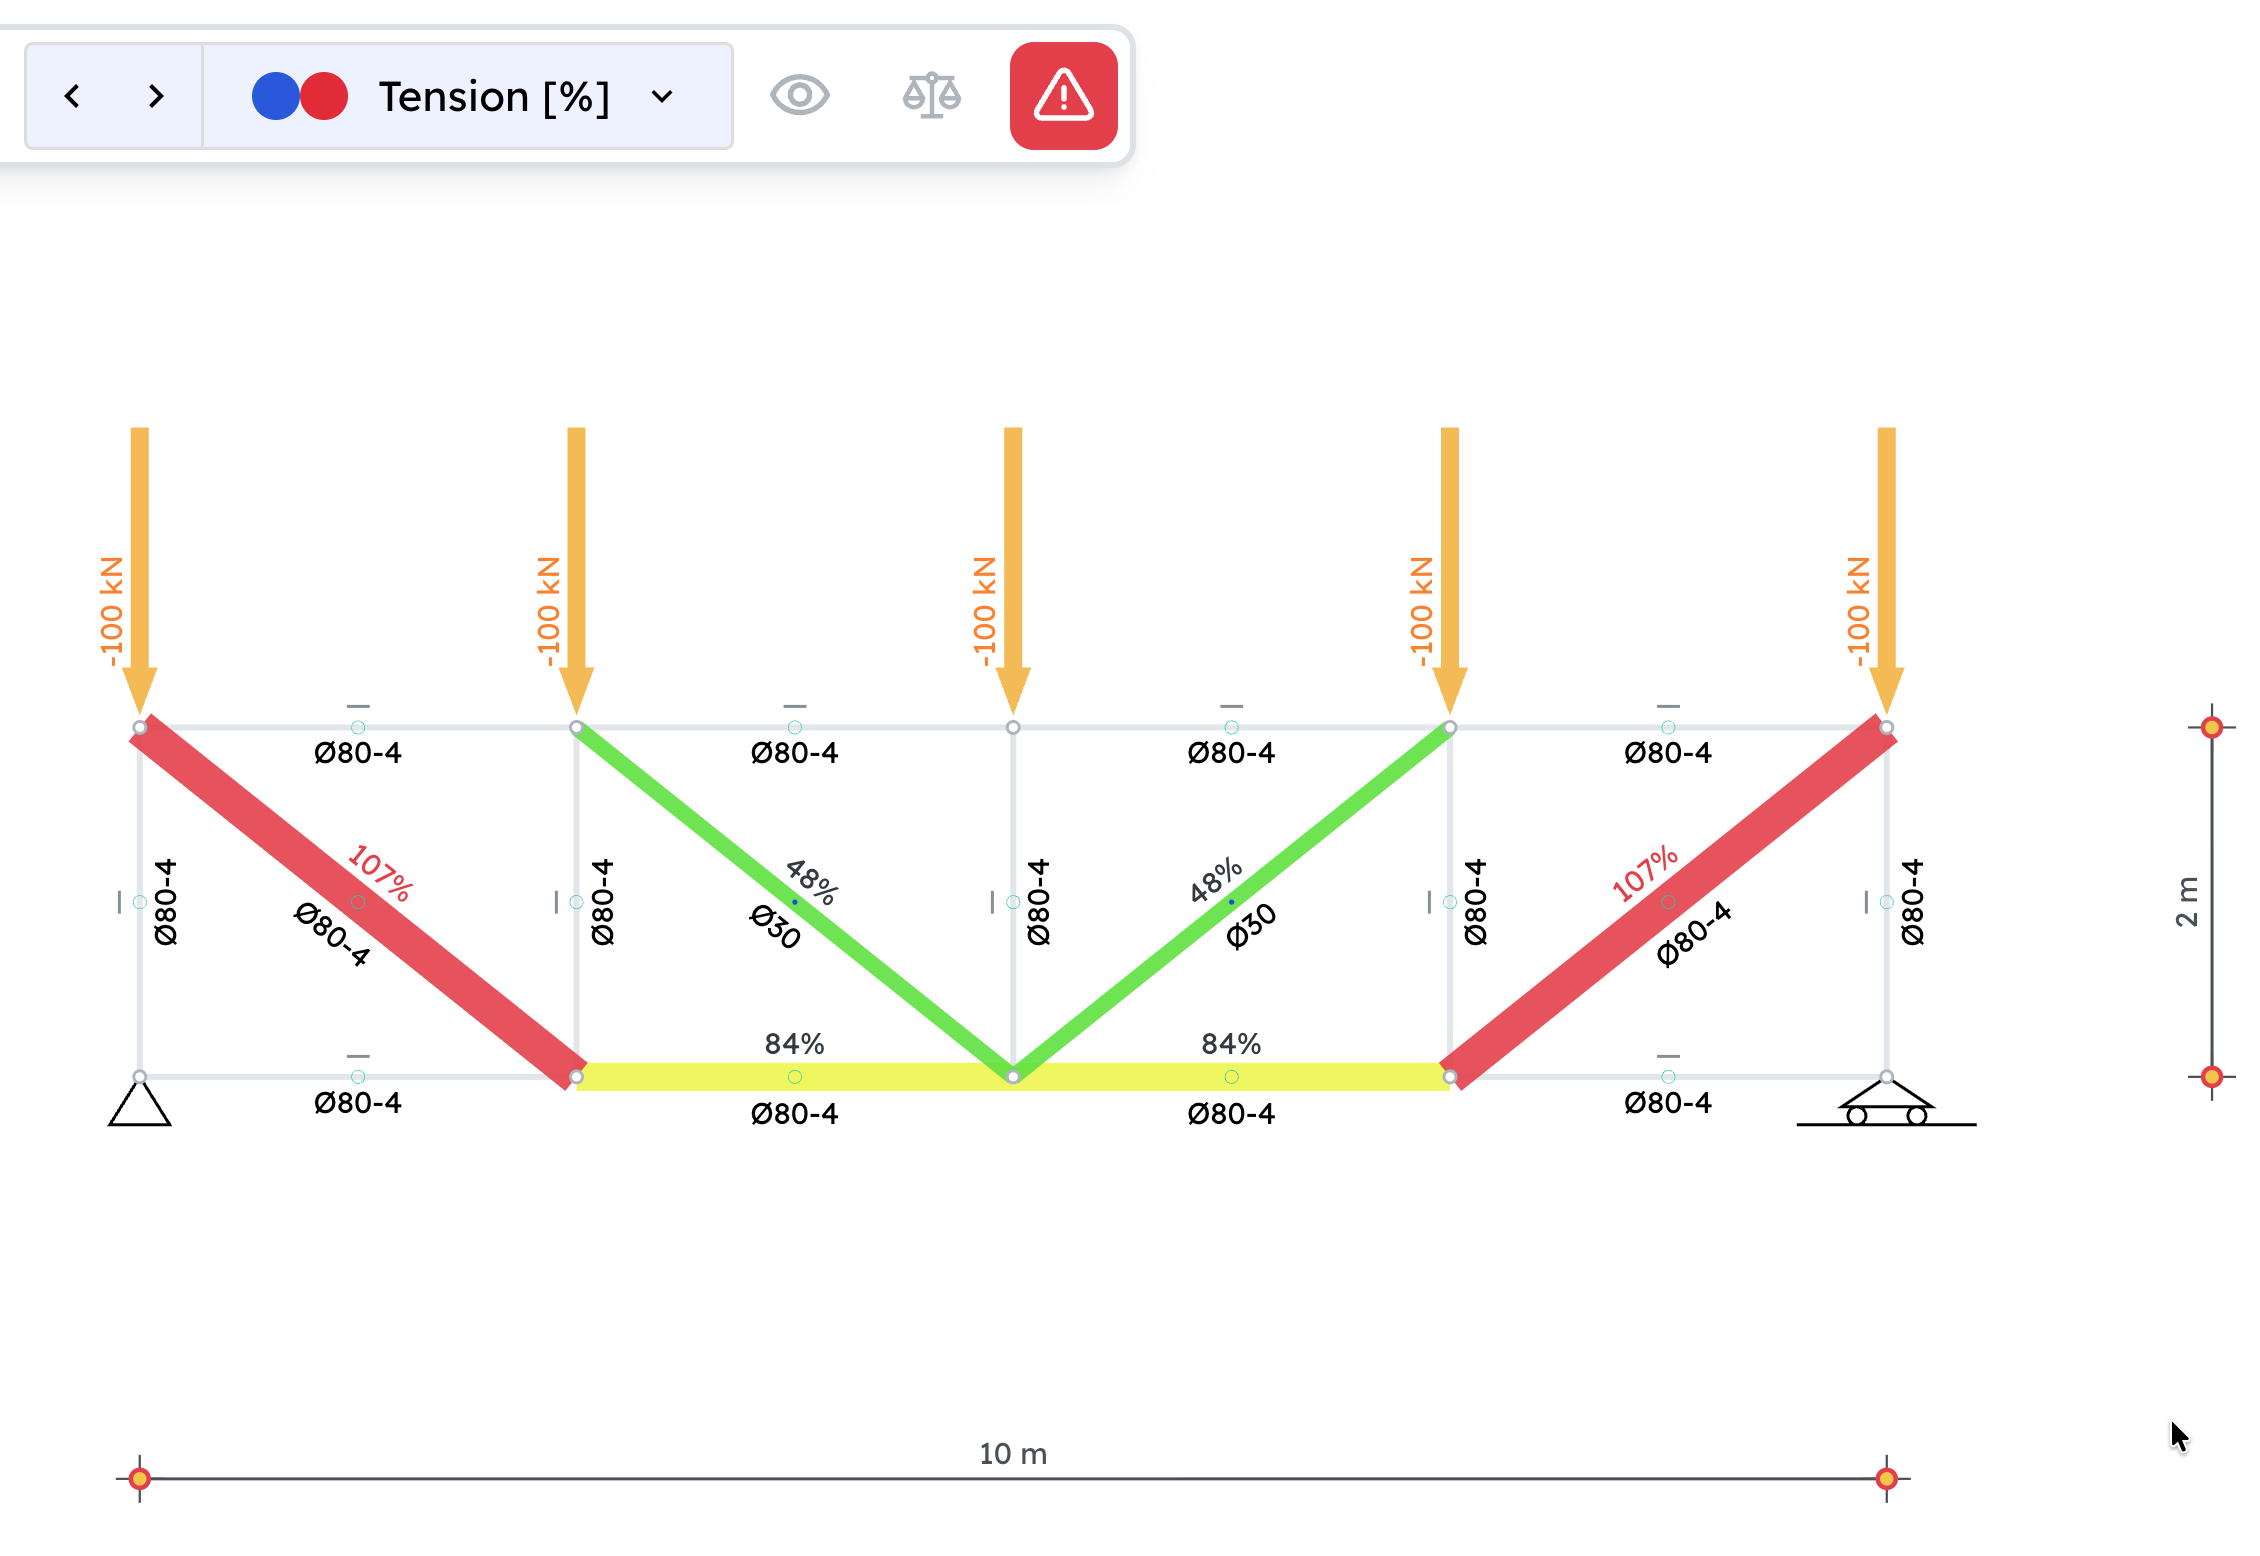
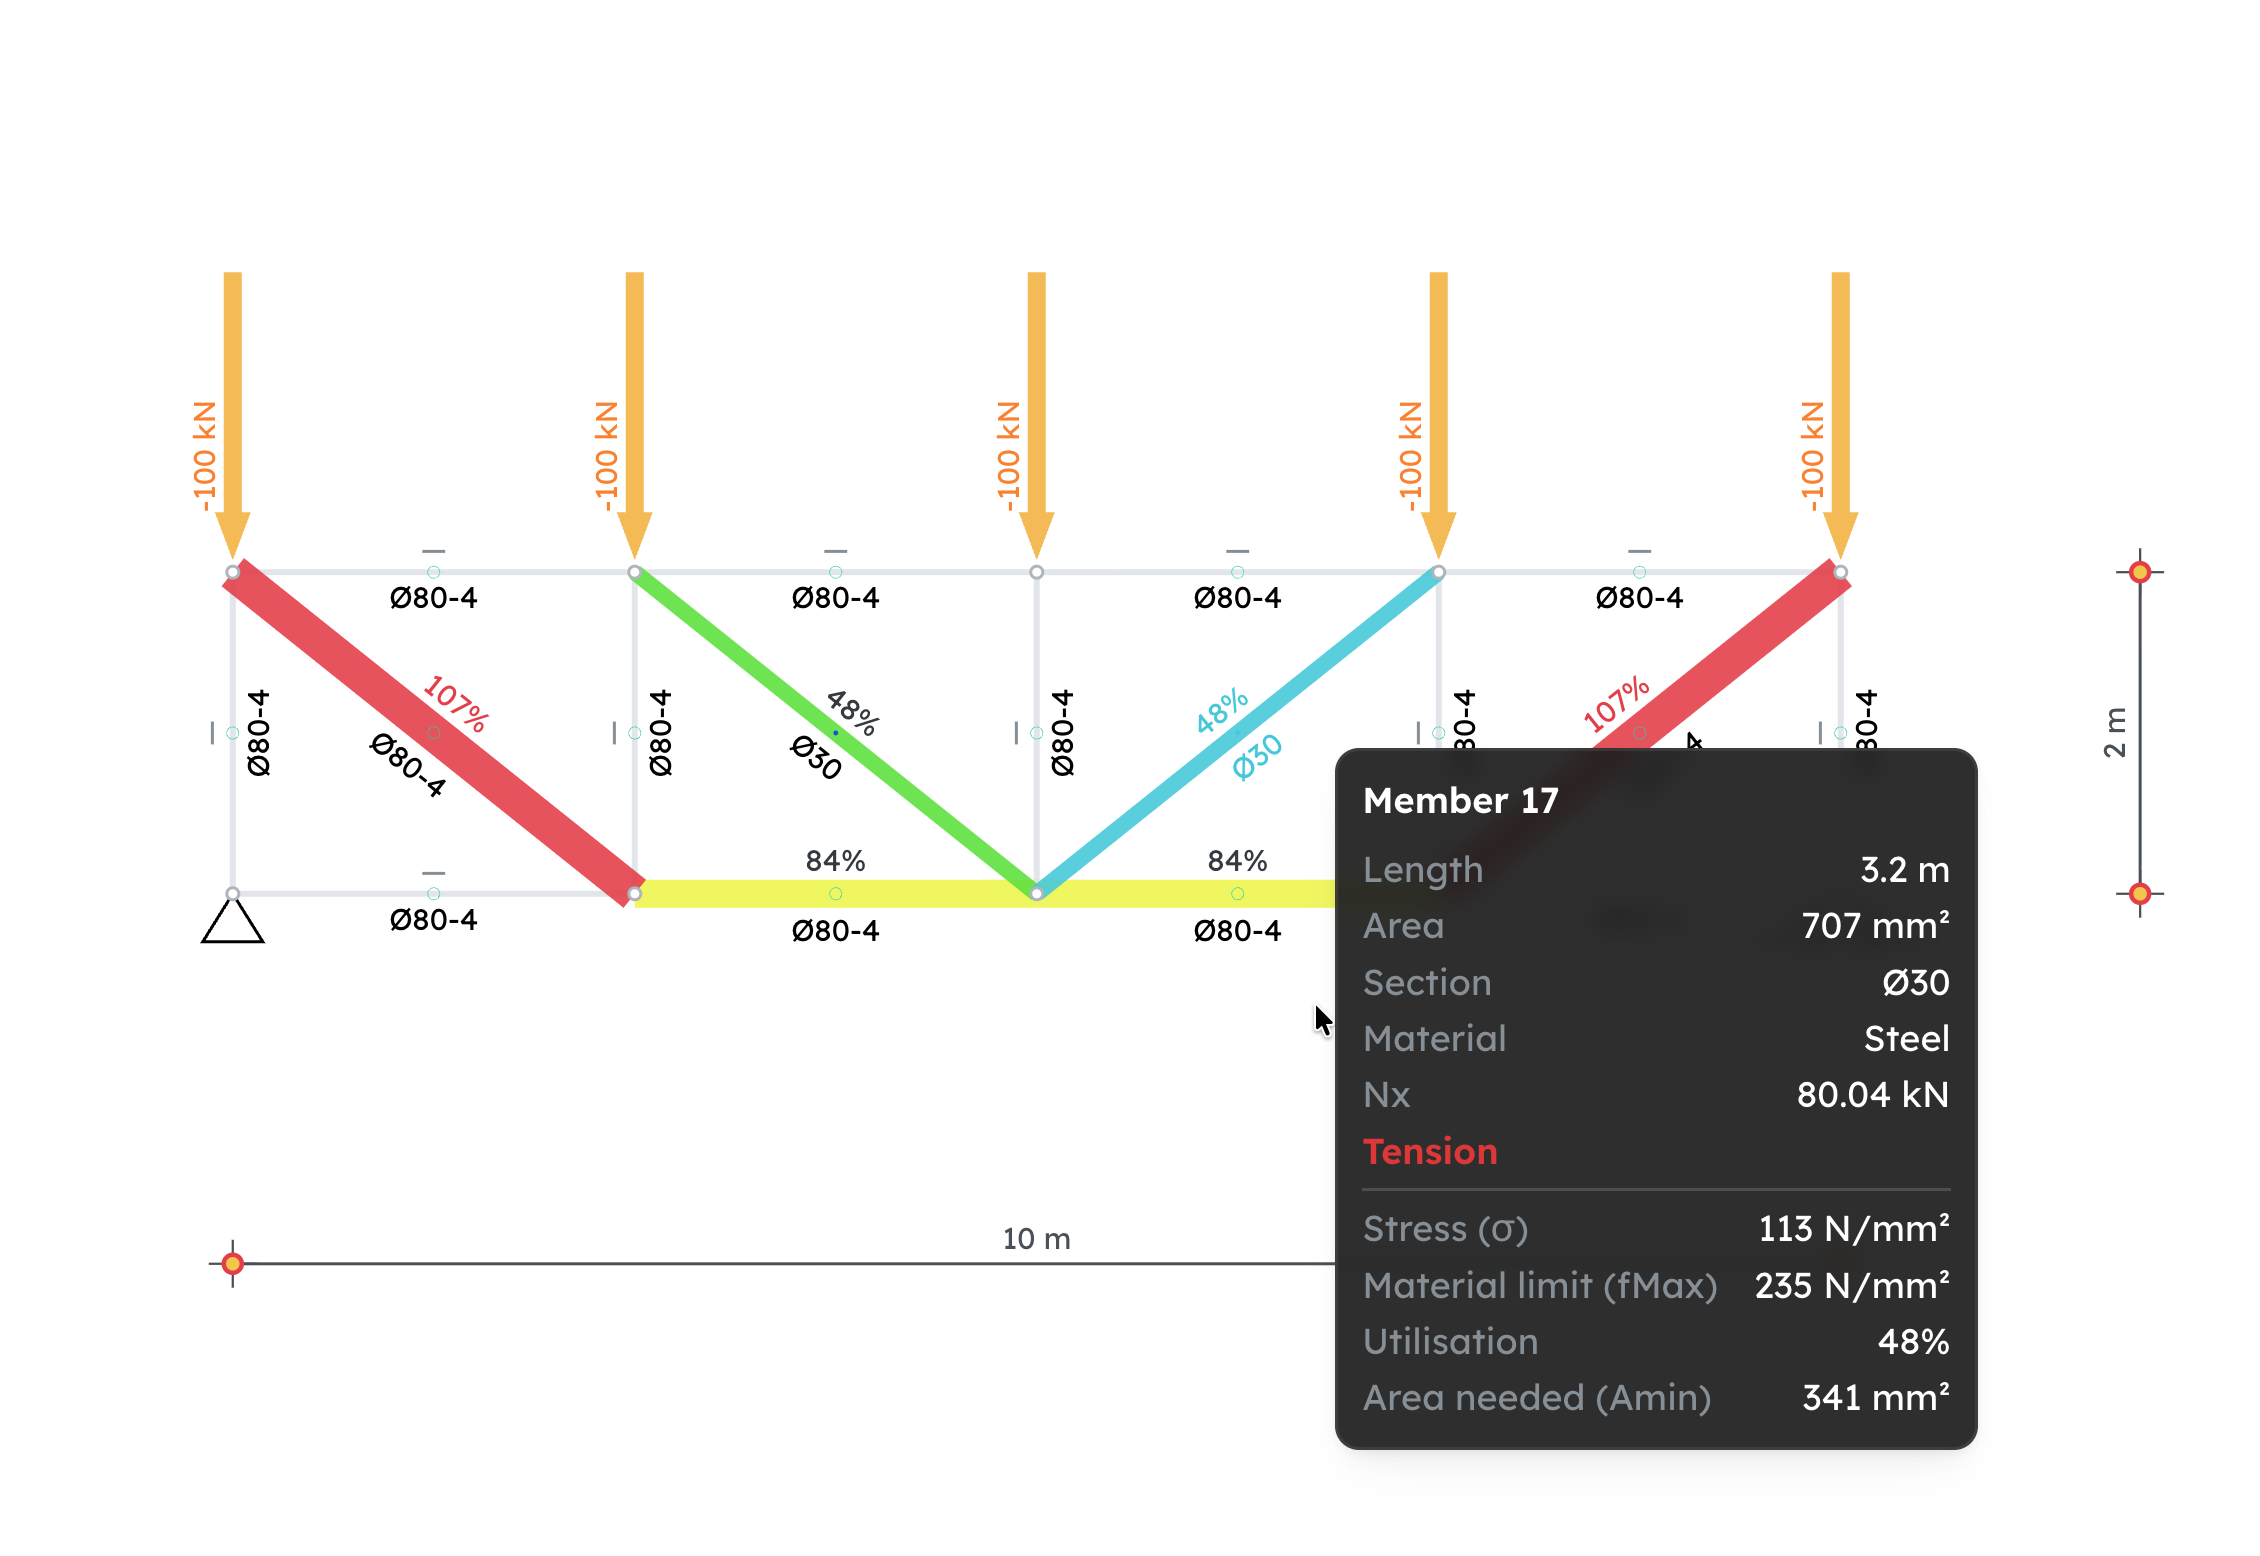
New diagram mode: Tension [%] shows how close each member in tension is to tearing (σ / fMax). Find it in the diagram dropdown at the top, under Checks. Use it to size the members that could tear: change their sections until every one is under 100%, and hover a member to see the area it needs (Amin) next to the area it has.
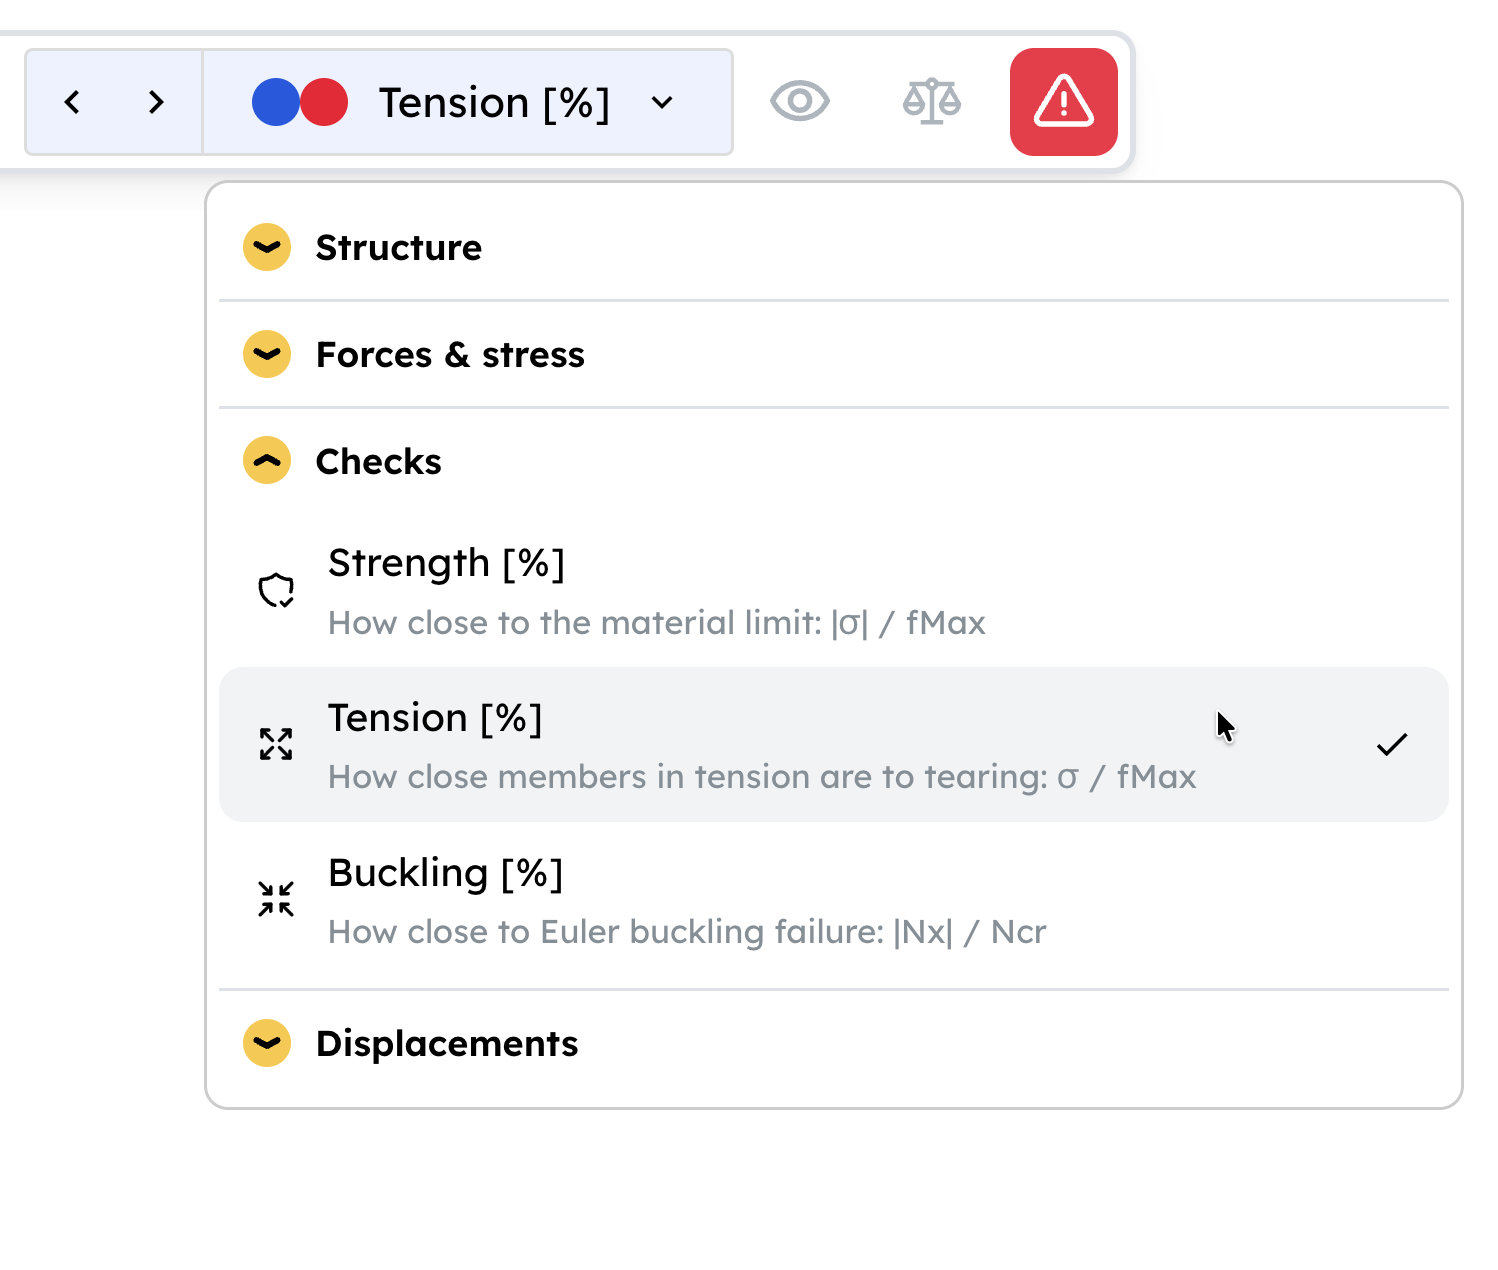
Minor update: the diagram dropdown is now split into sections, and each check shows its short formula.
See the Strength & utilisation guide for the formulas behind it.
Material & section lists
2026-09-14 · 2.18
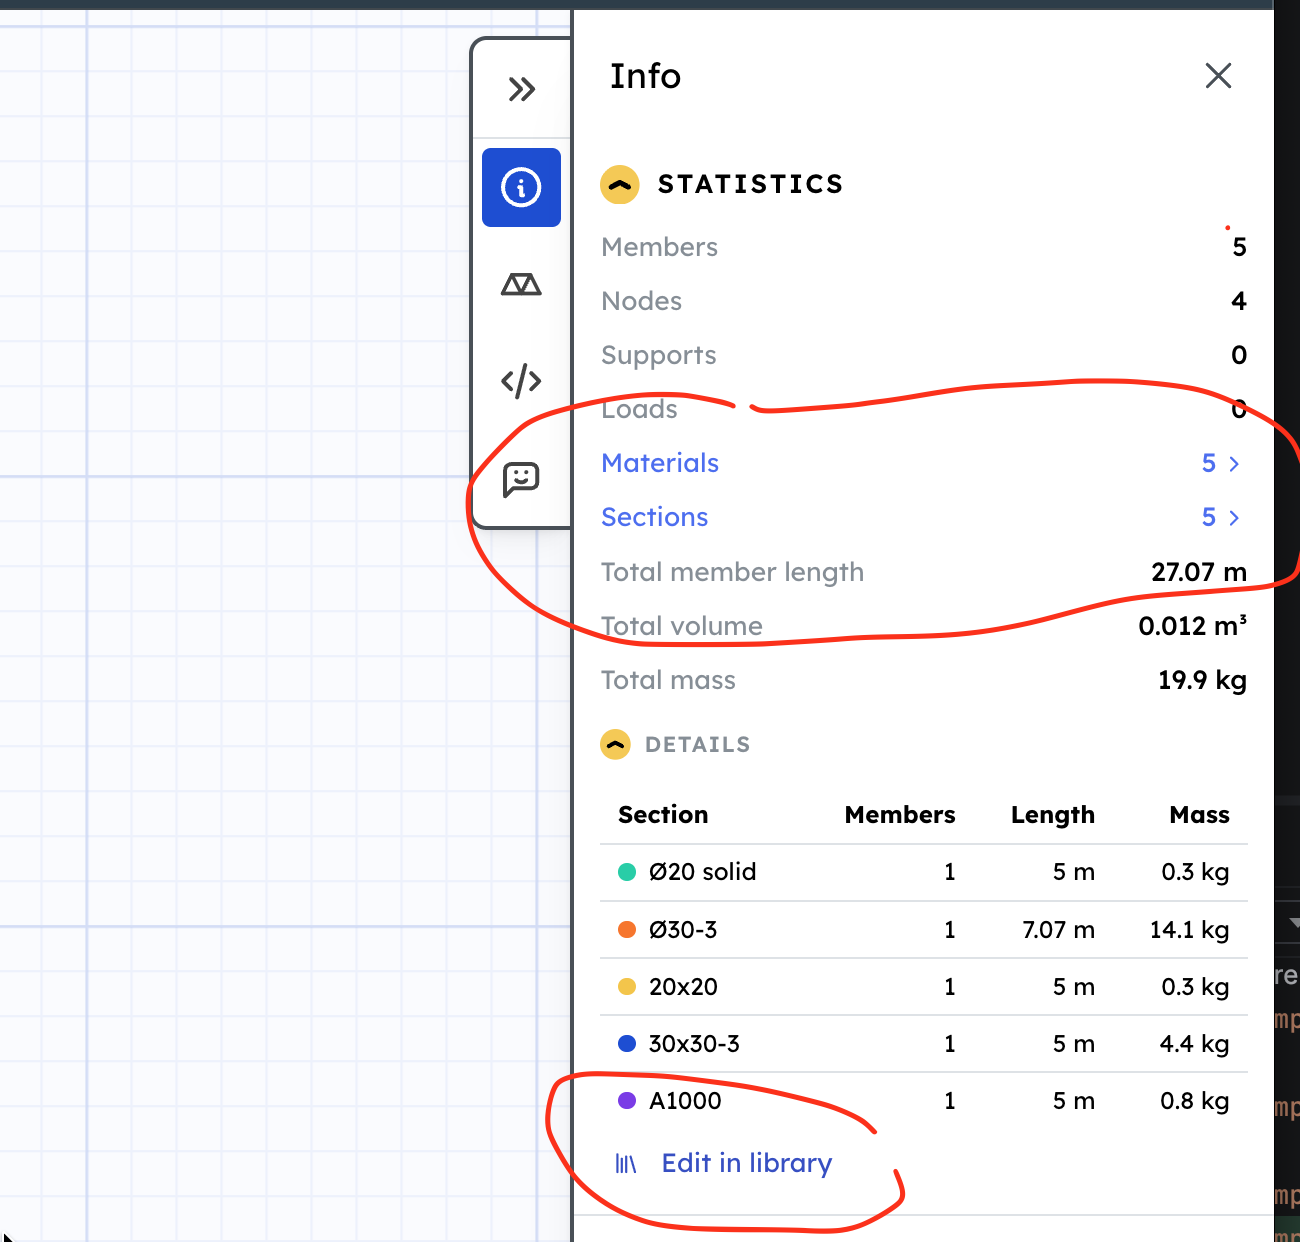
Materials and sections are much easier to manage now: all of them in one list, instead of stepping through them one dialog at a time. Open the list with the icon next to the Material and Section pickers in the Member tool, or click Materials or Sections in the Statistics panel on the right.
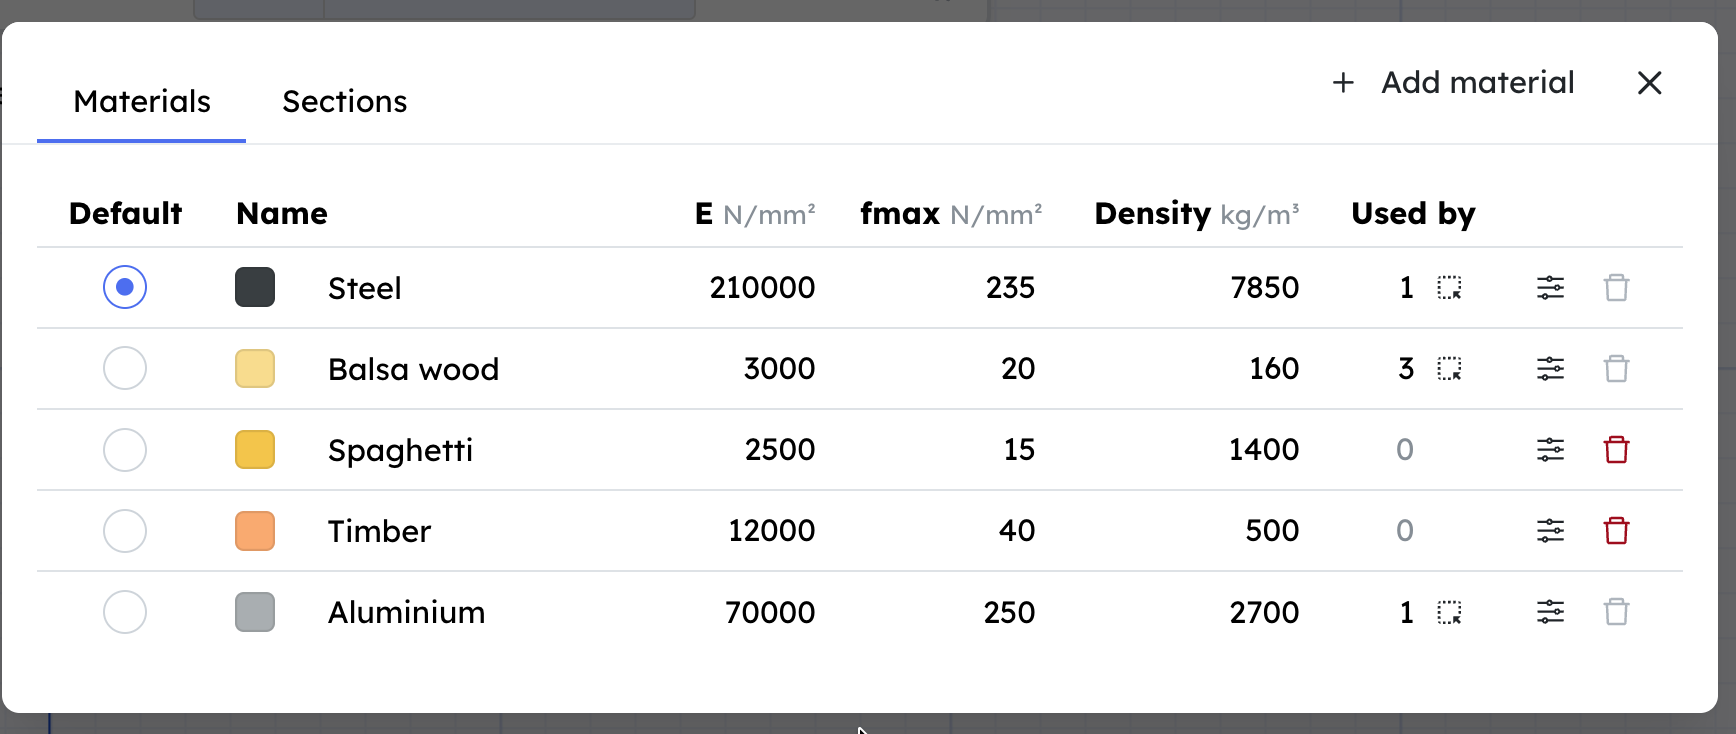
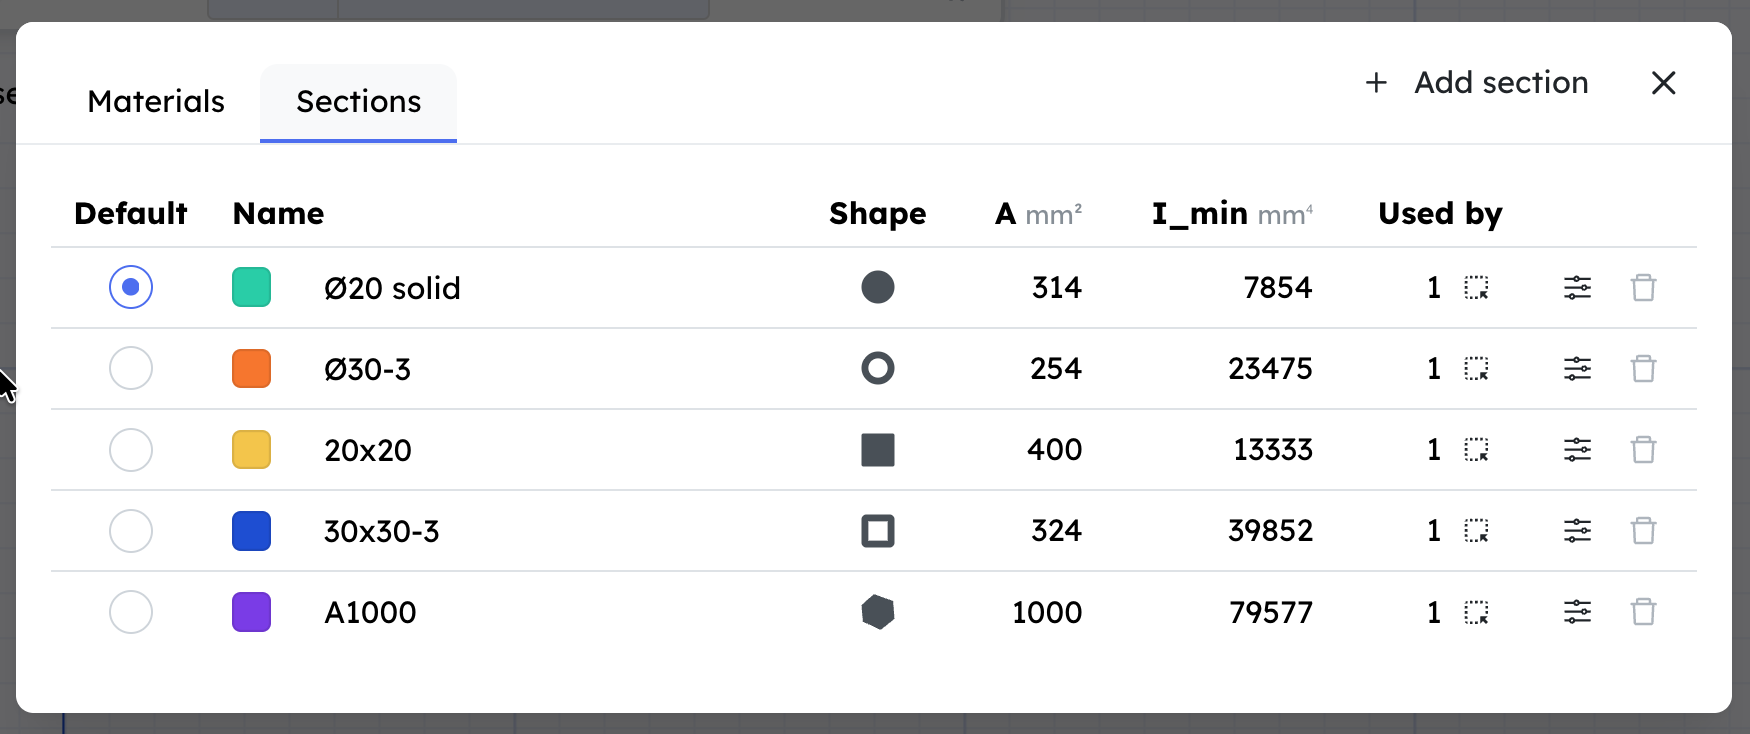
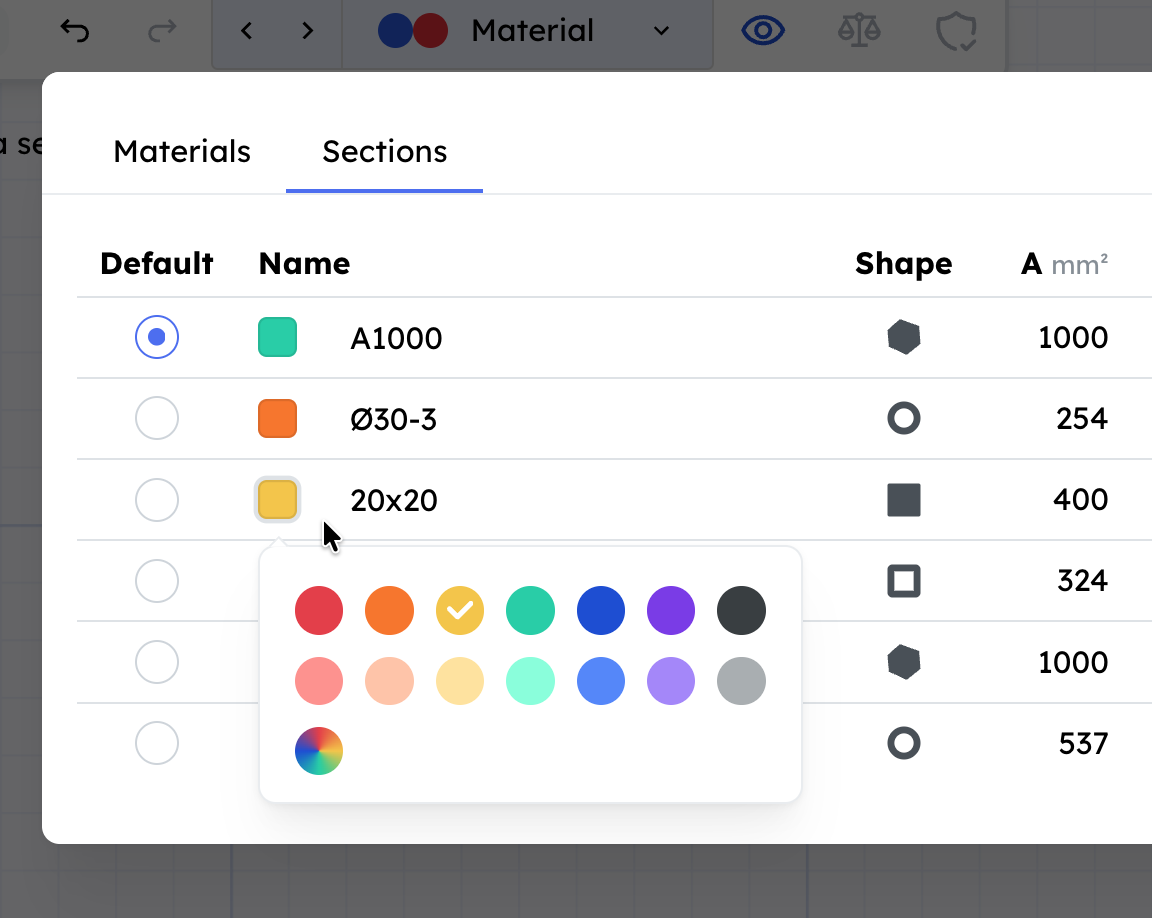
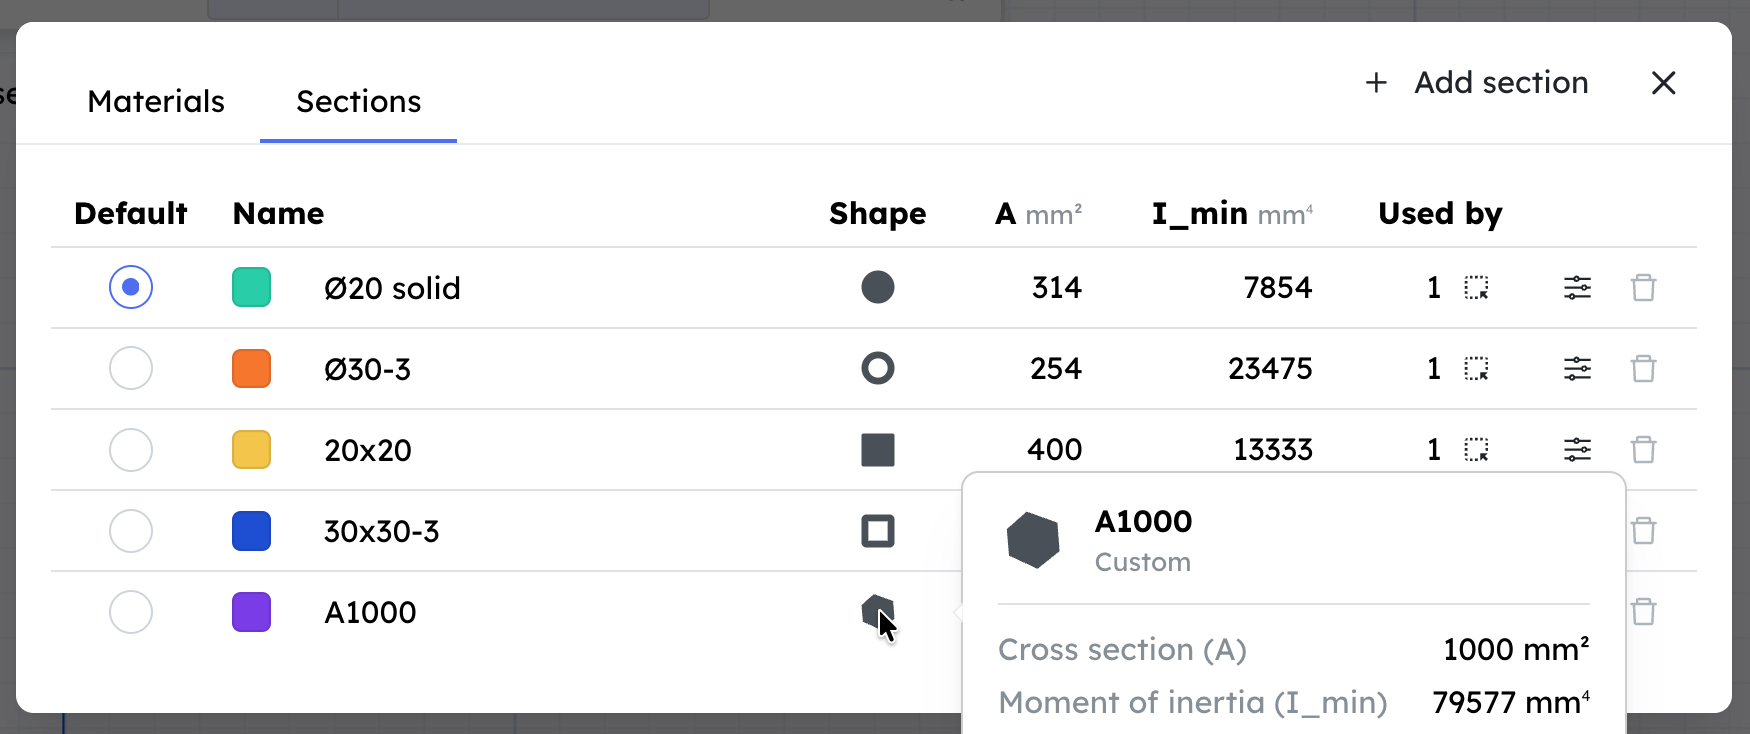
- Edit right in the list — rename, recolour or delete without opening anything, and compare all values side by side. Open an item to change its values, or add a new one.
- See where each one is used — every row shows how many members use it.
- Hover a section's shape to see its dimensions
- Pick the default — choose which material and section new members are drawn with.
- New: select by material or section — select (or deselect) every member that uses a material or section, right from the list.
See the Materials & sections guide for what each value means.
Example projects
2026-09-11 · 2.17
Major update: Browse ready-made example trusses right inside Truzme, and try one out with zero setup. No more blank canvas on startup.
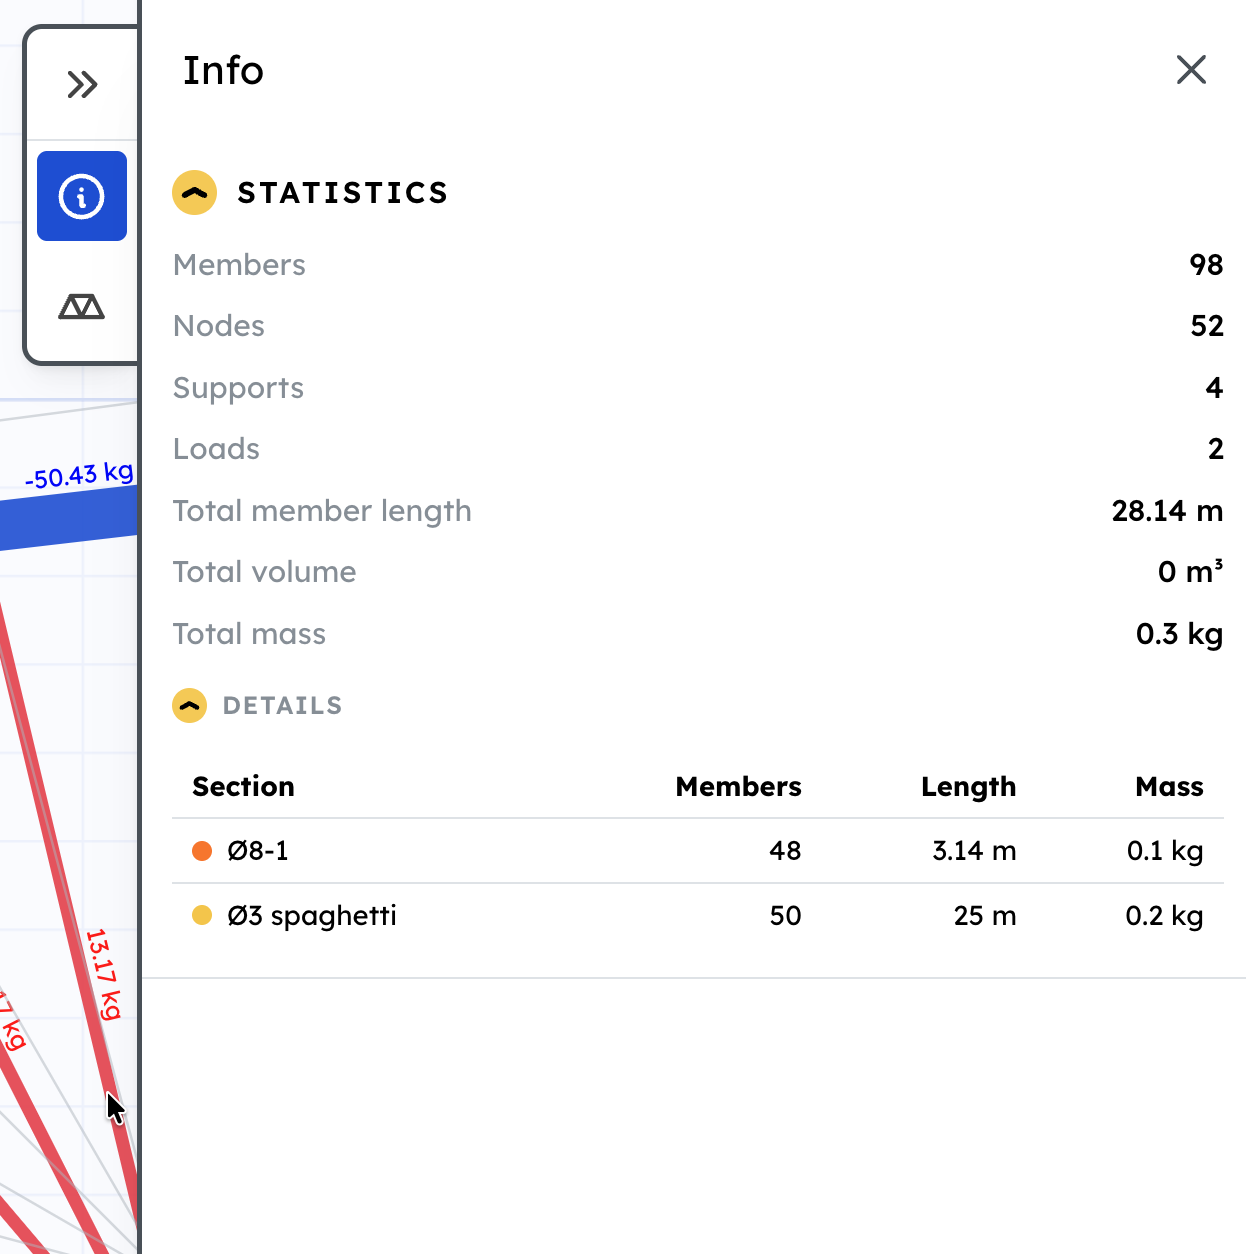
Minor update: density is now part of the material, so Statistics panel (on the right) now shows the total mass of the truss.
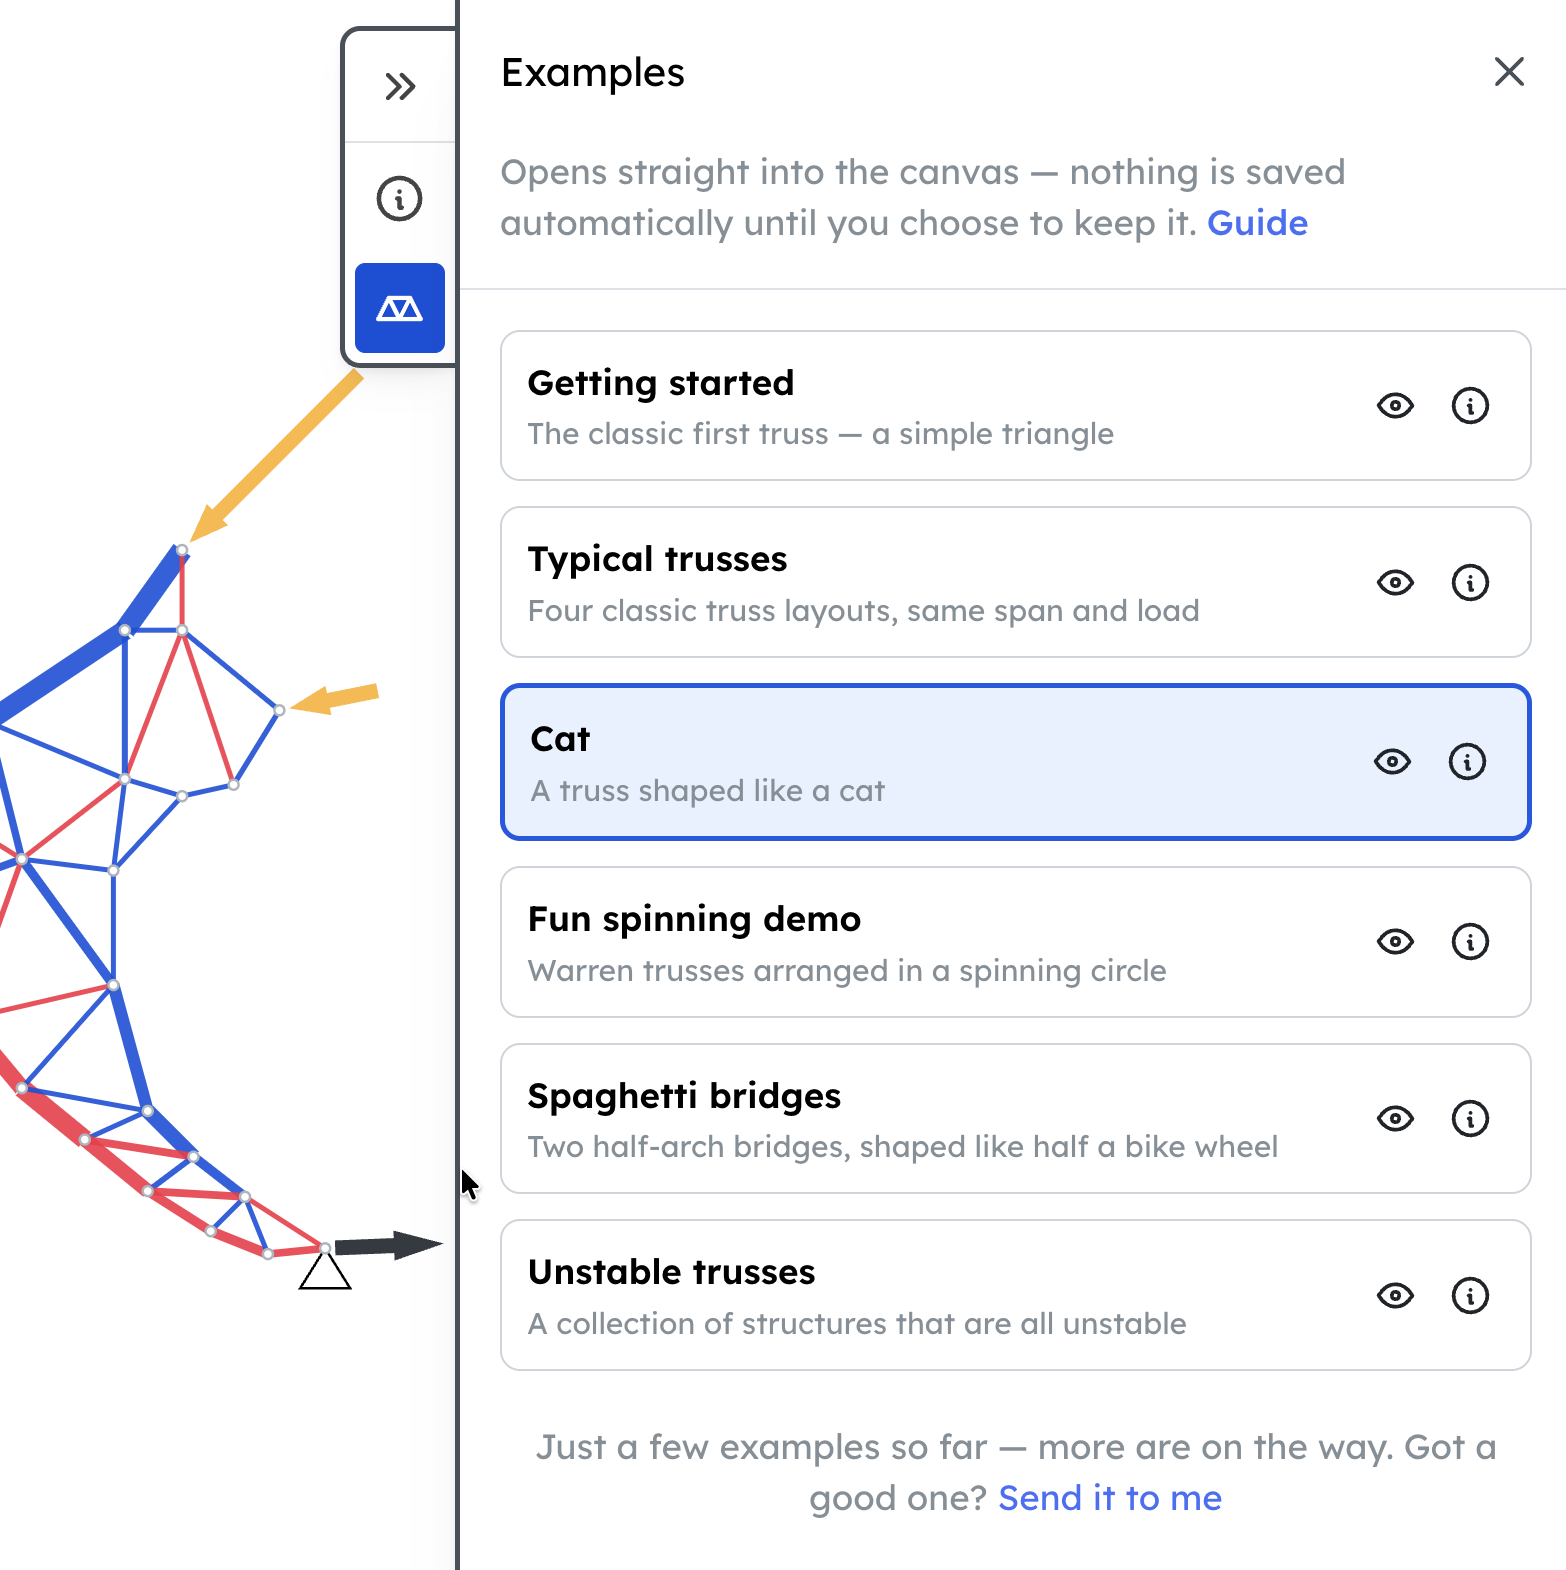
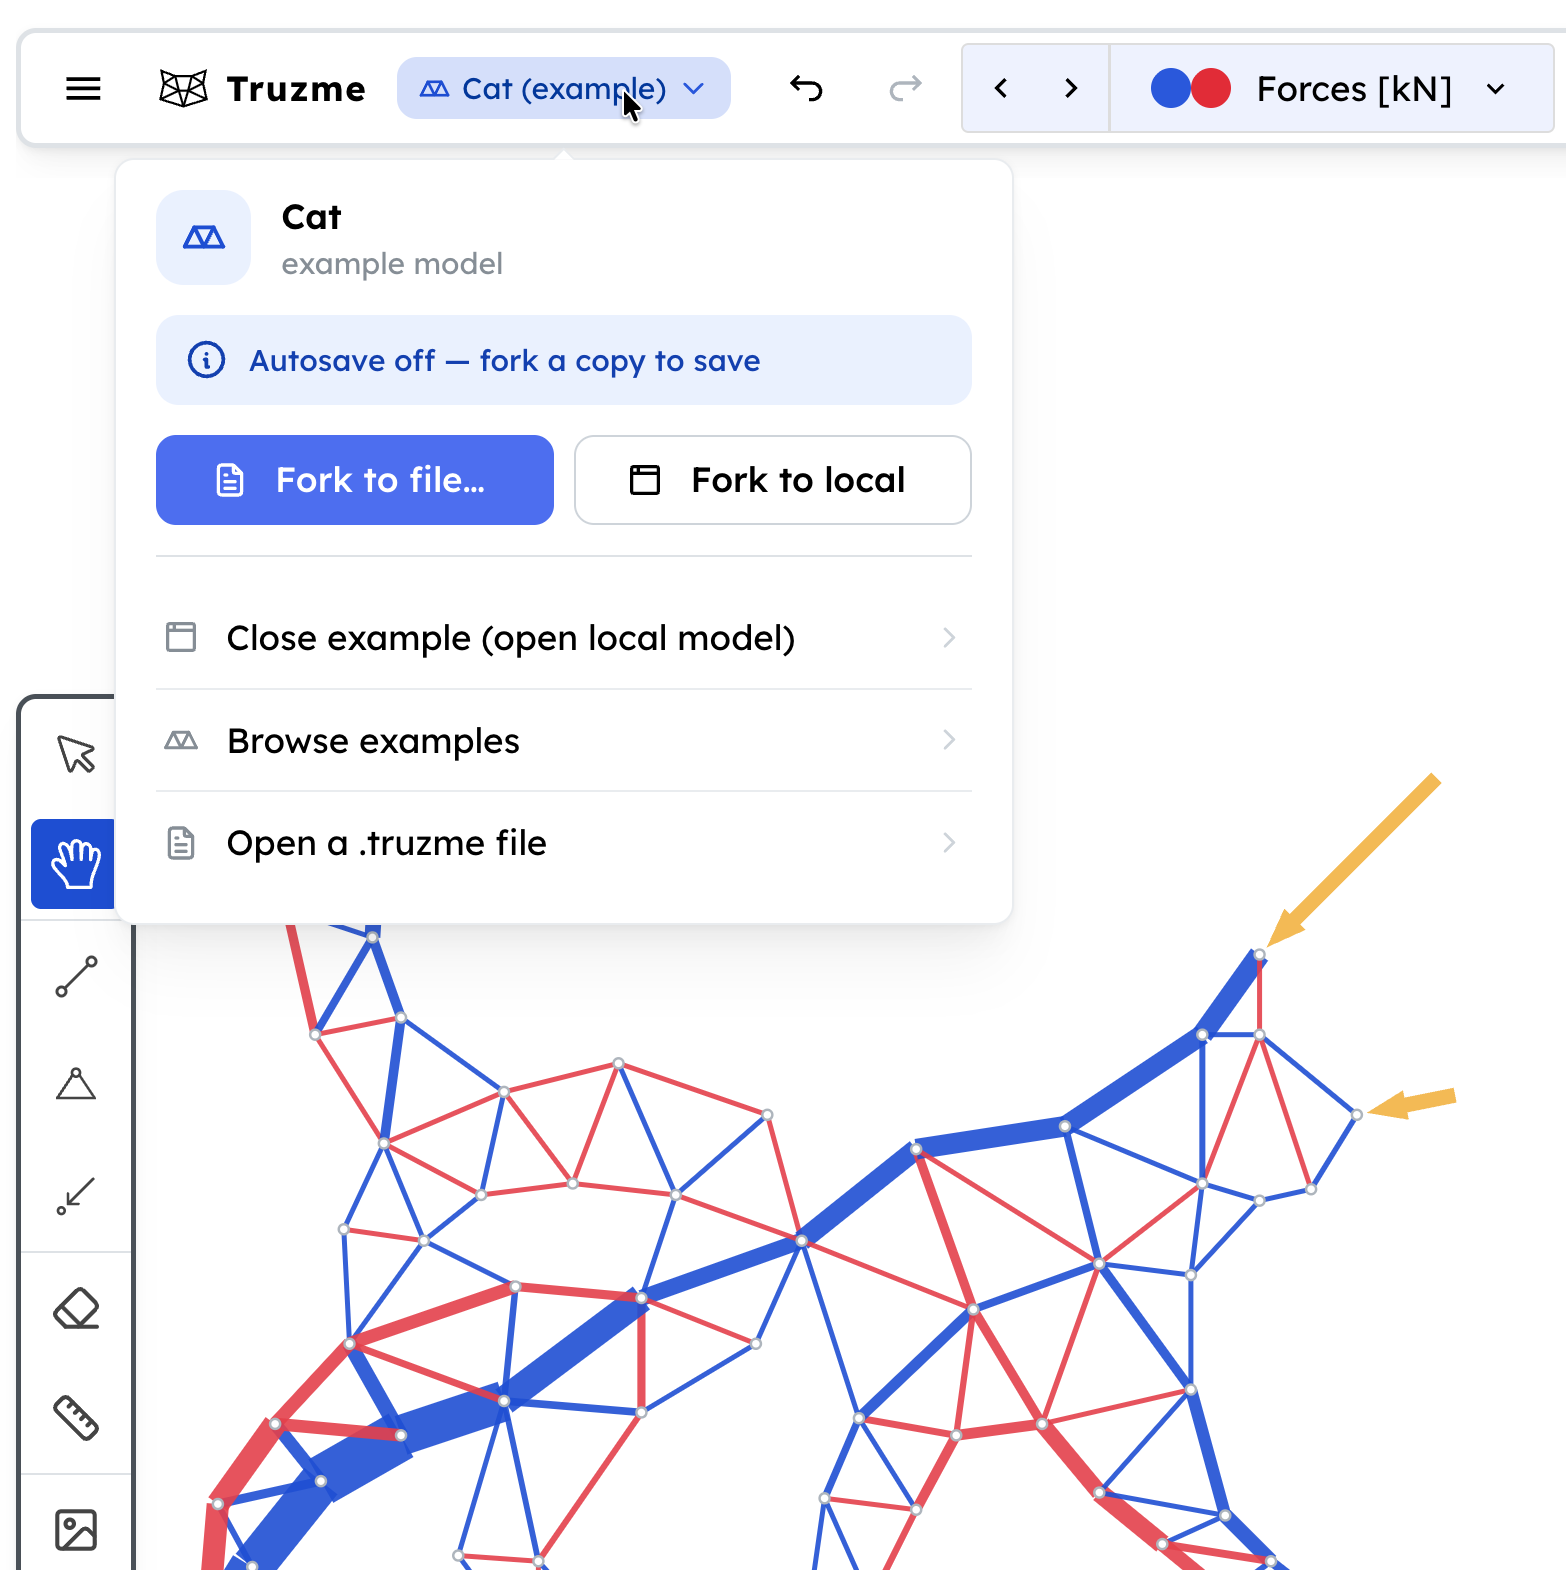
- Browse examples — click the truss icon on the right to open the Examples panel. Pick one and it loads straight into the canvas, no prompts.
- Keep it, or not — an example doesn't save automatically. The indicator next to the logo shows you're viewing one, with the option to fork it to a file or to local storage, or just close it to go back to your own model, untouched.
See the Examples guide for more.
Better file saving
2026-09-09 · 2.16
Saving to a .truzme file got a lot easier — save manually whenever you like, or turn on autosave and let Truzme handle it.
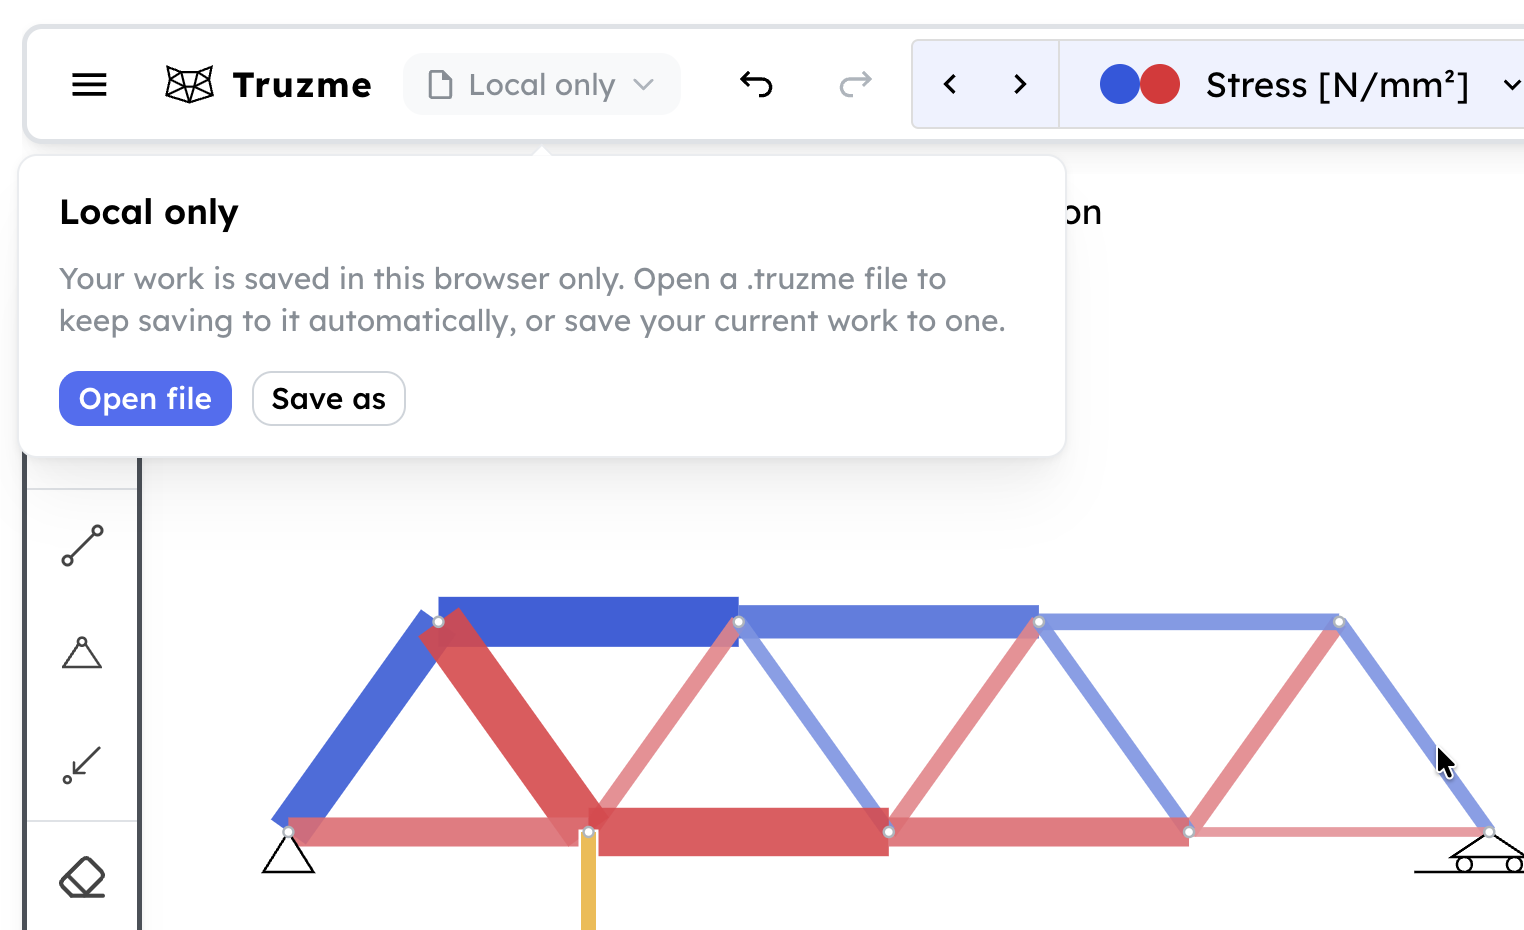
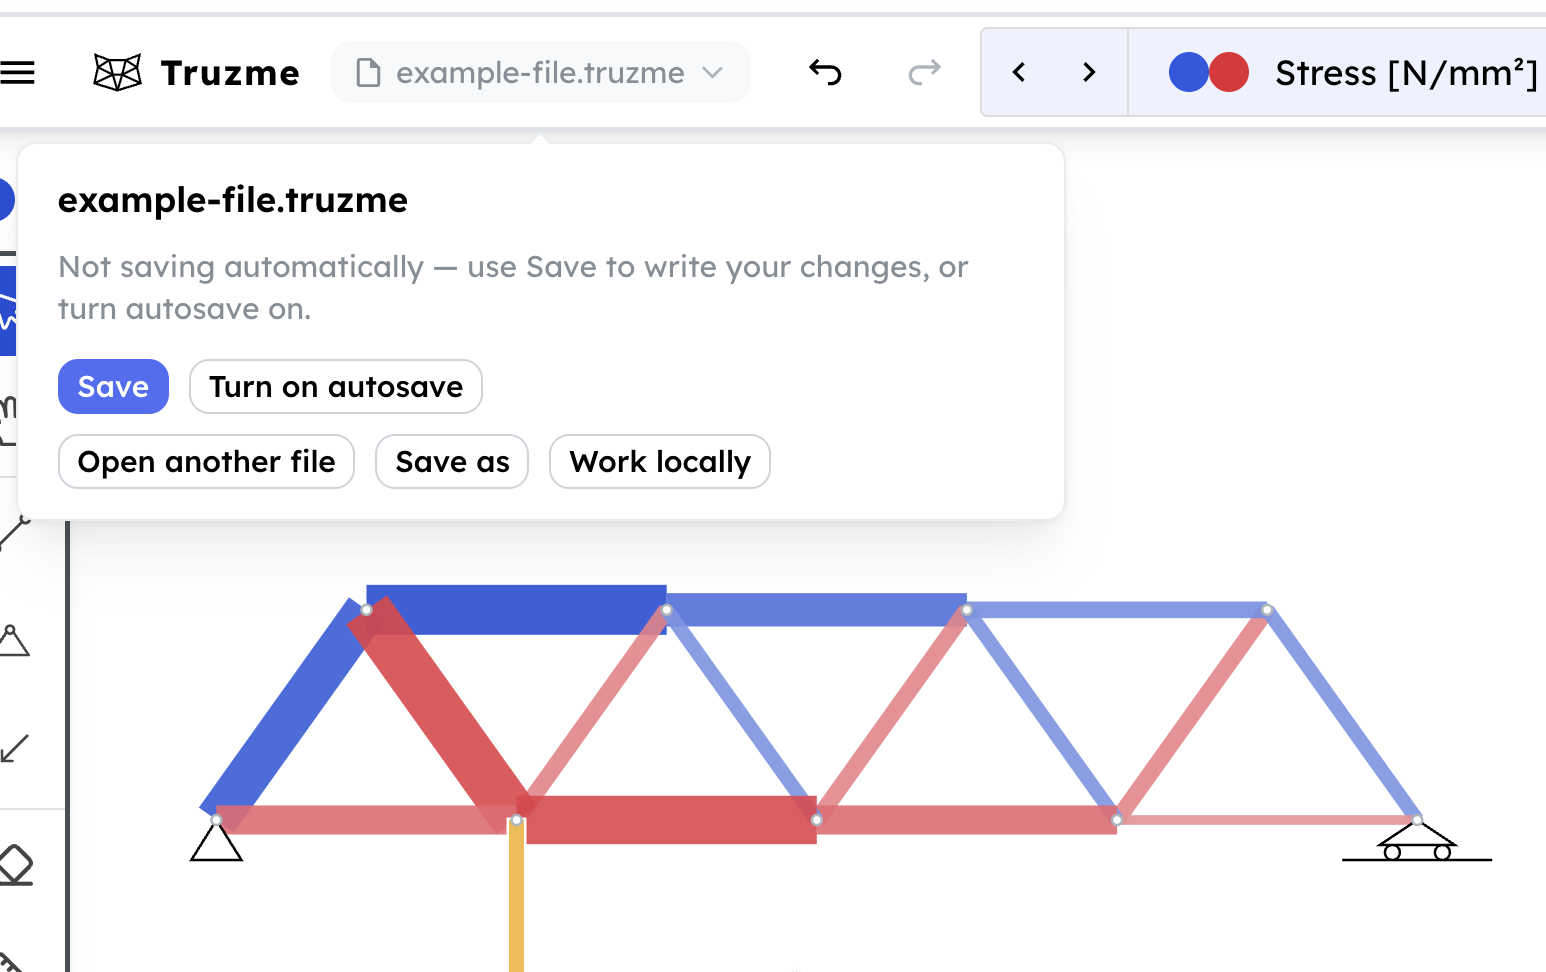
- File status — next to the logo, hover to see whether you're working locally or connected to a file, save, turn on autosave, reconnect, open another file, or save a copy.
- Autosave to file — turn it on and every change writes straight back to the file automatically.
- Reconnect after refresh — Truzme remembers the connected file across page reloads.
Chromium browsers only — Chrome, Edge, or Opera (Chrome recommended). Firefox and Safari don't support this yet and fall back to saving locally in the browser.
See the Files guide for more on how Truzme saves your work.
Guides & Interactive tours
2026-09-05 · 2.15
Two new ways to get oriented, both reachable from the Help dialog (the ? icon).
- Guides — written docs
- Interactive tour — a short, guided walkthrough
Statistics panel
2026-09-03 · 2.14
Open the Info icon (top-right corner) to see your model's totals — member, node, support and load counts, plus total length and volume, with a breakdown per cross-section under Details.
Display cross-section shape
2026-09-02 · 2.13
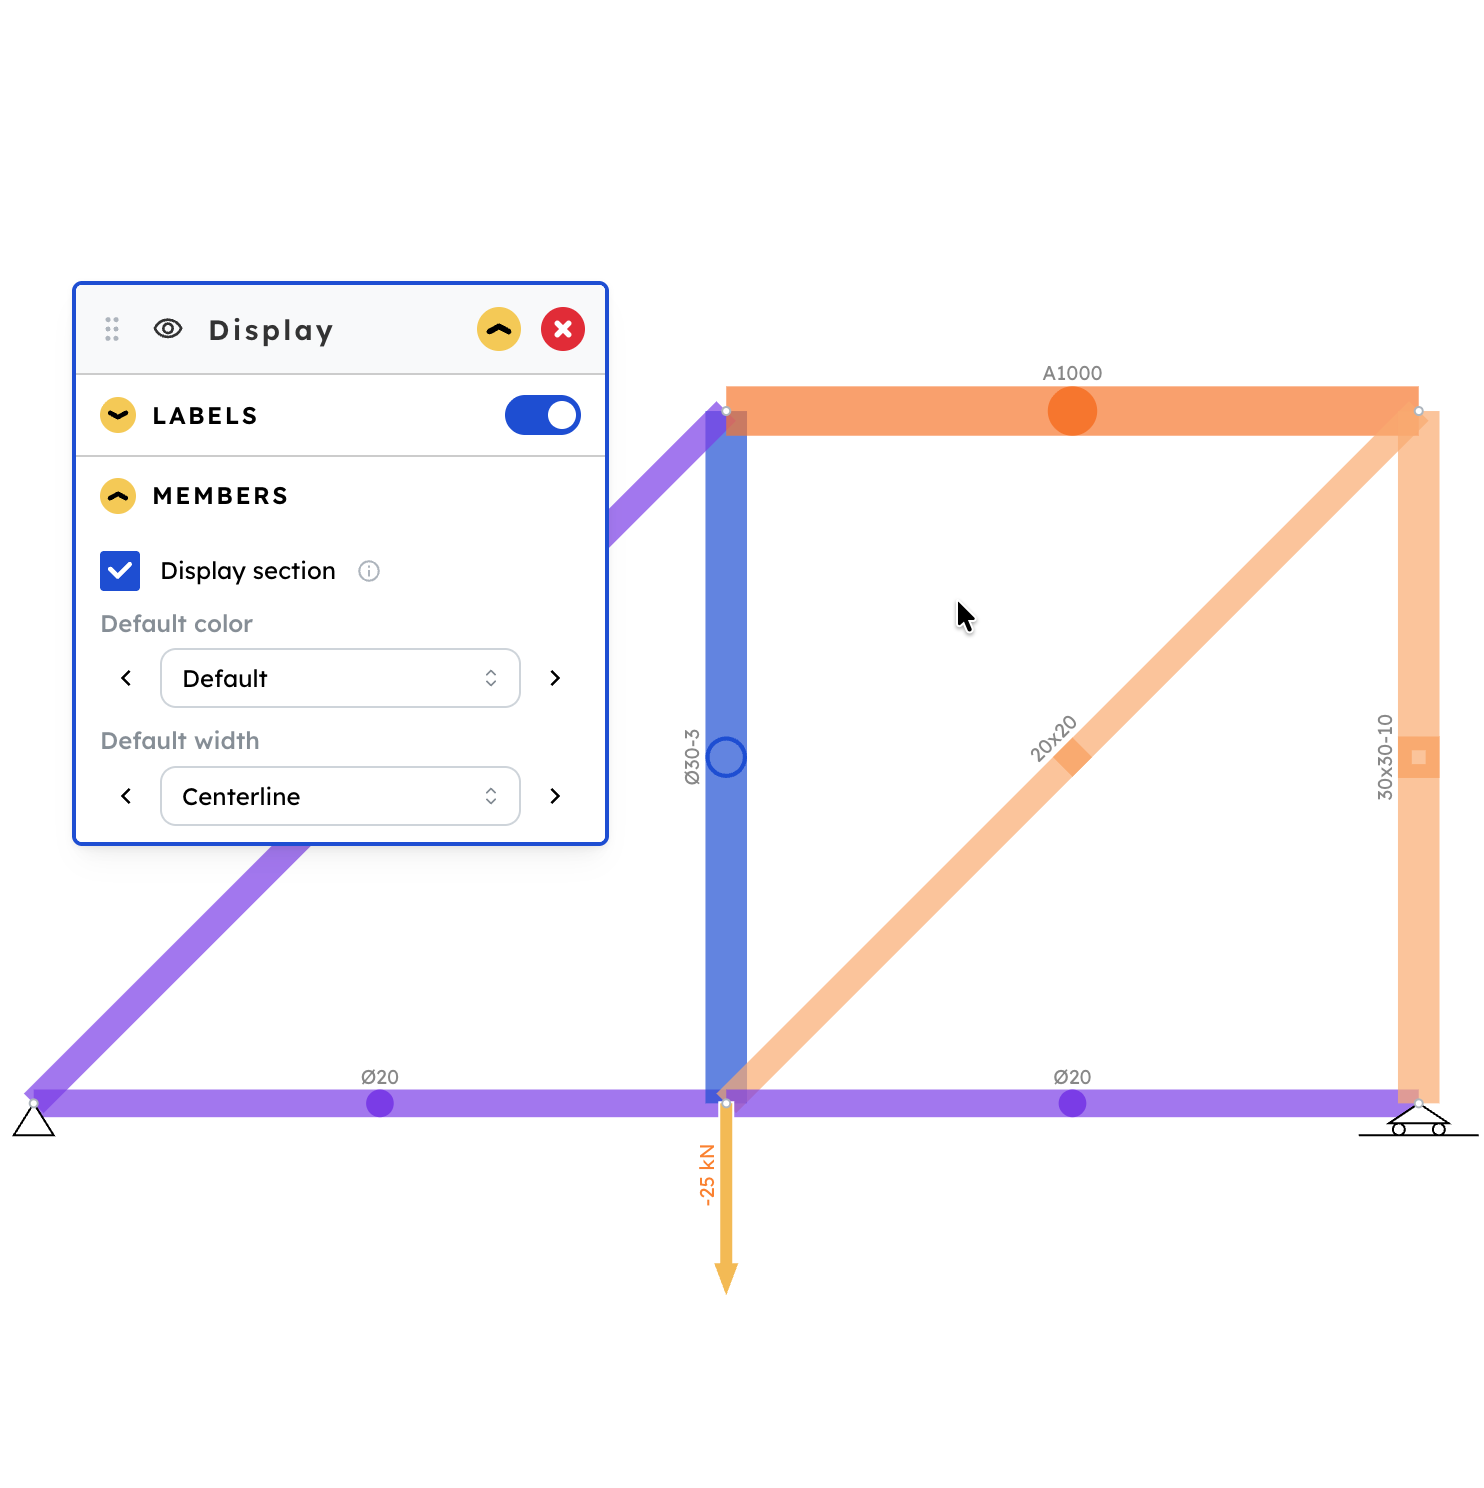
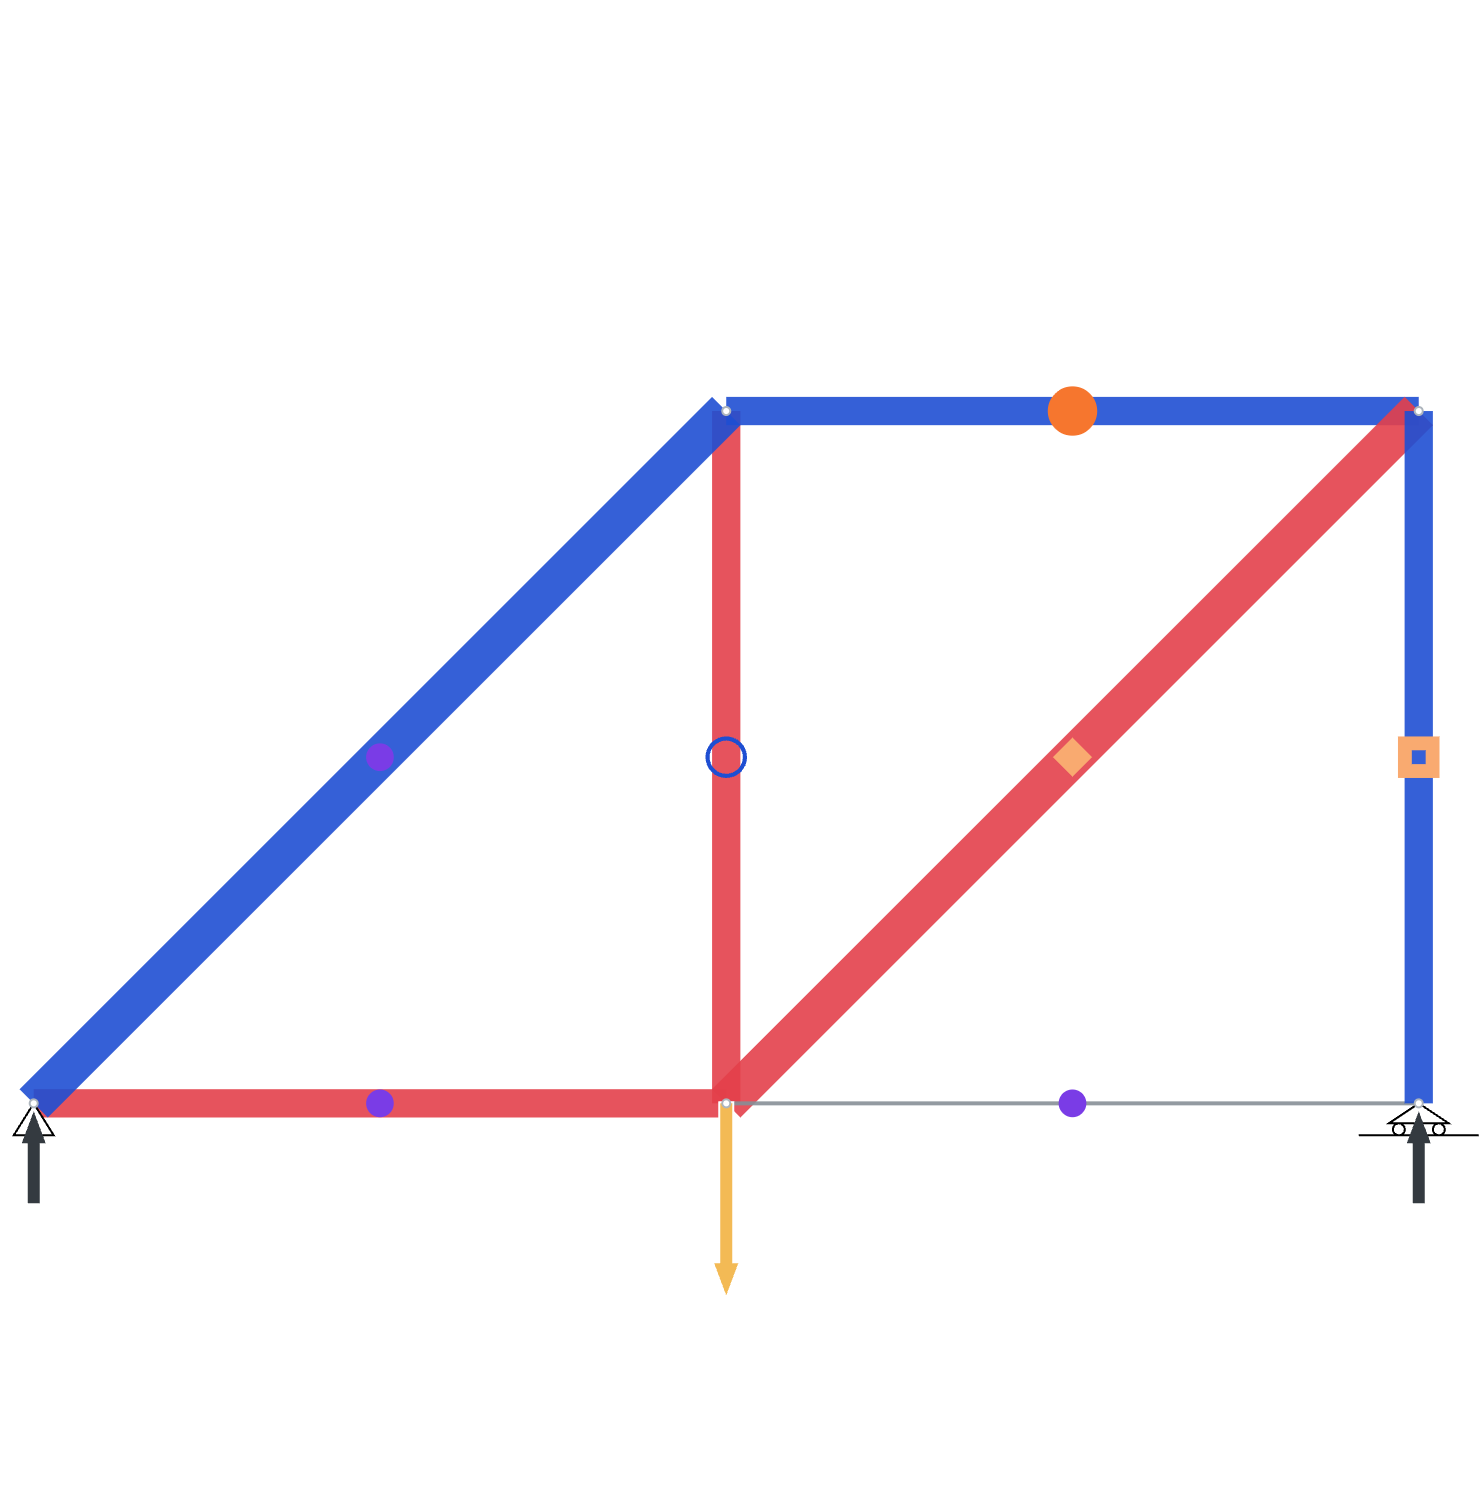
Turn on Display section (Eye icon → Display → Members) to see each member's real cross-section — round, tube or rectangle — drawn right on the truss, true to size, in every view. See the Materials & sections guide for how each shape's size is defined.
Buckling check + a friendlier Utilisation panel
2026-08-25 · 2.12
A member can now fail two ways — overloaded, or buckled — and you choose which to check for.
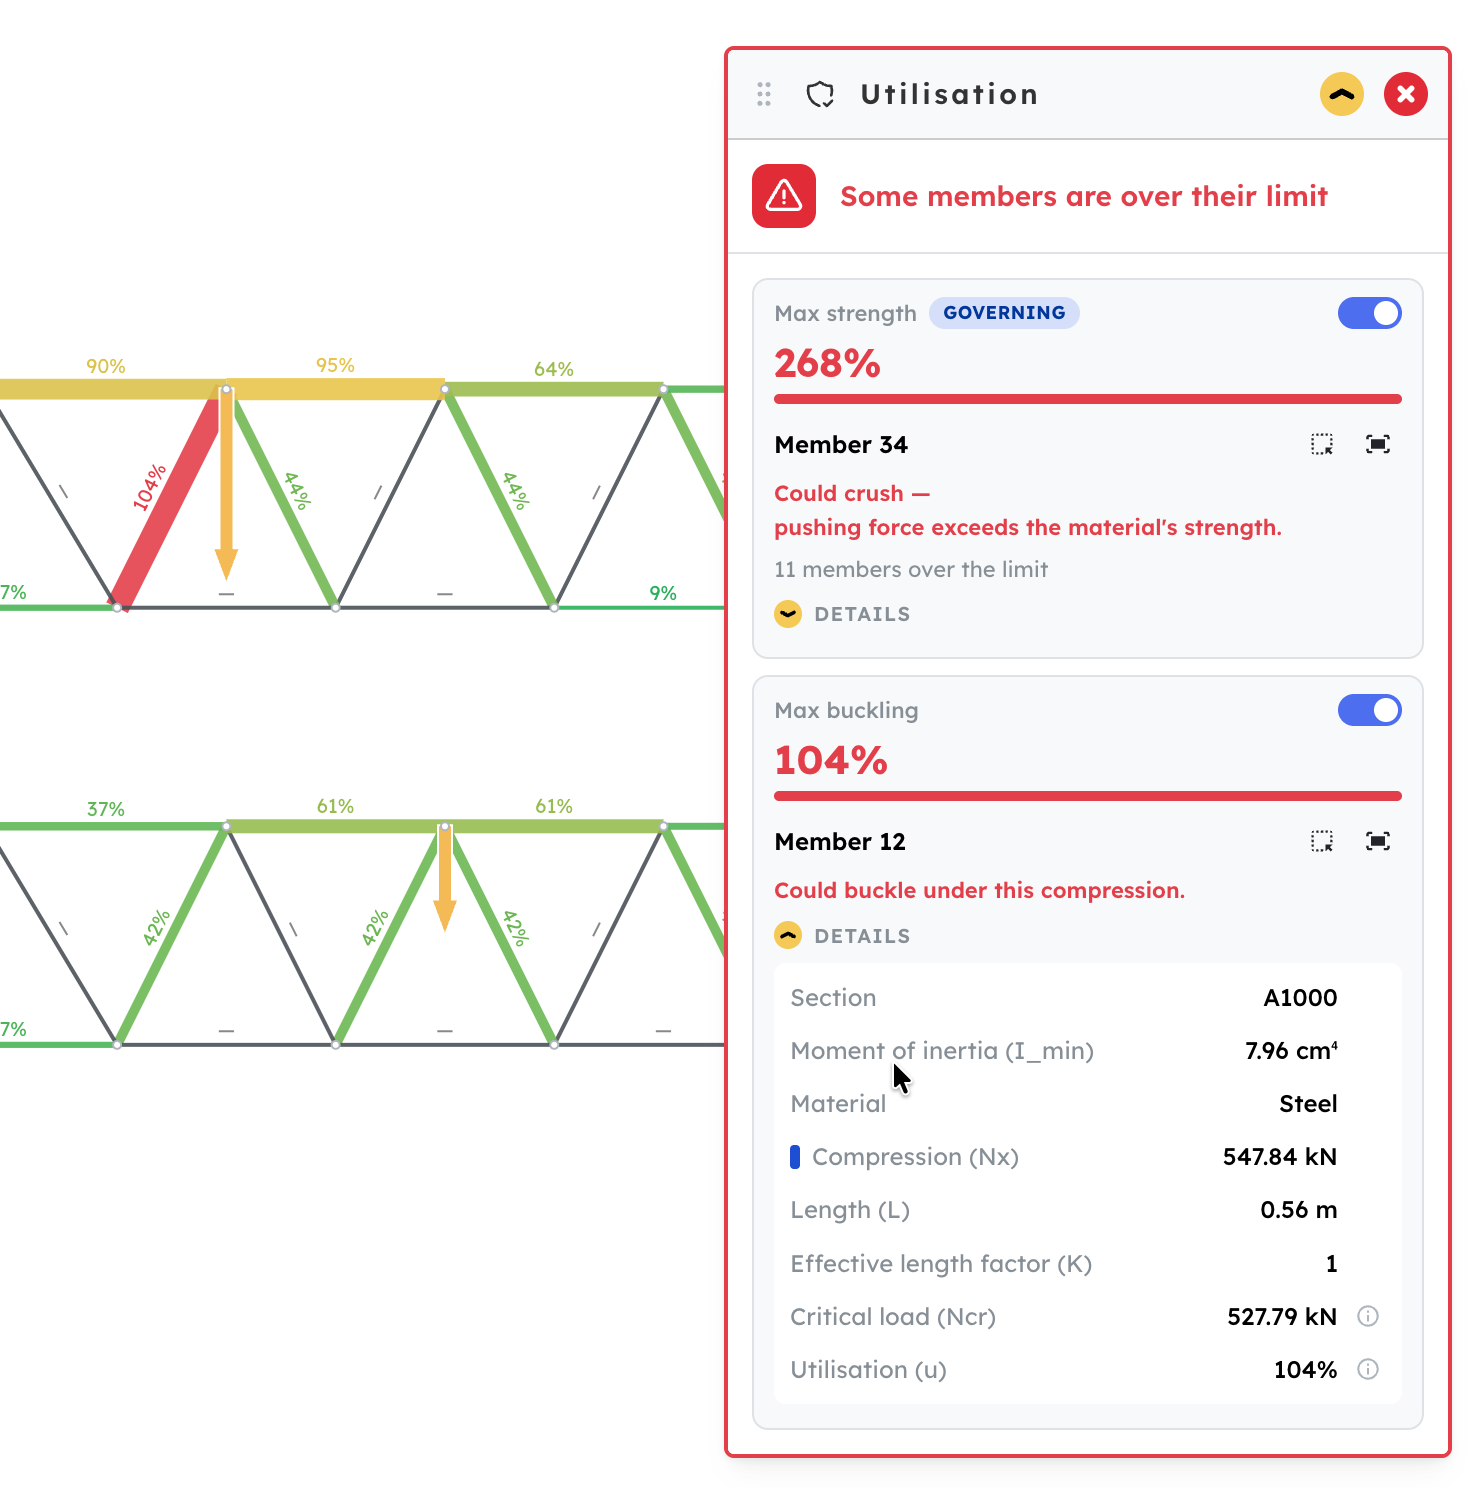
Buckling check (new)
A slender member in compression can buckle and give way before it ever runs out of strength — a different failure mode, checked with the classic Euler formula:
Ncr = π² · E · I_min / (K · L)²
Uses the member's length (L), material stiffness (E), cross-section stiffness (I_min), and the buckling length factor (K, fixed at 1 for now). New Buckling diagram and panel chip, right alongside Strength. See the Buckling guide for the full formula walkthrough.
Utilisation panel, reworked
- Opt-in checks — Strength and Buckling each have their own switch, both off by default. Nothing turns red until you turn a check on.
- ⓘ shows the formula — tap it next to any calculated value (Stress, Critical load, Utilisation) to see the formula, your numbers, and the result.
- Reasons, not just red — an over-limit member now says why: it could tear, get crushed, or buckle.
- Governing badge — with both checks on, shows which one's closer to failing.
See the Strength & utilisation guide for how to read the panel.
Stress & Strength diagrams + utilisation panel
2026-08-14 · 2.11
Two new diagrams show how hard each member is working — plus a panel that watches strength for you.
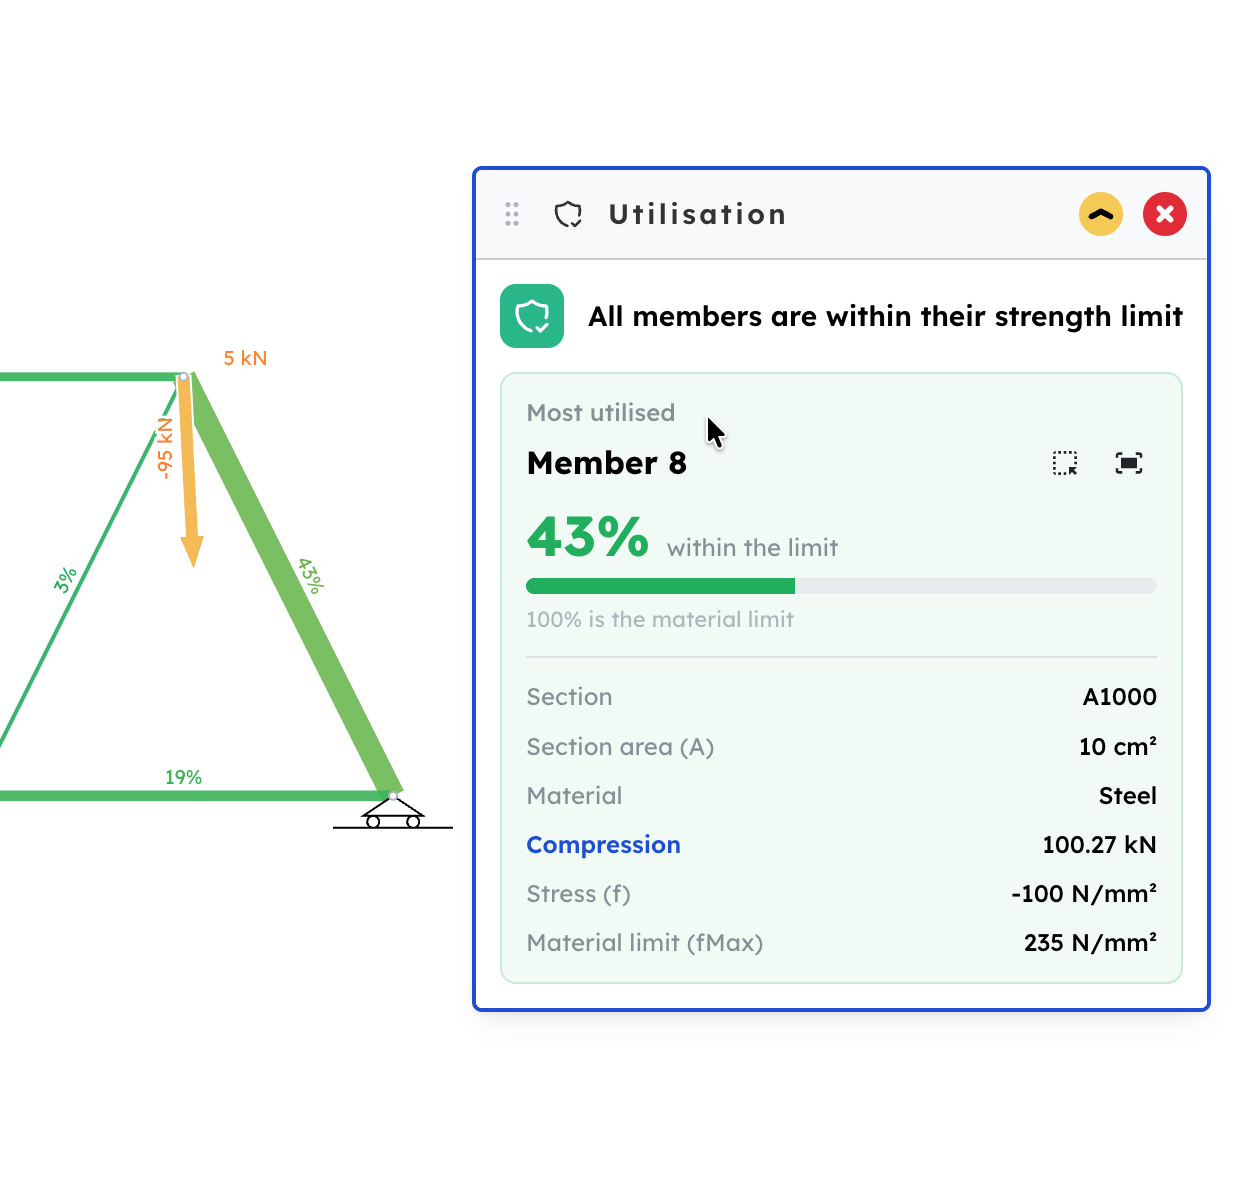
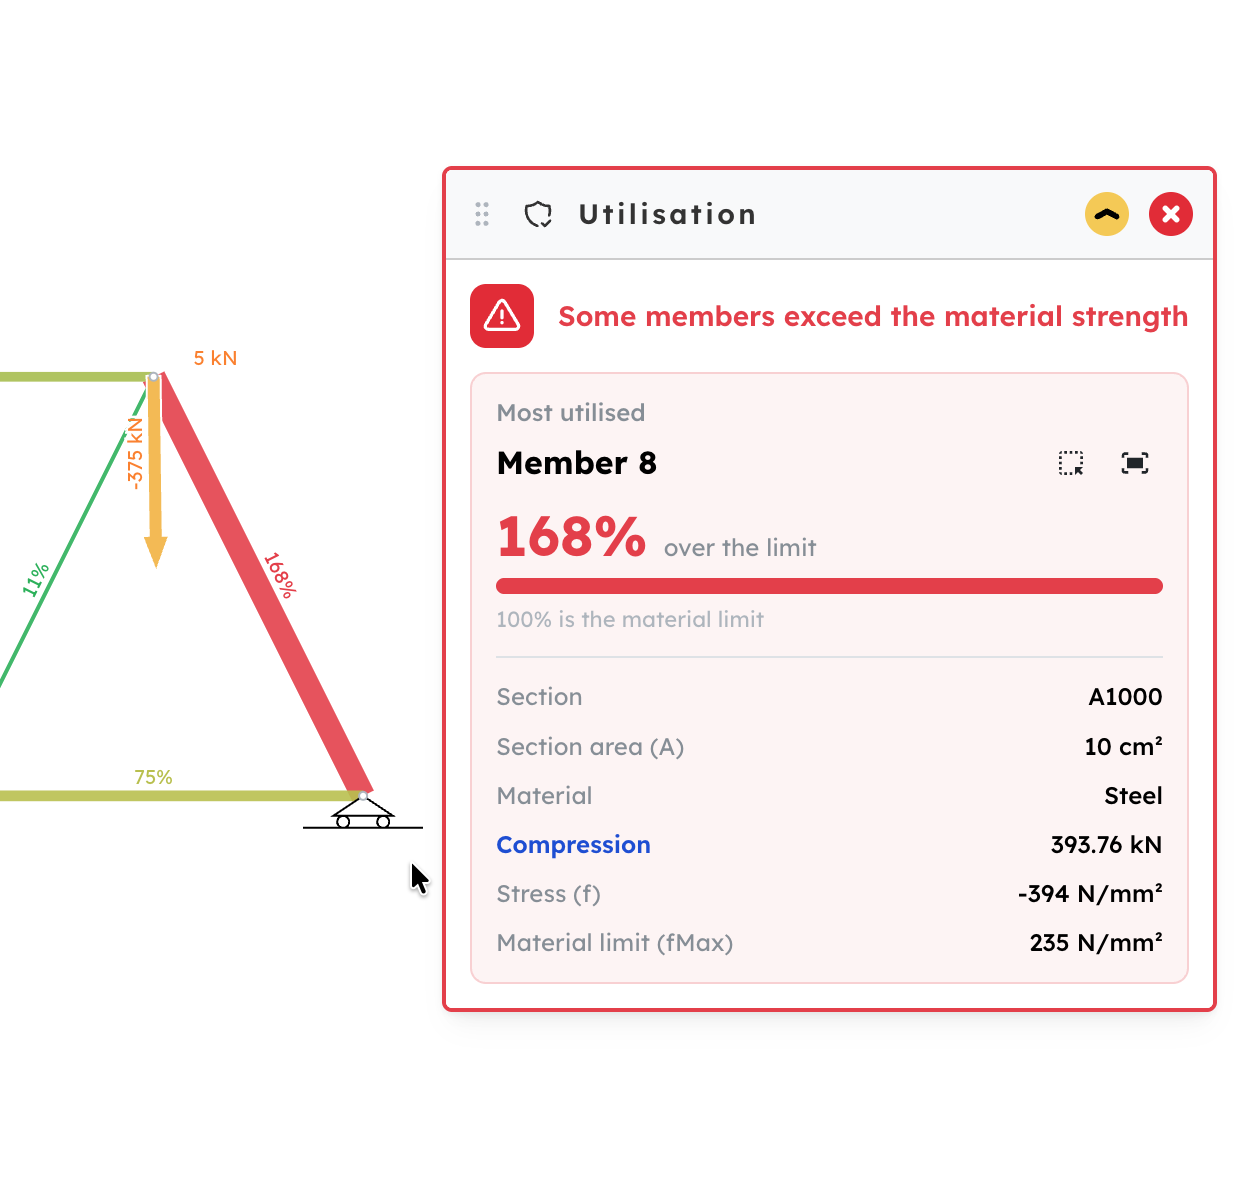
- Stress diagram — internal force ÷ cross‑section area, drawn as a red/blue heat‑map so tension and compression stand out.
- Strength diagram — stress ÷ material strength (fMax). Members run green when they have room and red once they go over the limit.
- Utilisation panel — a new toolbar panel flags any member over the limit and points you to the most‑utilised one: a gauge against the 100% limit and its key numbers (section, force, stress, fMax), with Select / Zoom to find it on the canvas.
See the Strength & utilisation guide for the formulas behind these.
Smarter snapping
2026-06-12 · 2.10
Snapping got a lot smarter, so building accurate trusses is easier.
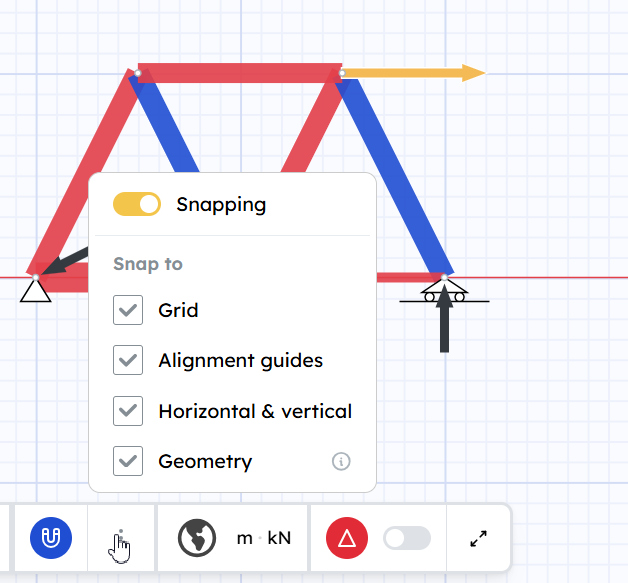
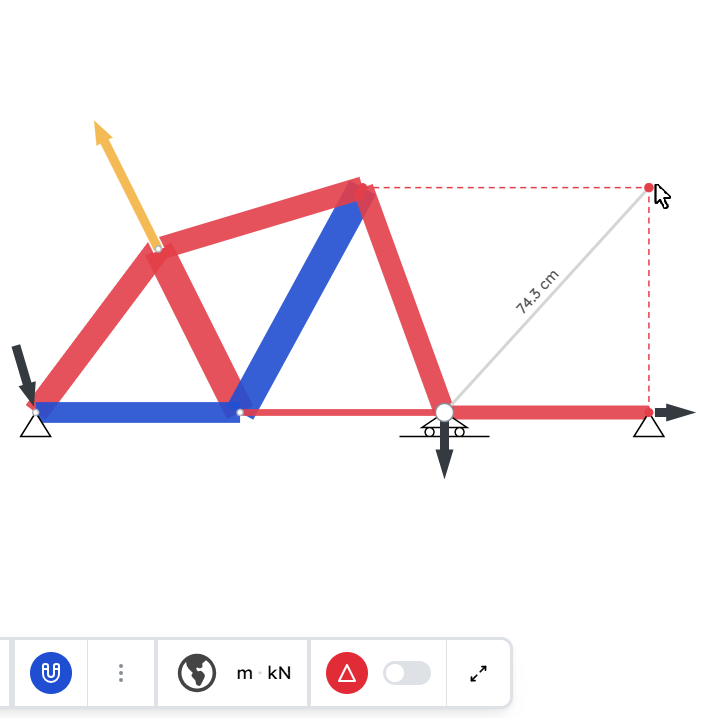
- Alignment guides — drag a joint and dashed lines show when it lines up with other joints, horizontally or vertically, so neat layouts come for free.
- Choose what to snap to — a snap menu in the bottom toolbar turns each kind on or off (grid, alignment guides, horizontal & vertical, geometry), or switches snapping off entirely.
- Horizontal & vertical — drag close to straight up/down or left/right and the line locks to it.
- Better point-in-line snapping — draw a vertical or horizontal line toward a diagonal member and it lands exactly on the crossing point.
Background images
2026-06-05 · 2.9
Drop reference images behind your model and trace over them — perfect for a truss problem from your textbook. Or just use them as illustrations to make your model clearer.
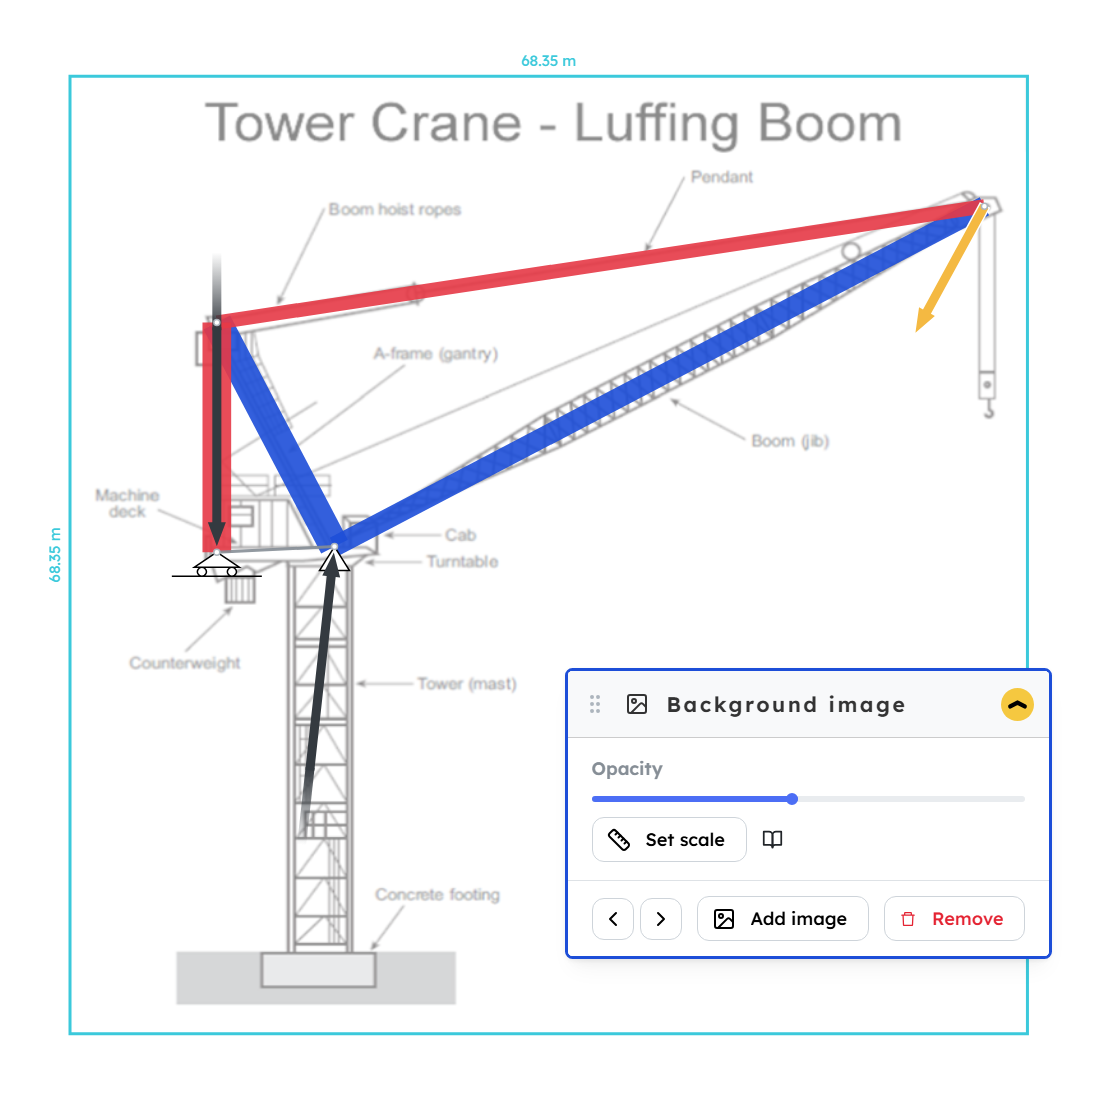
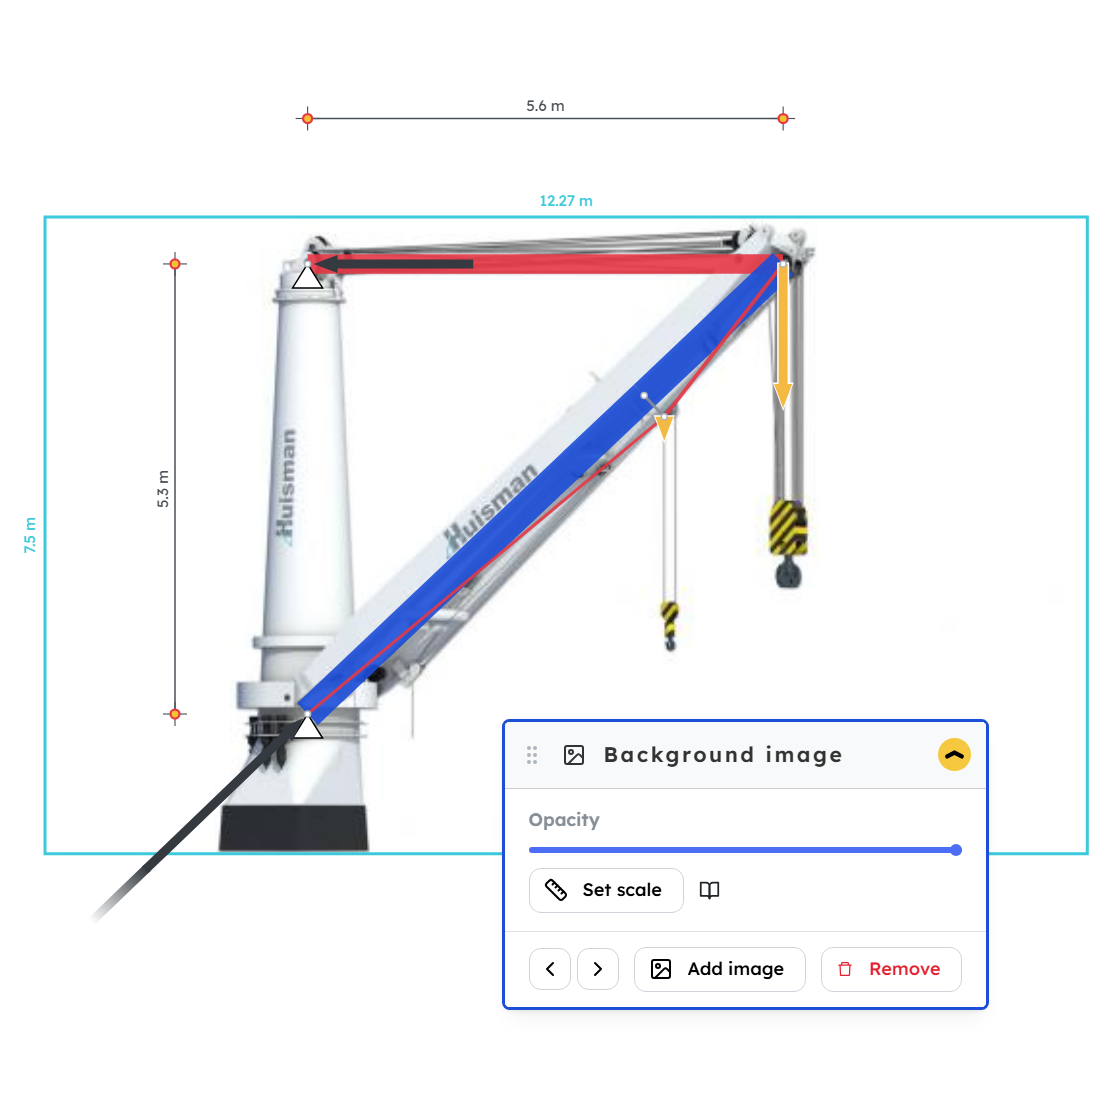
Pick the Background image tool and Add image (PNG or JPEG). Drag it into place, then build your truss on top. Add as many images as you like and step between them with the arrows.
- Set scale — pick two points whose real distance you know, type the length, and the image resizes to match.
- Opacity — fade an image so your drawing stands out.
Dimensions
2026-06-04 · 2.8
Show measurements right on your model — how long, how wide, how tall.
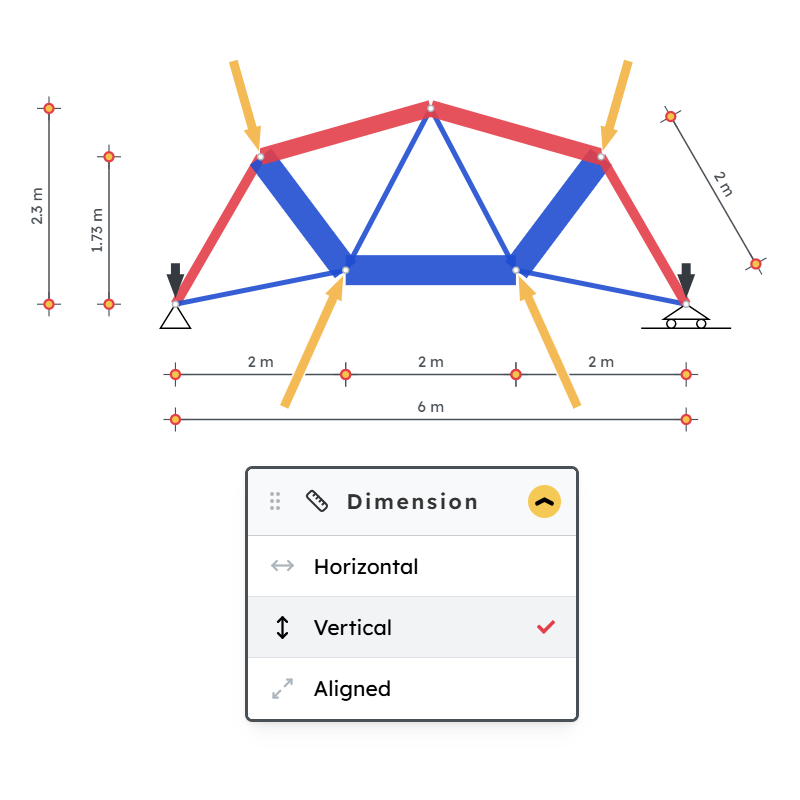
Pick the Dimension tool, click two points, then click where the line goes.
Three kinds: Horizontal, Vertical, and Aligned (any angle). Drag the line any time to move it.
Right-click menu
2026-06-03 · 2.7
Right-click anything on the canvas to get its actions right where you're working — no trip to the toolbar.
What's in the menu
- Member — change its material and section.
- Load — flip it, or switch between push and pull.
- Support — pick the support type with one click.
- Node — add a support (or remove it).
- Any element — delete it.
- Empty canvas — zoom to fit.
Good to know
- Works in any tool — you don't have to switch first.
- Select several elements of the same type, then right-click to act on all of them at once.
- If the menu covers what you need, drag it by the bar at the top.
Also improved
- Brush select to edit in bulk — drag a box to select many elements in the Support tool, Load tool, and the Member tool's edit mode, then apply an action to all of them at once.
- Loads are now draggable in the Select tool — drag a load to set its direction and Fx / Fy, right alongside nodes and other elements.
- Editing many members at once is easier — in the Member tool's edit mode, change the material or section of a whole selection in one go.
Materials & sections per member
2026-05-25 · 2.6
Every member can now have its own material and section.
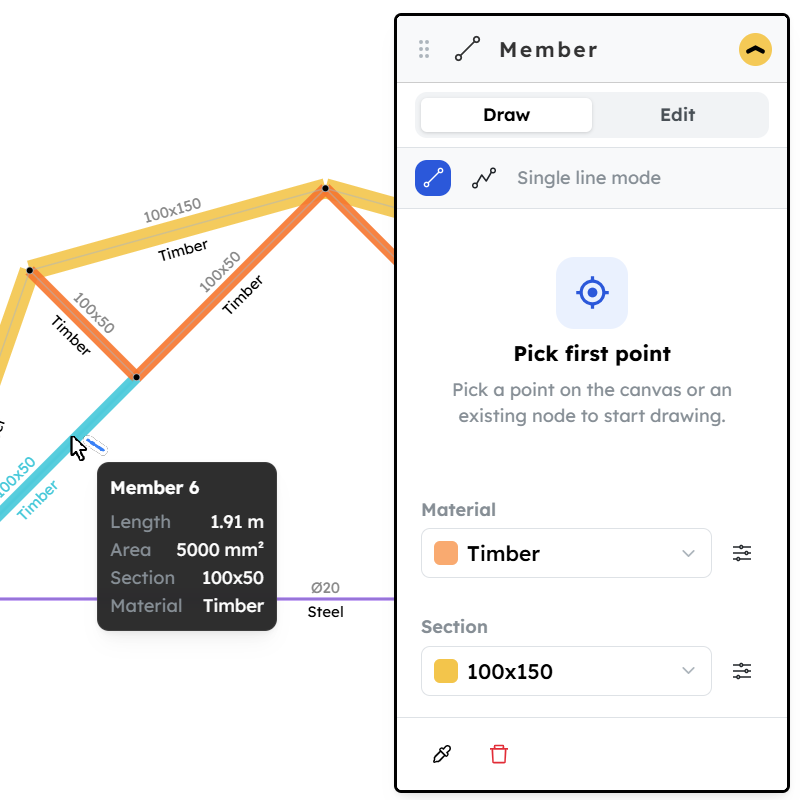
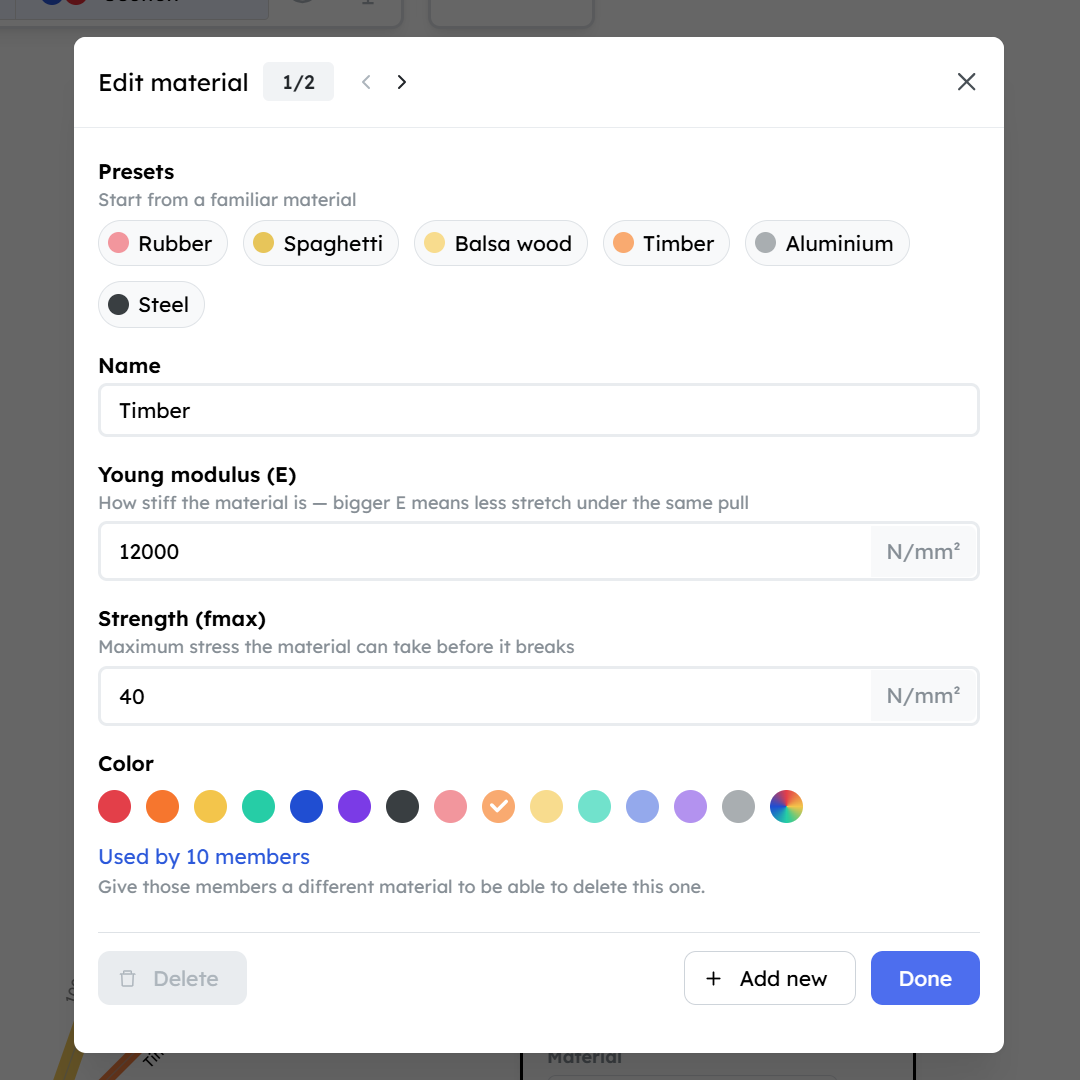
Materials
- Pick a preset (steel, aluminium, wood…) instead of typing the numbers.
- Give each material a color.
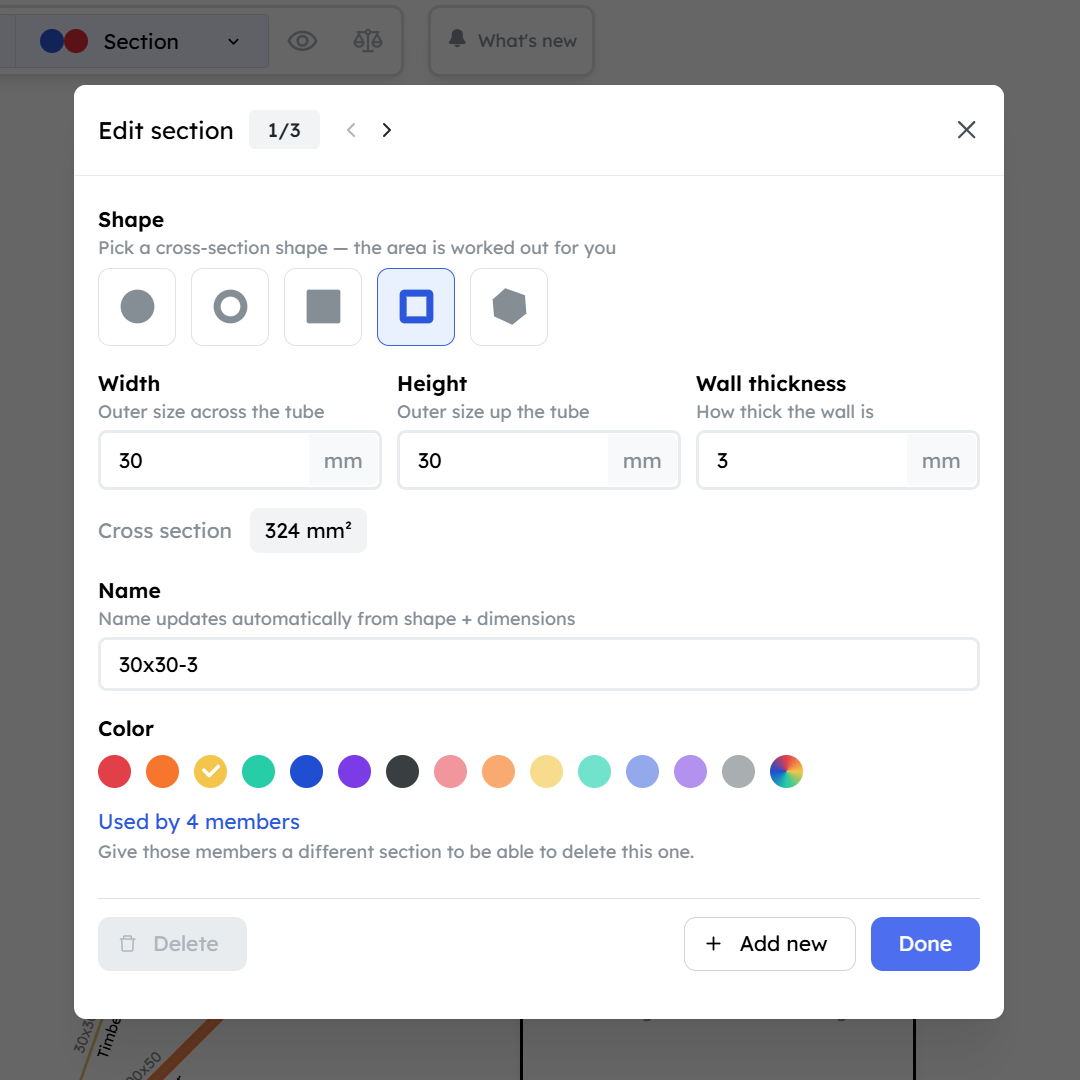
Sections
- Pick a type: solid round, pipe, solid square, hollow square, or custom.
- Enter the dimensions — the area is computed for you.
- Give each section a color.
Two new diagrams
- Material — each member colored by its material.
- Section — each member drawn at the real thickness of its section.
See the Materials & sections guide for what each property means and how the shapes are computed.
Rotate tool + push/pull loads
2026-05-19 · 2.5
Rotate selections around any point, and choose how a load is drawn.
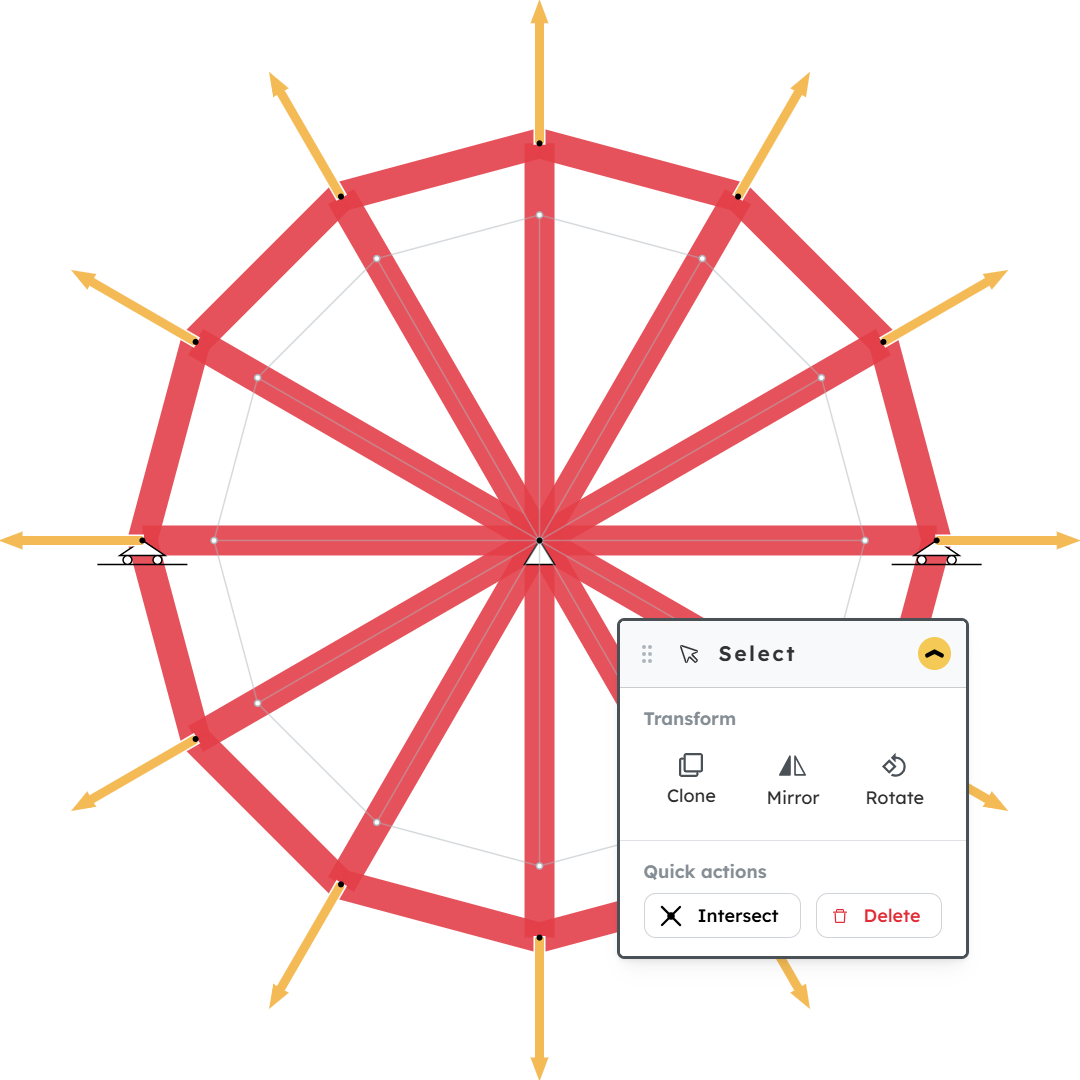
Rotate tool
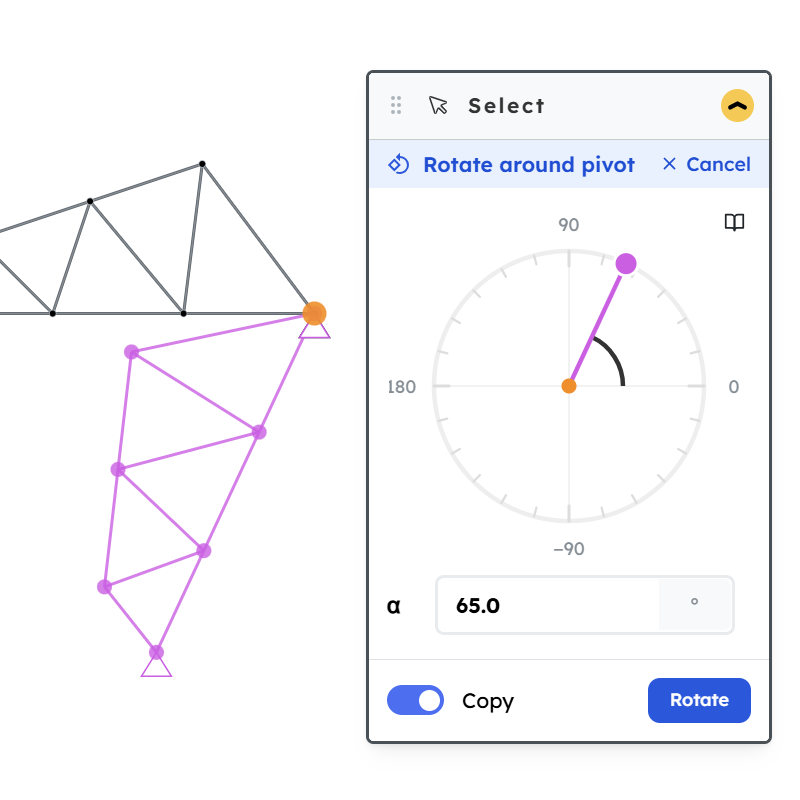
Pick a selection, hit Rotate, click on the canvas to set the pivot, then type the angle. The selection turns around the pivot point.
- Rotate moves the selected nodes and members in place
- Rotate copy leaves the original where it is and places a rotated copy
Not happy with the pivot? Just click somewhere else on the canvas to move it — you can re-pick the pivot anytime before you commit the rotation.
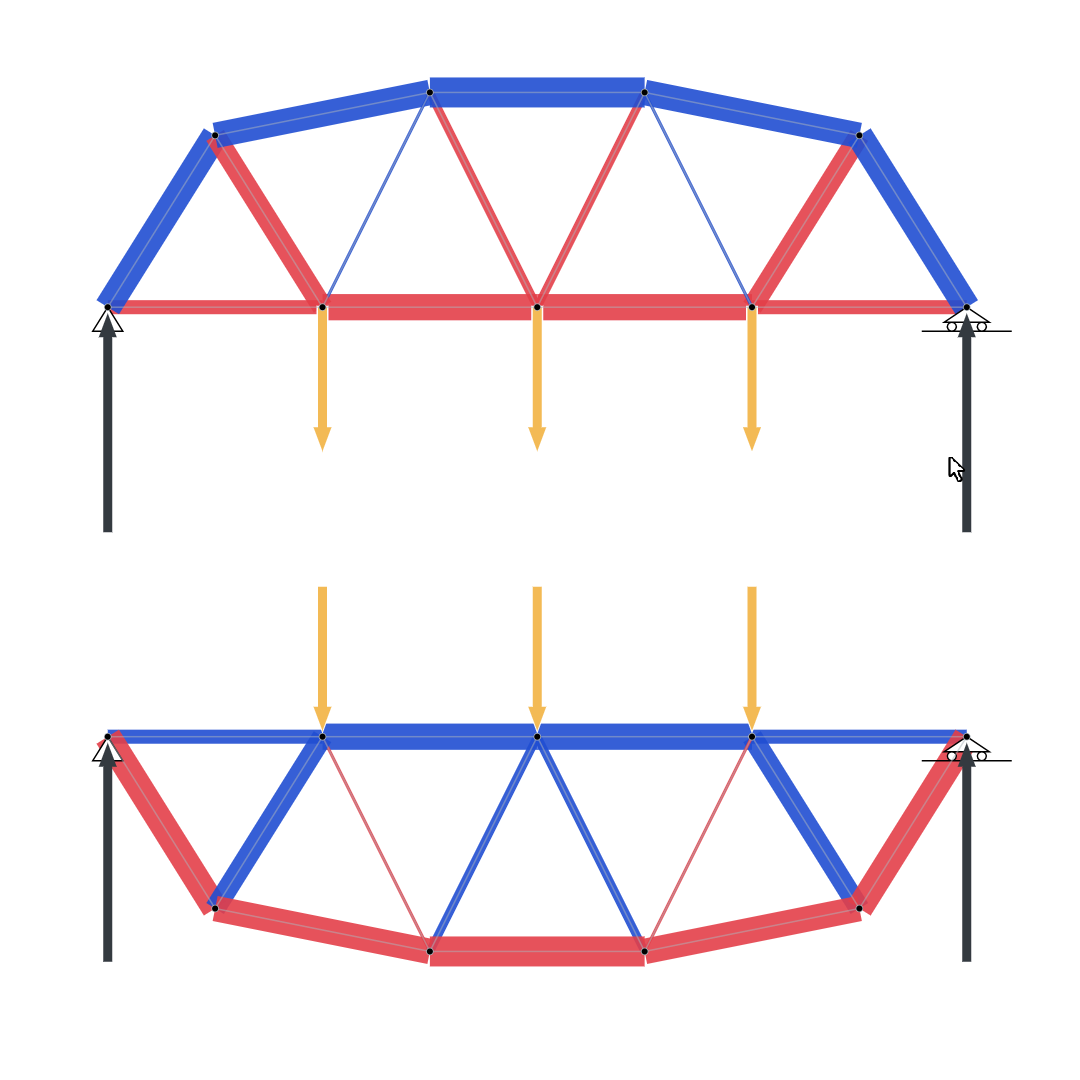
Push or pull a nodal load
When you add a load on a node, you can now choose how the arrow is drawn:
- Push — the arrow points into the node (pushing it)
- Pull — the arrow points away from the node (pulling it)
This is purely a visual choice. The force itself — its direction and magnitude — stays exactly the same. Sometimes a load just makes more sense as a pull than a push (for example a cable hanging off a node), and now you can show it that way.
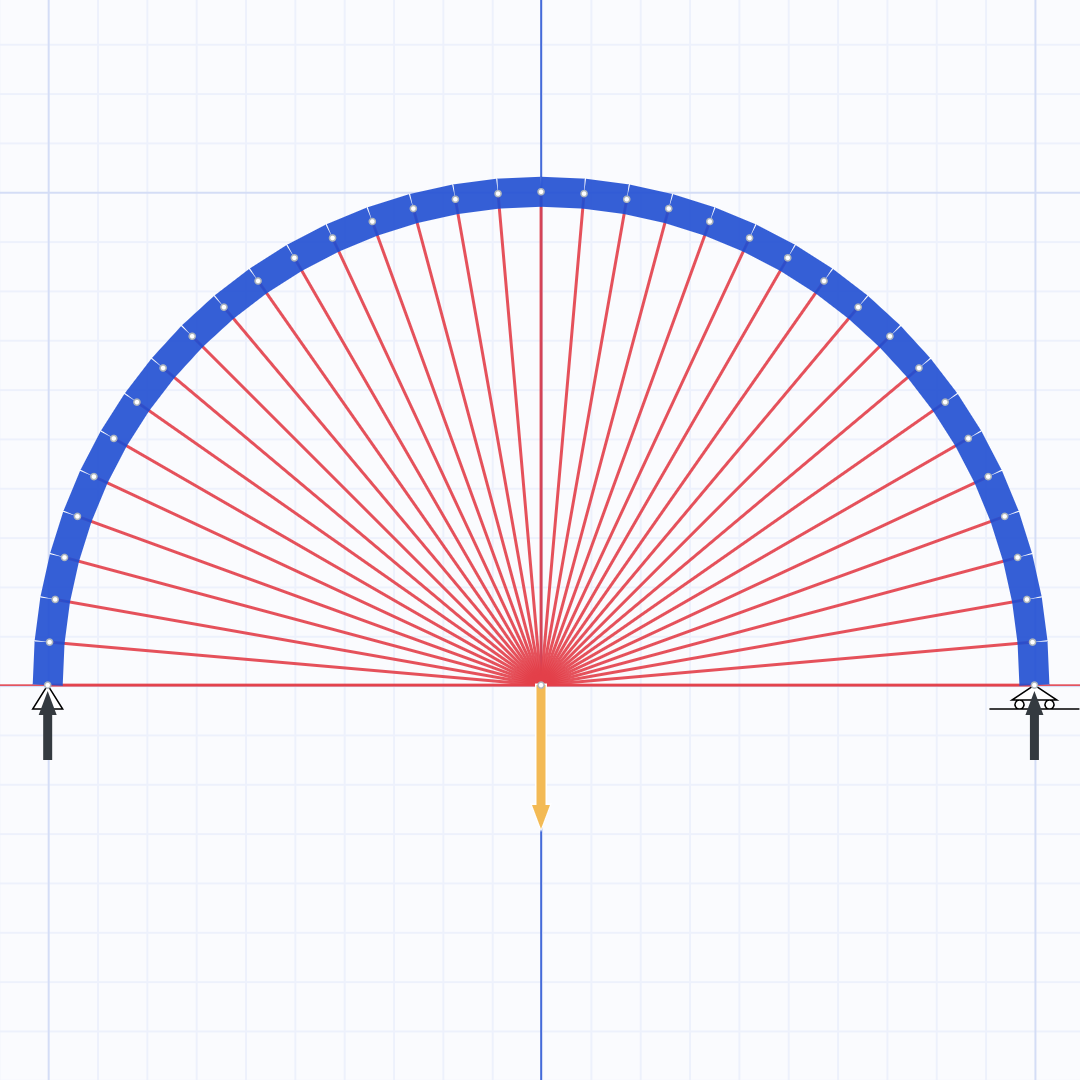
And the best part: you can finally draw a spaghetti bridge being pulled from below.
Improved stability report (Force balance) + consecutive clone
2026-05-17 · 2.4
A clearer way to see if your truss is in equilibrium.
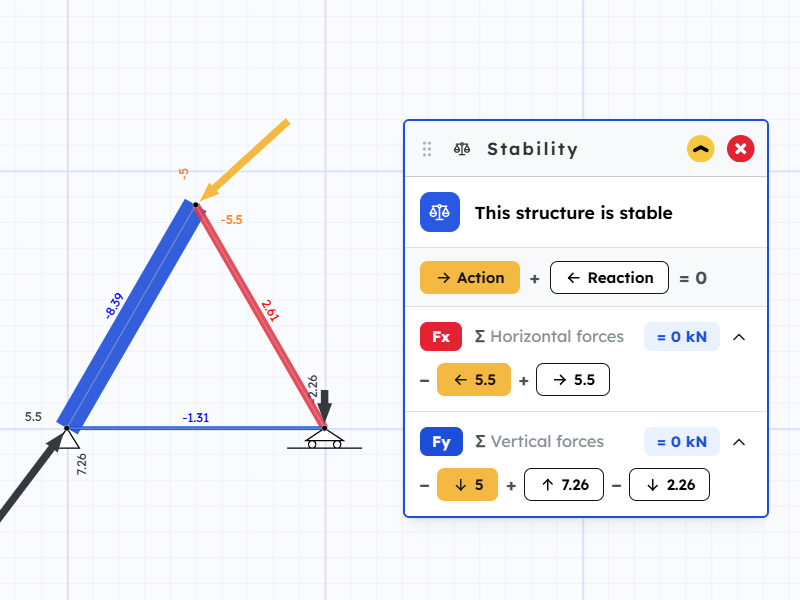
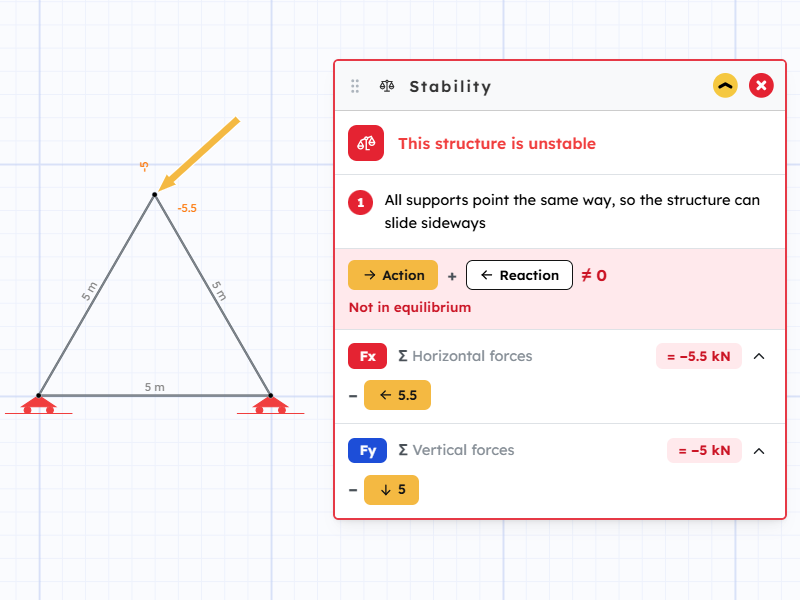
See the forces add up
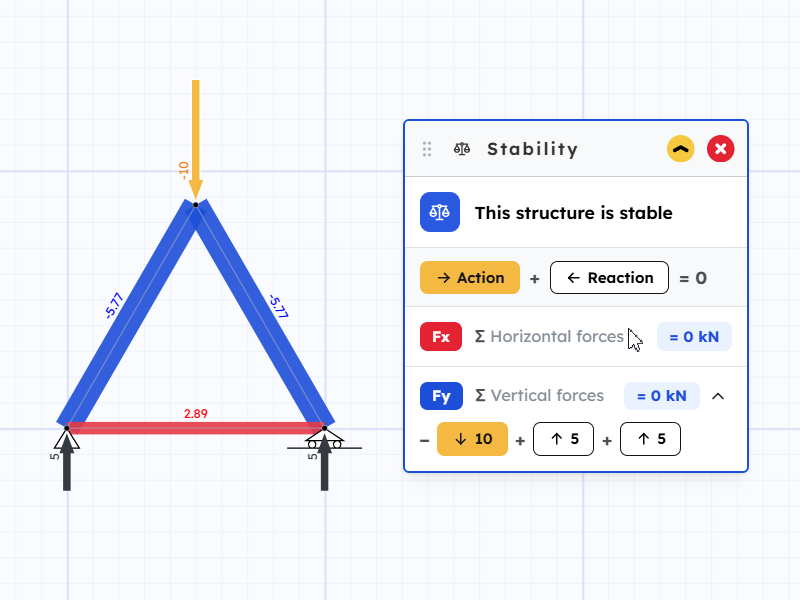
The stability panel now lays out every force as a simple equation, one for the horizontal direction and one for the vertical:
- Action chips are the loads you placed
- Reaction chips are what the supports push back with
- A sum at the end shows whether they cancel out
If the sums are zero, the truss is balanced. If not, the panel turns red so you know something's off. See the Stability check guide for what else the panel watches for.
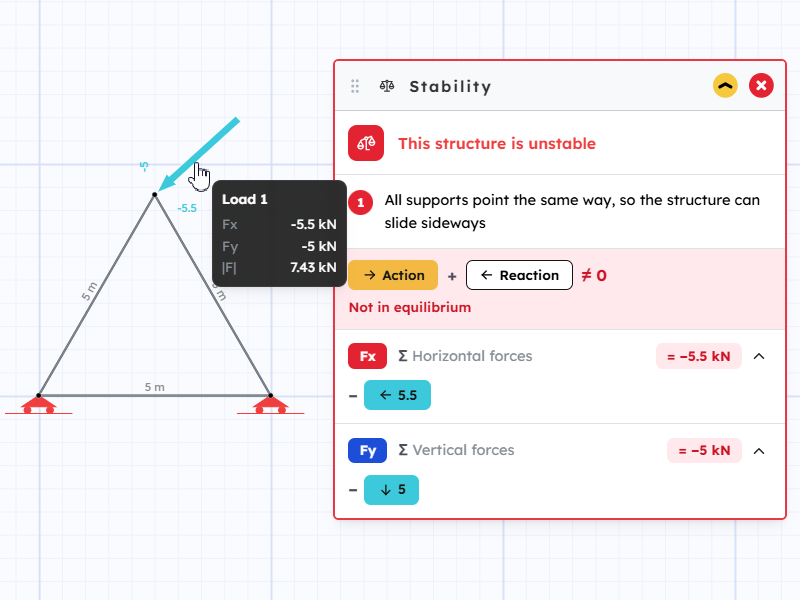
Find a force on the canvas
Hover any chip and the matching load or support lights up on the drawing. Helpful when there are a lot of forces and you want to track one down.
Pro tip: pin the panel to keep it open while you edit — the report updates instantly as you change the model.
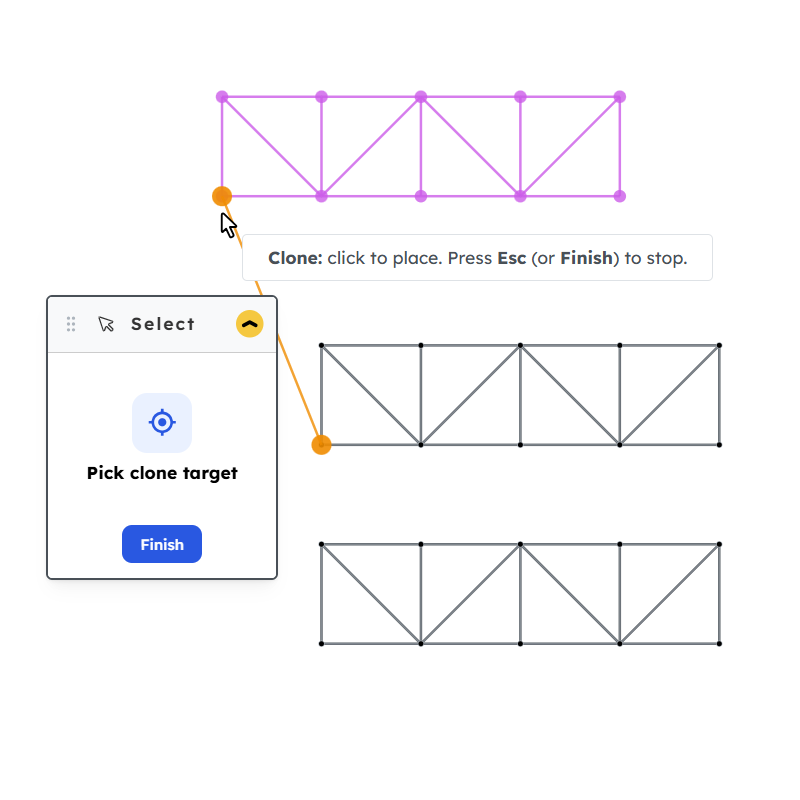
Consecutive clone
Cloning is now faster for repeating shapes. After you clone a selection, the new elements stay selected — so you can clone them again, and again, without re-picking anything. Great for stacking identical truss bays or copying a pattern across the model.
Precise polylines with coordinates
2026-05-11 · 2.3
Draw shapes by typing exact numbers instead of clicking by eye.
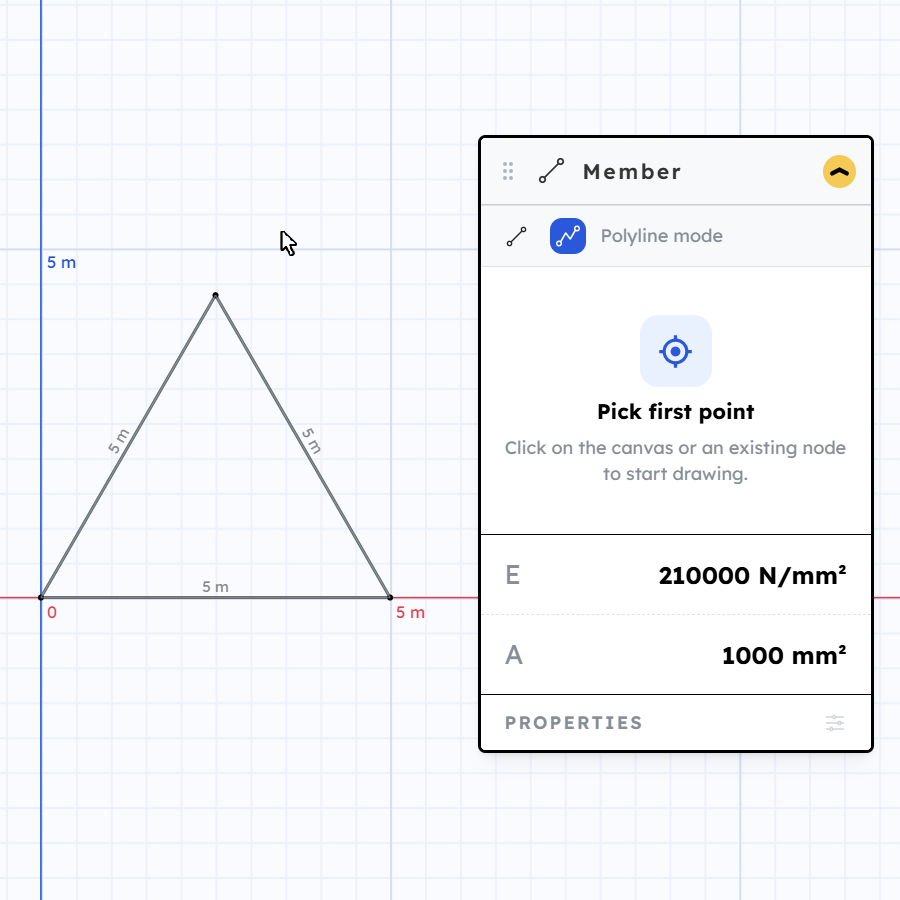
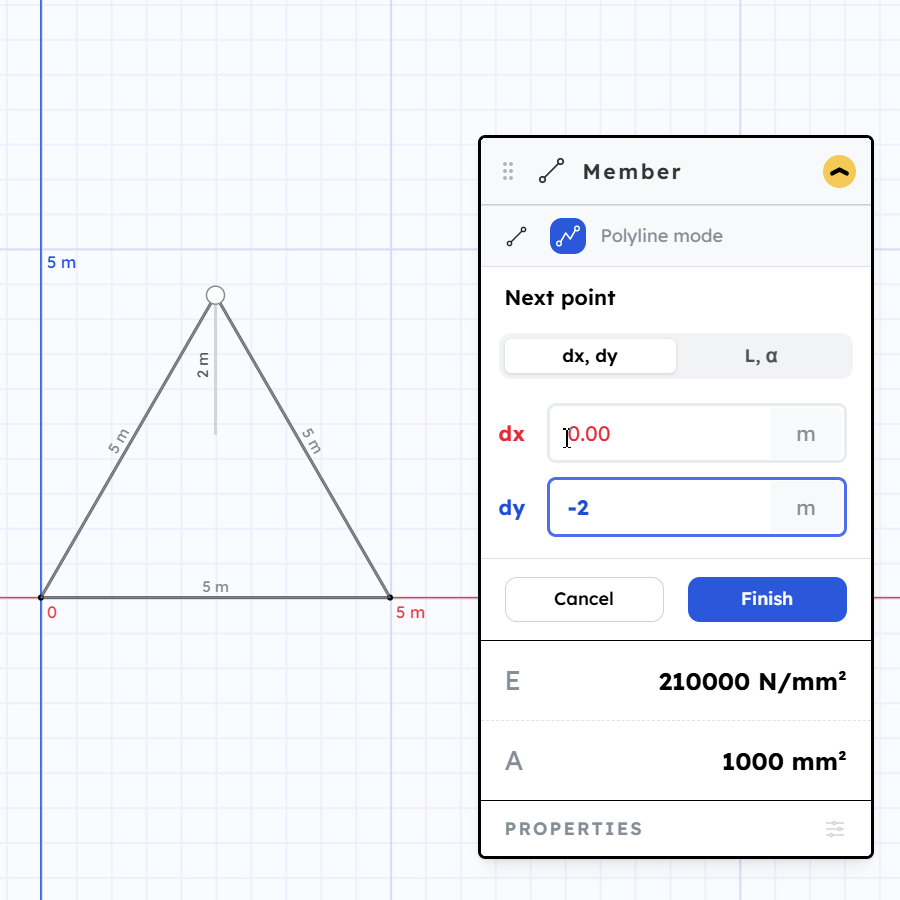
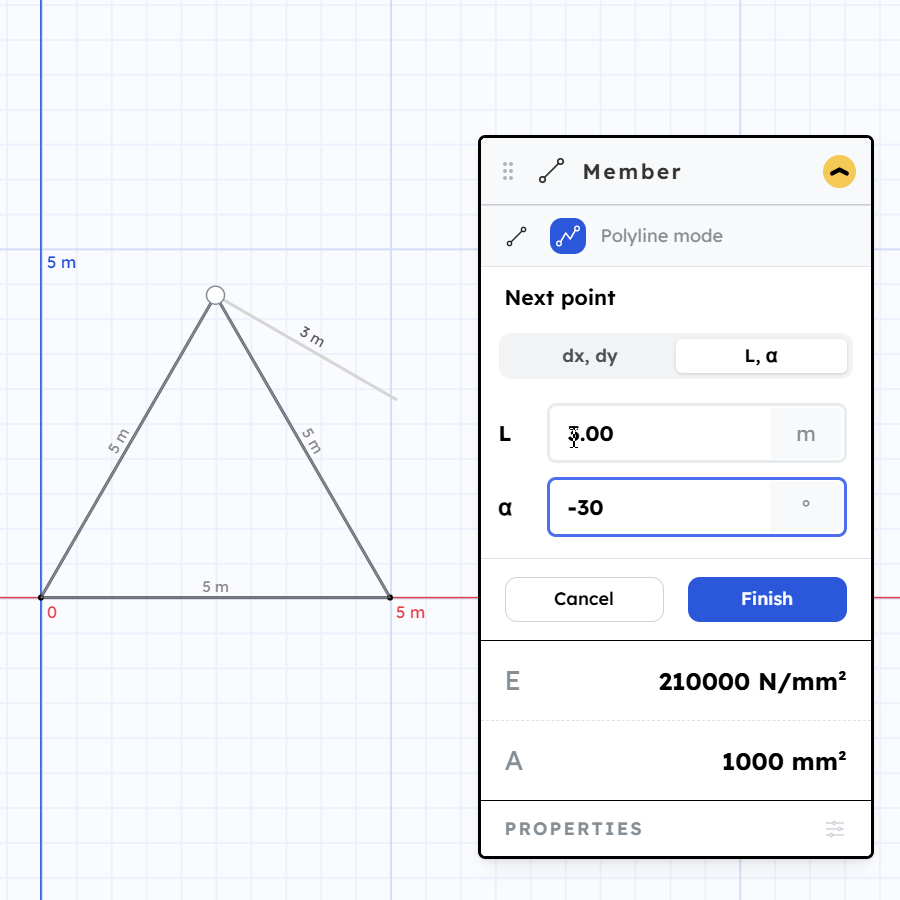
Coordinate input for polylines
When drawing a polyline, you can now type the next point's coordinates instead of clicking. Two modes:
- X, Y — give the absolute position of the next point
- Length and angle — give the distance and direction from the previous point
This makes it easy to build exact shapes. For an equilateral triangle, for example, just use the same length for each side and 60° angles.
Pro tip: after placing the first point, press X, Y, L, or A to jump straight to that input — then hit Enter to apply the value.
Line or polyline
You can now choose between a plain line (two points) and a polyline (chain of connected segments) when drawing members.
Snapping, rulers, and tooltips
2026-05-08 · 2.2
A bunch of things that should make building trusses a lot less frustrating.
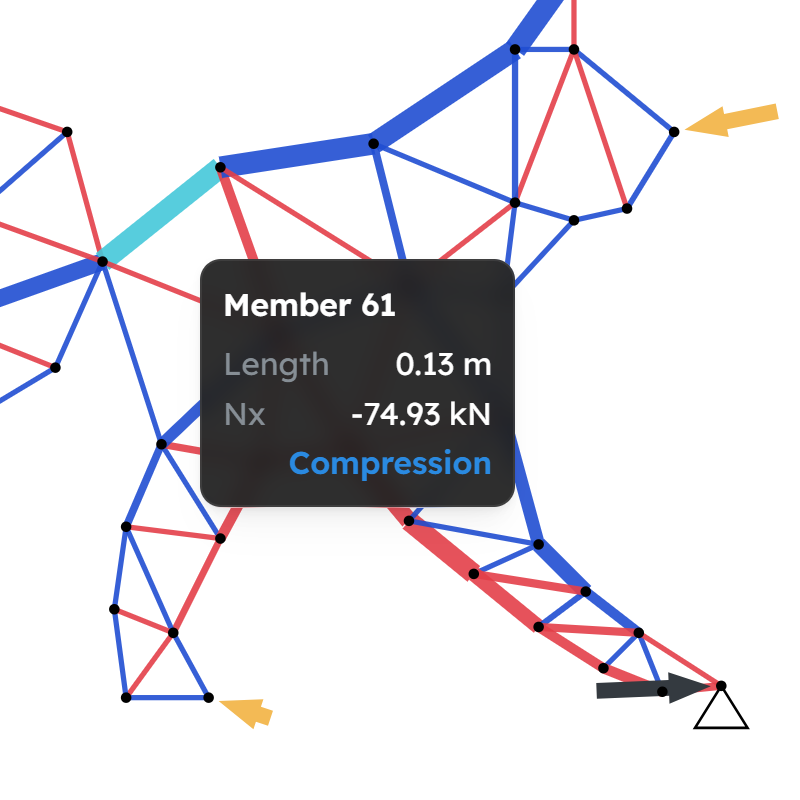
Hover feedback and tooltips
- A hover state indicator shows which element your cursor is over — no more guessing what will get selected when you click
- Tooltips appear when you hover over elements, showing their key properties and results
Better snapping
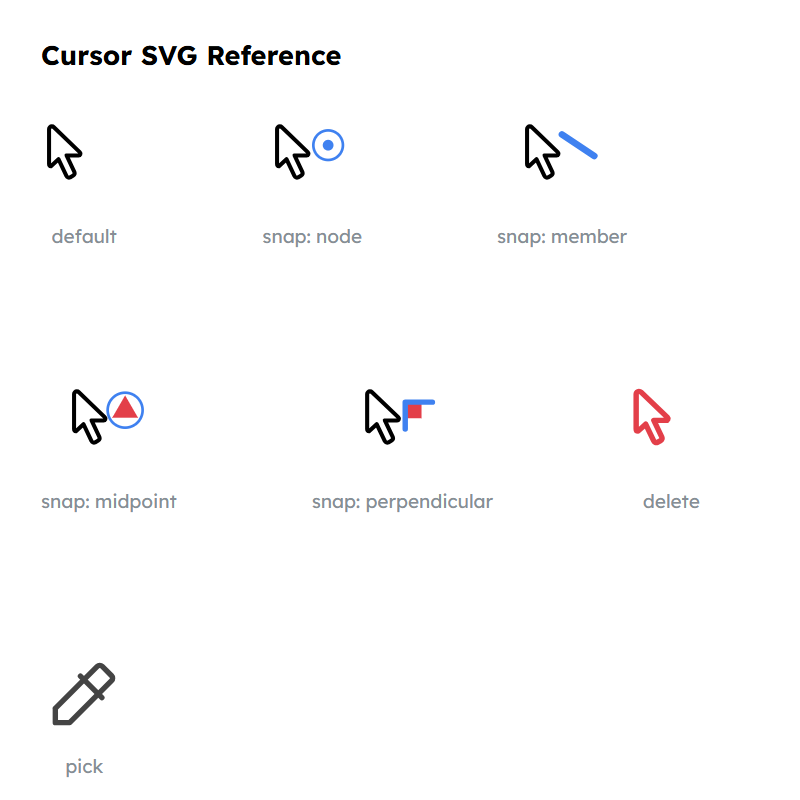
Three new snap targets when placing nodes:
- Point on line — snap to any point along an existing member, not just its endpoints
- Line center — snap straight to the midpoint of a member
- Perpendicular — snap at a right angle to a member
If you've ever spent 30 seconds trying to hit a midpoint by eye, this one's for you.
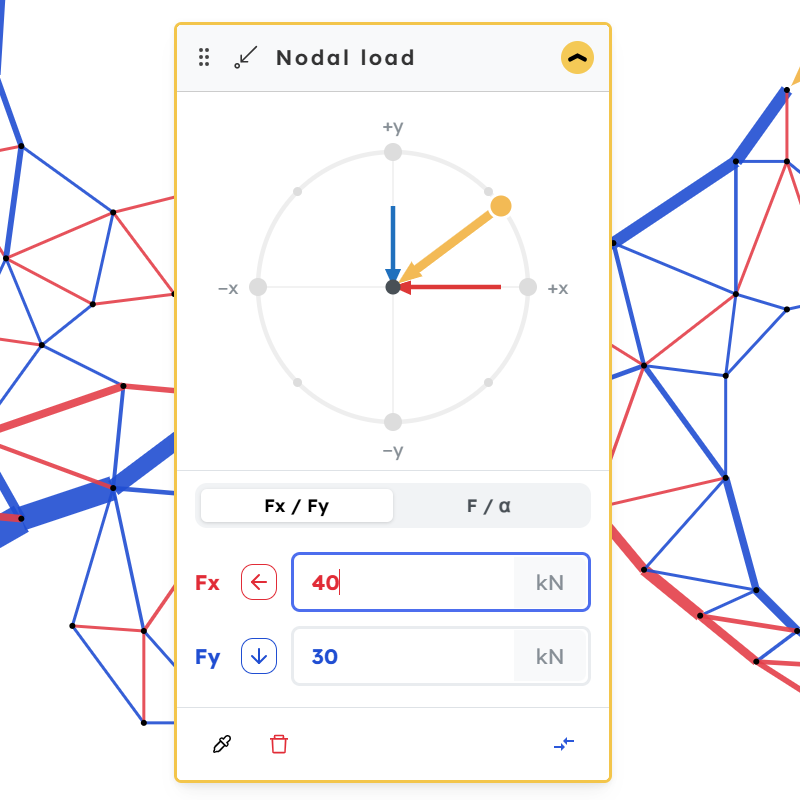
Enhanced load inputs
The load input controls have been improved. They're easier to add/update or delete loads on nodes.
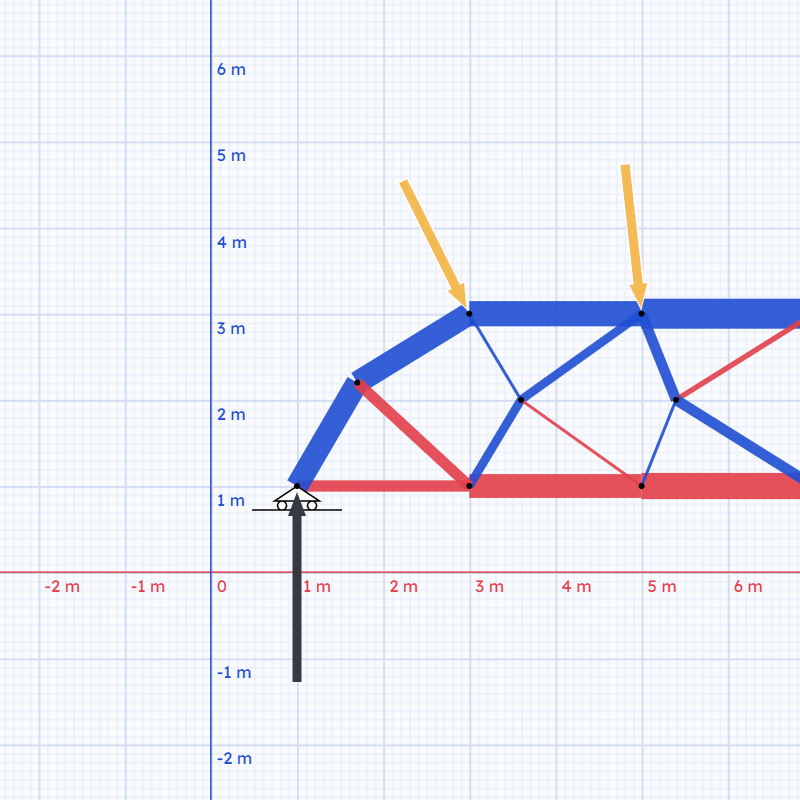
Axis rulers
There's now a ruler along both the X and Y axes. Handy for checking coordinates at a glance.
Metric & Imperial units
2026-05-03 · 2.1
You can now choose between Metric and Imperial units in the calculator setup. All inputs and results display in the selected unit system. See the Units guide — switching is just a display choice, your structure's real size never changes.
I work in metric day-to-day, so imperial support got less real-world testing — if anything looks off, I'd really appreciate a heads-up. Use the feedback button above and describe what you expected to see.
Truzme 2.0 Beta
2026-04-27 · 2.0 Beta
This is a significant update — most of the work happened under the hood, but it sets the foundation for everything coming next.
Rebuilt from the ground up
The entire app state has been rewritten. The old system was getting in the way of adding new features, so it was replaced with something leaner and more predictable. From the outside it should feel the same — or better — but internally it's a much cleaner foundation.
Calculator redesign
The calculator interface has been reorganised to support more powerful features without becoming cluttered. Controls are easier to find, and the layout scales better as more tools get added.